Tuesday, June 30, 2020

Pori pakoda recipe | Puffed rice pakoda recipe

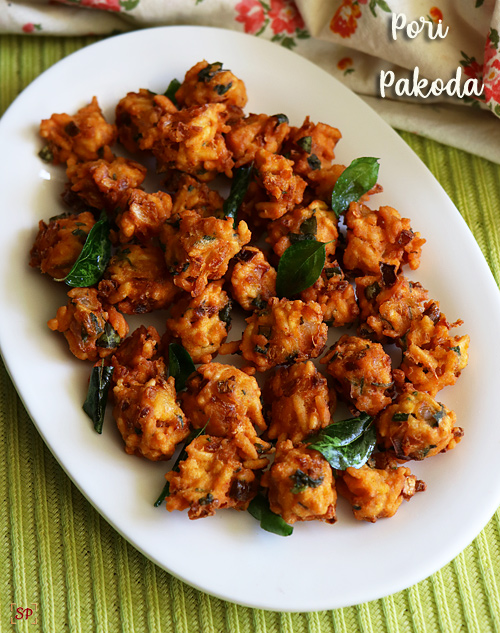
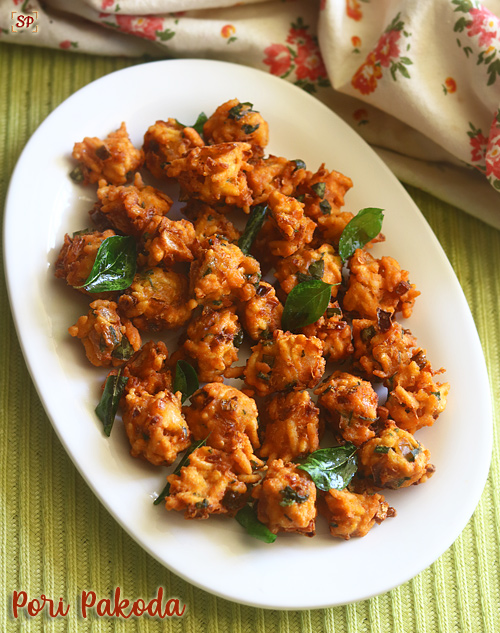
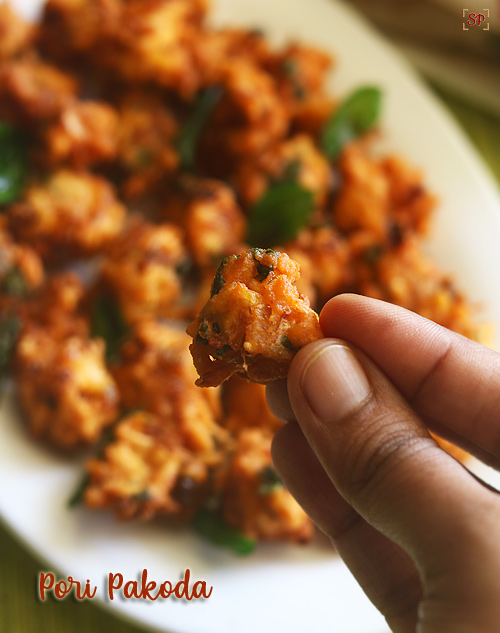
Pori pakoda recipe a crispy snack made with puffed rice

Pori pakoda was new to me when I saw it first time in a book.When I had just a small batch of leftover pori wanted to try this pori pakoda / puffed rice and it tastes so good, comes out very crispy too.

Kids will love it for the texture, both enjoyed having it giving a surprise to me.I was really not sure how kids would like but when I saw them enjoying I felt this is a keeper whn you want to make quick snacks.

Print

Pori pakoda recipe

Pori pakoda recipe a crispy snack made with puffed rice
Author Sharmilee J

Ingredients

  • 1 cup puffed rice
  • 1/4 cup besan flour
  • 1/8 cup rice flour
  • 1/2 cup onion finely chopped
  • 1 no green chilli finely chopped
  • 1/2 tsp ginger
  • 1 tbsp curry leaves finely chopped
  • 2 tbsp coriander leaves finely chopped
  • 1/4 tsp turmeric powder
  • 1/2 tsp red chilli powder
  • salt to taste
  • water as needed

Instructions

  • First add all the ingredients except oil,water to a mixing bowl.
  • Mix it well.Then add water little by little to form a stiff dough.You can add a tsp of hot oil for extra crispness too.
  • Heat oil in a kadai - pinch small portions and drop into hot oil.Deep fry in medium flame util golden brown and crisp.Repeat to finish.
  • Finally fry curry leaves and garnish.Crispy pori pakoda ready!

Notes

  • Adding hot oil ensure extra crispness so if you prefer add it.
  • Pori by itself when deep fried gives a crisp and crunch texture so perfect for making pakoda.

How to make pori pakoda recipe:

  1. First add all the ingredients except oil,water to a mixing bowl.
  2. Mix it well.Then add water little by little to form a stiff dough.You can add a tsp of hot oil for extra crispness too.
  3. Heat oil in a kadai – pinch small portions and drop into hot oil.Deep fry in medium flame util golden brown and crisp.Repeat to finish.

Finally fry curry leaves and garnish.Serve hot!Crispy pori pakoda ready!
 

The post Pori pakoda recipe | Puffed rice pakoda recipe appeared first on Sharmis Passions.


from Sharmis Passions https://ift.tt/3igqxXh
via KITCHEN MASALA

Buckwheat flour paratha, Kuttu ka paratha

kuttu-ka-paratha

Buckwheat flour paratha with potatoes and few simple ingredients. Quick video, step wise detailed pictures.

Kuttu ka paratha is very common stuff prepared with buckwheat flour in India. Though I am not familiar with it, have come across many posts in Instagram during Navratri. This is made as Farhali recipe (for fasting). They use rock salt for this as they avoid table salt in such fasting recipes. I made it fully gluten free, but you can use mixture of flours too. Replace one cup with Singhare atta or regular atta too. This makes rolling easy. I referred here for recipe.

buckwheat-paratha

For this paratha, rolling could be tricky as it very delicate to handle. Potato is used as binding agent here also for taste since the kuttu atta is bland. But as we work with the dough, it tends to leave out moisture. So it will be difficult to handle. Make sure to prepare tight dough and roll immediately. Do not give standing time.

Also use more dusting flour for easy handling. If it sticks to the rolling platform or breaks while you take out, it means there is more moisture in the dough. Use lots of dusting flour to avoid kuttu ki atta sticking. Also make it thick. While rolling, apply pressure gently.

kuttu-ka-paratha
Print Pin
0 from 0 votes

Buckwheat flour paratha

Buckwheat flour paratha with potatoes and few simple ingredients. Quick video, step wise detailed pictures.
Course Main Course
Cuisine Indian
Prep Time 10 minutes
Cook Time 20 minutes
Servings 8 Parathas

Equipments (Amazon Affiliate links)

  • Cast iron griddle
Cup measurements

Ingredients

  • 2 cups buckwheat flour
  • 3 potatoes small to medium
  • 3-4 green chilli finely chopped
  • 1/4 cup coriander leaves finely chopped
  • 1/2 tsp ajwain/ omam
  • Salt as needed
  • Ghee or oil for cooking

Instructions

  • Pressure cook potatoes with enough water to immerse for 3 whistles.
  • Drain water, cool and peel the skin. Mash it smoothly or grate it.
  • Gather all the ingredients required. Take buckwheat flour in a mixing bowl along with grated potato.
  • Add salt, green chilli, coriander and ajwain to it. Mix well.
  • Add water carefully little by little to the flour and make a stiff dough.
  • Divide into equal sized balls. Let it be slightly larger than the roti dough balls.
  • Dust well and roll out gently to thick parathas. Sprinkle flour in between for easily taking out.
  • Heat tawa and first toast both sides slightly in high flame and then add ghee.
  • Cook in medium flame until it turns golden here and there.
  • Repeat to finish. Each time, work on the dough balls to smoothen it and dust well.
  • Also make sure the rolling surface is dry.

Video

Notes

  • Make sure to prepare dough stiff and not too sticky.
  • Use lots of dusting flour for rolling.Make roti immediately as you prepare the dough.
  • Rolling surface should not be stick, so each time dust well with sukhi kuttu atta.

Buckwheat paratha method:

  1. Pressure cook potatoes with enough water to immerse for 3 whistles.
  2. Drain water, cool and peel the skin. Mash it smoothly or grate it.
    step1-cook-potato
  3. Gather all the ingredients required. Take buckwheat flour in a mixing bowl along with grated potato.
    step-2-ingredients
  4. Add salt, green chilli, coriander and ajwain to it. Mix well.
    step3-mix
  5. Add water carefully little by little to the flour and make a stiff dough. Divide into equal sized balls. Let it be slightly larger than the roti dough balls.
    step4-divide
  6. Dust well and roll out gently to thick parathas. Sprinkle flour in between for easily taking out.
    step5-dust
    step6-roll
  7. Heat tawa and first toast both sides slightly in high flame and then add ghee.
    step7-cook
  8. Cook in medium flame until it turns golden here and there. Repeat to finish. Each time, work on the dough balls to smoothen it and dust well. Also make sure the rolling surface is dry.
    step8-done

Serve with dahi or aloo ki sabzi.

buckwheat-paratha-recipe

The post Buckwheat flour paratha, Kuttu ka paratha appeared first on Raks Kitchen.


from Raks Kitchen https://ift.tt/2BTAqJw
via KITCHEN MASALA

Monday, June 29, 2020

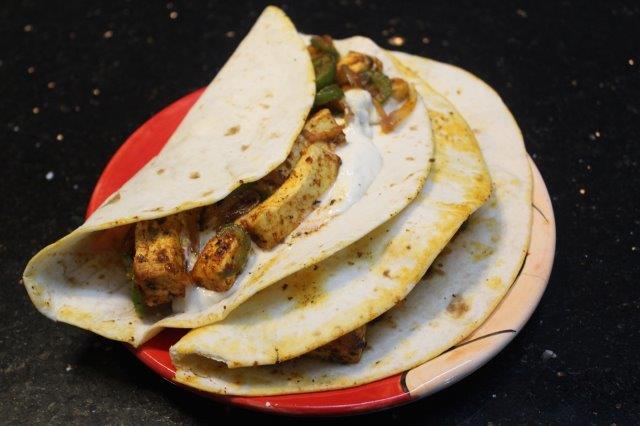
Soft Paneer Tacos Recipe

Soft Paneer Tacos Recipe with Step by Step Pictures.

Spicy paneer tacos recipe spiced up with peri peri spice mix. This delicious paneer tacos is super easy to make and needs a handful of ingredients.

Tacos is a easy recipe which is made using cooked kidney beans and spices. The whole thing is filled inside crisp shell with cheese, onions, lettuce and tomatoes. My husband loves tacos and i make it quite often for him. You can buy taco shell in super market these days they are easily available. Or you can make it your own. Will share a separate recipe for taco shells. You can find it in amazon if you cannot find it in local shop.

This recipe is made using soft tortillas and the filling is a basic paneer filling.

Check out Mexican Tacos if you want too.

More Mexican Recipes for you.

Similar Recipes,
Mexican Breakfast Burrito
Mexican Scrambled Eggs
Mexican Rice
Veg Fajitas
Mexican Salsa

Hope you will give this a try and let me know how it turns out for you.

Soft Paneer Tacos Recipe
 
Prep time
Cook time
Total time
 
Delicious soft paneer tacos is a easy and delicious dinner or breakfast recipe. This tacos will be your kids favorite.
Author:
Recipe type: Main
Cuisine: Mexican
Serves: 4 servings
Ingredients
  • Oil - 2 tblsp
  • Onions - 1 large sliced thinly
  • Capsicum - 1 large sliced thinly
  • Paneer - 200 grams
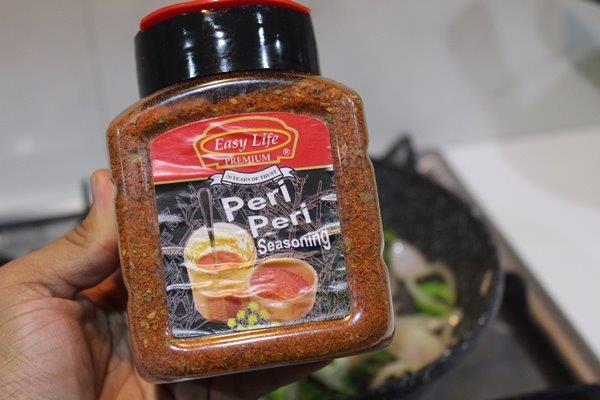
  • Peri peri spice mix as needed
  • Salt to taste
  • Tortillas as needed
  • Mayonnaise or Garlic Sauce as needed
Instructions
  1. Heat oil in a pan. Add in onions and capsicum and mix well. Cook for few minutes.
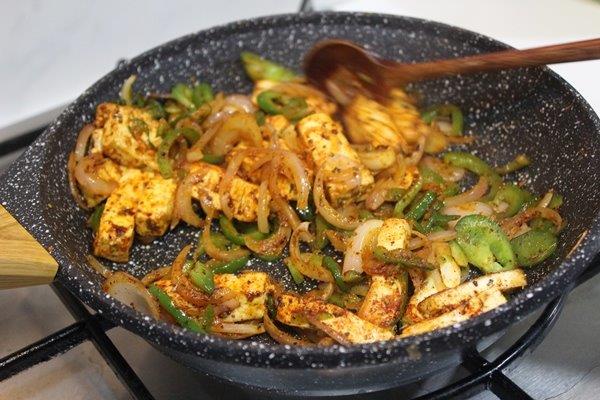
  2. Now add in paneer and saute them well. Add peri peri mix and mix well.
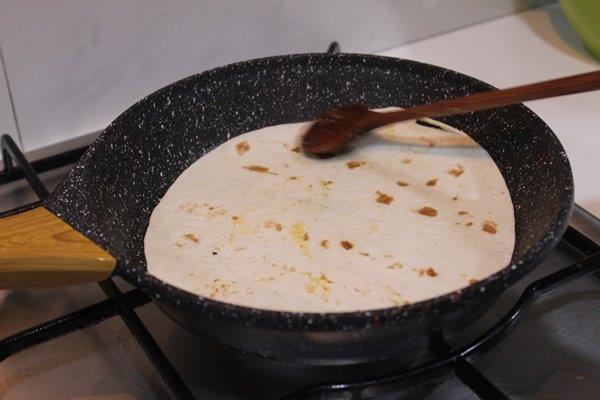
  3. Warm some tortillas.
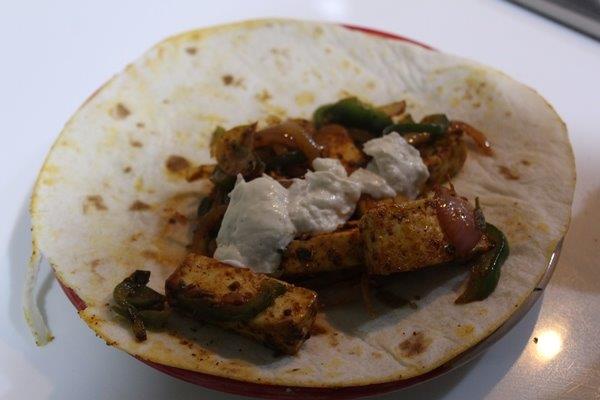
  4. Spoon filling in and spoon garklic sauce or mayo.
  5. Serve.

Pictorial:

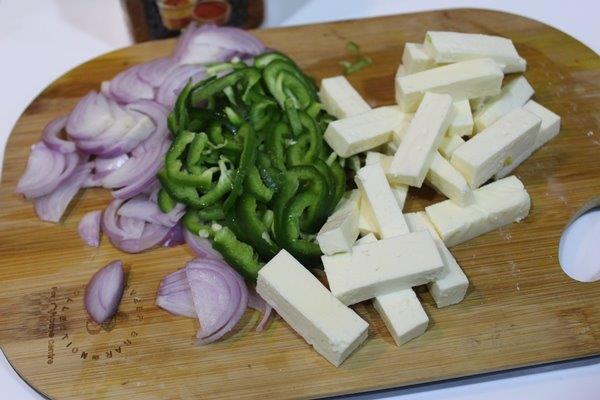
1)Take onions, capsicum and paneer

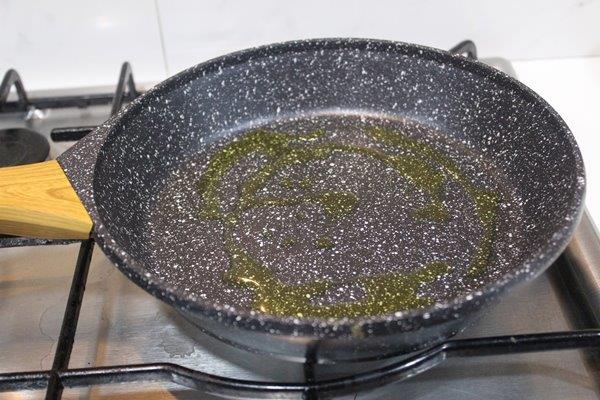
2)Heat a pan with little oil

3)Add in onions and capsicum

4)Look who is doing the cooking

5)Saute till onions is cooked

6)Add in paneer cubes

7)Saute them well

8)Add in peri peri spice mix

9)Add it in

10)Saute them well

11)Done

12)Warm some tortillas

13)Take it off the heat

14)Spoon some filling in

15)Spoon garlic sauce

16)Fold and serve

17)Enjoy

The post Soft Paneer Tacos Recipe appeared first on Yummy Tummy.


from Yummy Tummy https://ift.tt/3eRtjAg
via KITCHEN MASALA

Sunday, June 28, 2020

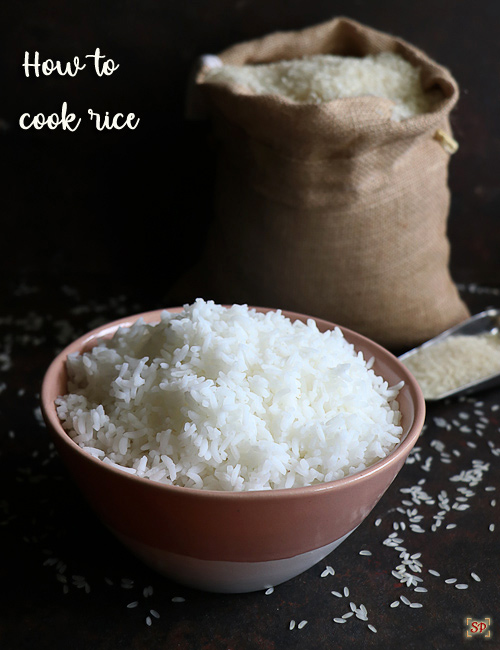
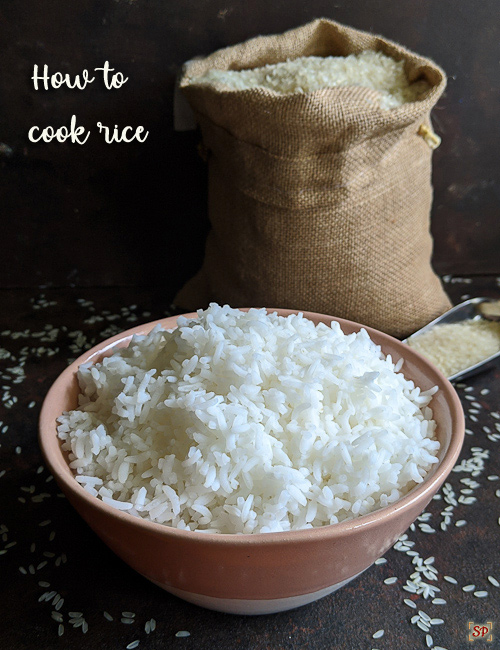
How to cook rice in open pot draining method

Cook rice in open pot – Draining Method

cook rice draining method

Cook rice in open pot is the age old method followed by our elders but it needs baby sitting as we need to keep checking for the doneness.After the use of pressure cookers this method had been slowly fading away.

I have been grown up eating rice in this method so am not fond of cooker rice and I can easily find out the difference between both the rice.Though each has its own benefits I love this method may be am used to it so find it easy.

I use cooker only for pulao,biryani and such one pot dishes and sometimes for cooking basmati rice for fried rice.

cook rice draining method

Difference between rice in cooker and open pot :

  • Cooker needs no baby sitting just count the whistles and you are done.But open pot method needs to be checked often for doneness.
  • Cooker rice can be mushy/undercooked at times incase the cooker whistle has issues inbetween.Open pot method we keep checking so there is less chance for mushy/undercooked rice.
  • Cooker is easy for beginners but open pot method takes a little time to get used to.
  • Cooker rice doesn’t let out water if kept for a long time but in open pot method rice lets out water after long hrs(say 8-9 hrs).If we keep rice for noon at 12PM ,the rice becomes mushy around 8PM(incase if you want to reuse it).
  • Maintenance is more in cooker, no maintenance at all in one pot method.Just any container and a lid will do.
  • Cooker rice will not easily break if cooked perfectly, but rice cooked in draining method easily mushes up so we need to be very careful while making variety dishes.
  • I have read and hear people say in draining method the starch goes off so best for weigtht loss but am really not sure of this.And for that reason there are starch free  diet cookers being available in market these days.
    cook rice draining method
Print

Cook rice in open pot method

Cook rice in open pot method draining method
Course Main Course
Cuisine Indian
Prep Time 10 minutes
Cook Time 15 minutes
Total Time 25 minutes
Servings 3
Author Sharmilee J

Ingredients

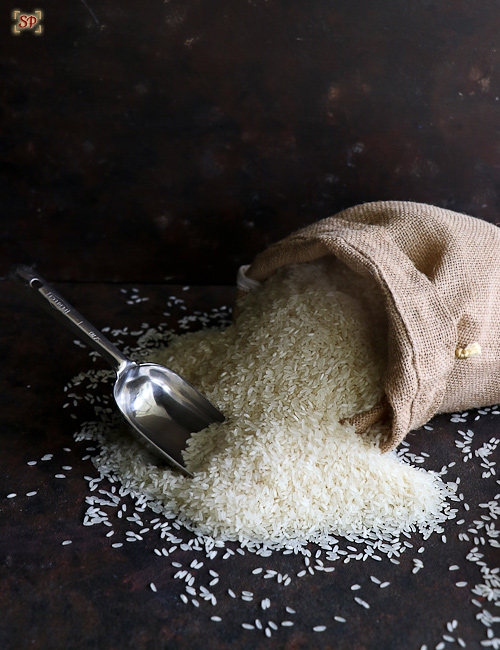
  • 1 cup rice (ponni pulungal rice - parboiled rice)
  • 4 cups water

Instructions

  • To a mixing bowl - add rice soak in water.Keep covered for 10 mins though this step is optional it ensures fast cooking.I sometimes forget to soak and add rinsed rice as such too.
  • Rinse well atleast 2-3 times,drain water and set aside.
  • Boil 4 cups water when it starts to boil rigorously, simmer and add drained rice.
  • Give a quick mix.Let it cook in low medium flame.
  • Keep checking, cook until rice is easily mashable but not too mushy.At this stage, switch off.
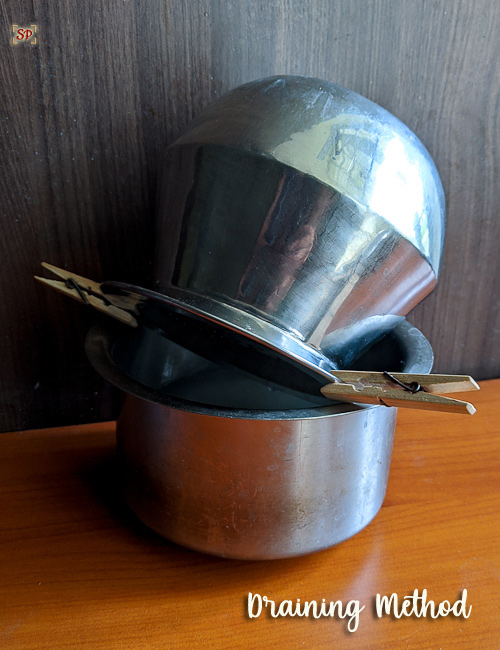
  • Gently remove from flame using a cloth.You can either drain using a colander or drain using the traditional method.I have shown the colander just for your reference.I usually drain like this : First pour the excess water to a vessel.
  • Seal both sides using clips.Slant it over the same bowl leaning on the wall.Keep it in the slant position for atleast 20 mins for all the excess water to drain completely.Now take out the clips.
  • This starch water can be used for drinking as such or used to season iron utensils or rinsing your hair or starching your cotton clothes etc, it has many more uses like this,Set aside to use.Now take the rice pot and fluff the rice.Rice will be grain seperated and soft.
  • Serve hot with any curry of your choice.

Notes

  • The time for cooking can't be predicted as it depends on the rice variety and age of the rice.
  • I use ponni pulungal arisi.
  • I have used lid with holes but you can use regular fitting lid too but make sure you slant the lid for the water to drip.
  • Also while slanting make sure to lean on the wall for support.Be careful as it will be hot, I usually use a cloth.
  • If you don't have a proper lid then you can drain using a colander too as I've shown in the steps.

How to cook rice in pot draining method:

  1. To a mixing bowl – add rice soak in water.Keep covered for 10 mins though this step is optional it ensures fast cooking.I sometimes forget to soak and add rinsed rice as such too.cook rice draining method
  2. Rinse well atleast 2-3 times,drain water and set aside.
    cook rice draining method
  3. Boil 4 cups water when it starts to boil rigorously, simmer and add drained rice.
    cook rice draining method
  4. Give a quick mix.Let it cook in low medium flame.cook rice draining method
  5. Keep checking, cook until rice is easily mashable but not too mushy.At this stage, switch off. cook rice draining method
  6. Gently remove from flame using a cloth.You can either drain using a colander or drain using the traditional method.I have shown the colander just for your reference.I usually drain like this : First pour the excess water to a vessel.cook rice draining method
  7. Seal both sides using clips.Slant it over the same bowl leaning on the wall.Keep it in the slant position for atleast 20 mins for all the excess water to drain completely.Now take out the clips.
    cook rice draining method
  8. This starch water can be used for drinking as such or used to season iron utensils or rinsing your hair or starching your cotton clothes etc, it has many more uses like this,Set aside to use.Now take the rice pot and fluff the rice.Rice will be grain seperated and soft.
    cook rice draining method

Serve hot with any curry of your choice.

cook rice draining method

Rice cooked and you can use it for making variety rice or have it as such with any curry of your choice.

cook rice draining method

The post How to cook rice in open pot draining method appeared first on Sharmis Passions.


from Sharmis Passions https://ift.tt/31octF3
via KITCHEN MASALA