“Raw Banana Yogurt Curry is a popular side dish made during onam or any occasions. Simple dish to make and taste delicious. This curry is best served hot with rice and papad.” Plantain Curry or Kaalan (Malayalam) is a Keralite dish from Southern India, made of yogurt, coconut and a vegetable like nendran (plantain) or yam. This curry is basically cooked with these...
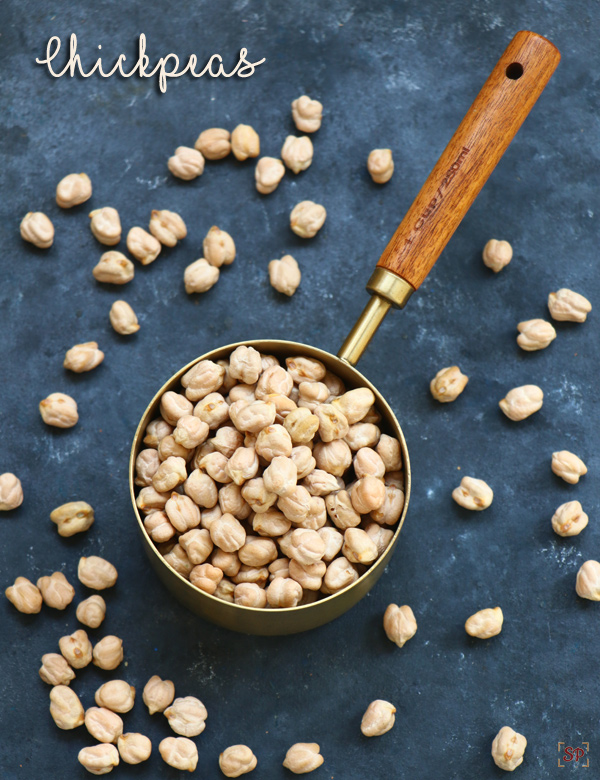
Instant pot chickpeas recipe – An easy way to make soft chickpeas perfect for salads, curries, hummus etc.
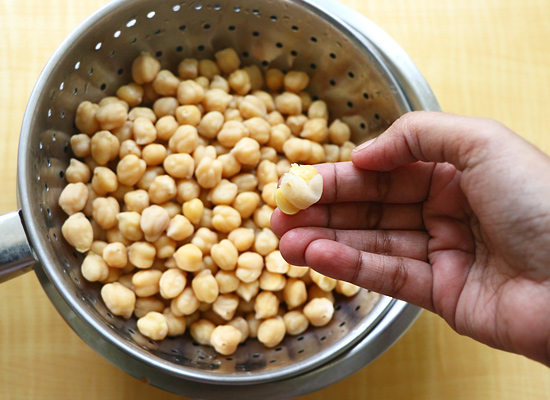
Instant pot chickpeas recipe with step by step pictures. Chickpeas or chana as we call it is highly nutritious and rich in protein.
How do you like to eat chana? I love it in any form especially chana masala with roti is my most favorite. I always make sundal atleast twice a month as gugu loves it. Generally we cook chana using pressure cooker. But this recipe given here is for cooking chickpeas in instant pot which is an easy way when compared to pressure cooker. Chana masala is one of the most popular sidedishes especially with kids.
How to cook instant pot chickpeas?
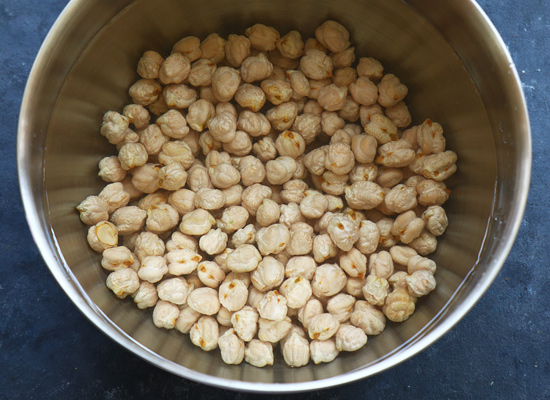
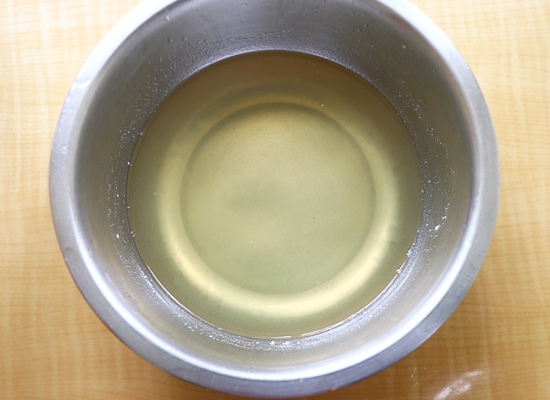
First soak chickpeas in enough water for abpout 8 hrs. You can do that directly in instant pot or in a seperate bowl .I prefer to do it seperately as I usually rinse it before cooking. Though there is a way to cook chickpeas even without soaking in instant pot I prefer to always soak and cook for perfect soft chickpeas. Also it is always good to discard the soaked water then rinse it well before cooking. After that add rinsed, drained chickpeas to instant pot along with salt and water, cook till mentioned time.
Variations in cooking chickpeas:
You can either soak and cook or cook without soaking.
You can even soak in hot water for quick soaking incase you forget.
If you want to cook chickpeas without soaking then set instant pot in pressure cook mode high for about 90 minutes.
If you are not planning to store so then you can add a pinch of turmeric powder.
Serving:
You can use cooked chickpeas in making
Salads
Curries
Hummus
Sundal
Pulao
Biryani etc.
Storage suggestion:
Cooked chickpeas stores well in fridge for about 3 days but make sure to drain water before storing. You can use the water for making sambar, soup or any curries etc. You can even freeze cooked chickpeas for about 15 days. Thaw it before using it for recipes.
If you have any more questions about this instant pot chickpeas recipe do mail me at sharmispassions@gmail.com
Follow me on Instagram, Facebook, Pinterest ,Youtube and Twitter .
Tried this instant pot chickpeas recipe? Do let me know how you liked it.Tag us on Instagram @sharmispassions and hash tag it on #sharmispassions.
Instant pot chickpeas recipe - An easy way to make soft chickpeas perfect for salads, curries, hummus etc.
CourseSalad, Side Dish
CuisineIndian
Cook Time10minutes
Soaking time8hours
Total Time8hours10minutes
Servings3
AuthorSharmilee J
Ingredients
1cupdried chickpeas
5cupswater
1tsprock salt
Instructions
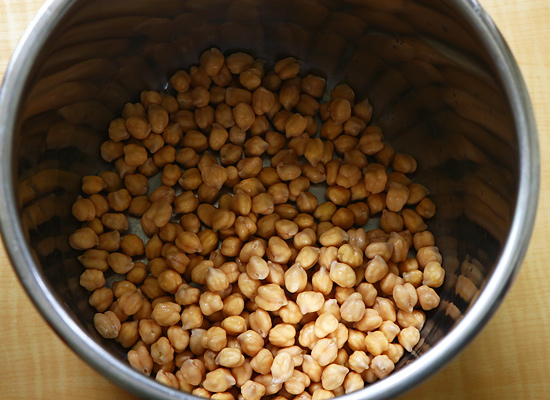
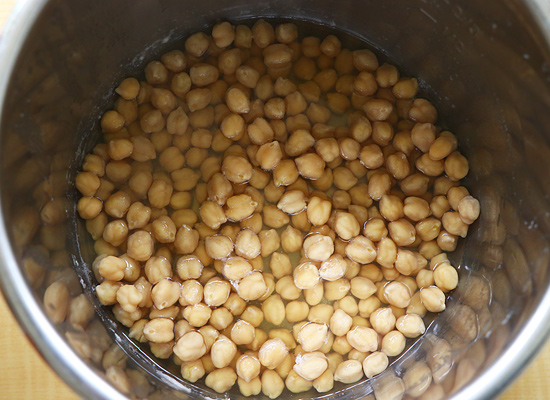
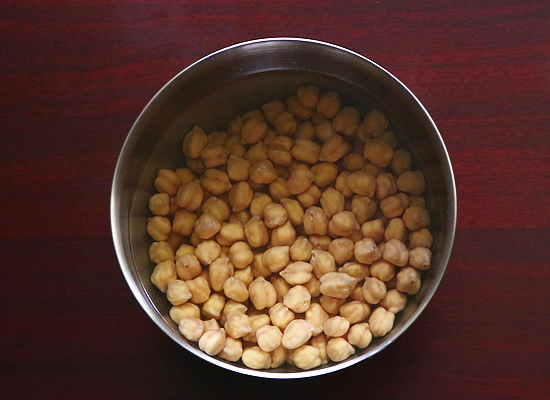
Soak chickpeas in enough water for atleast 8 hrs or overnight.
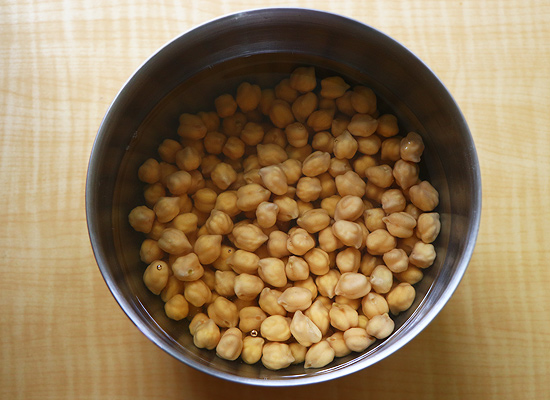
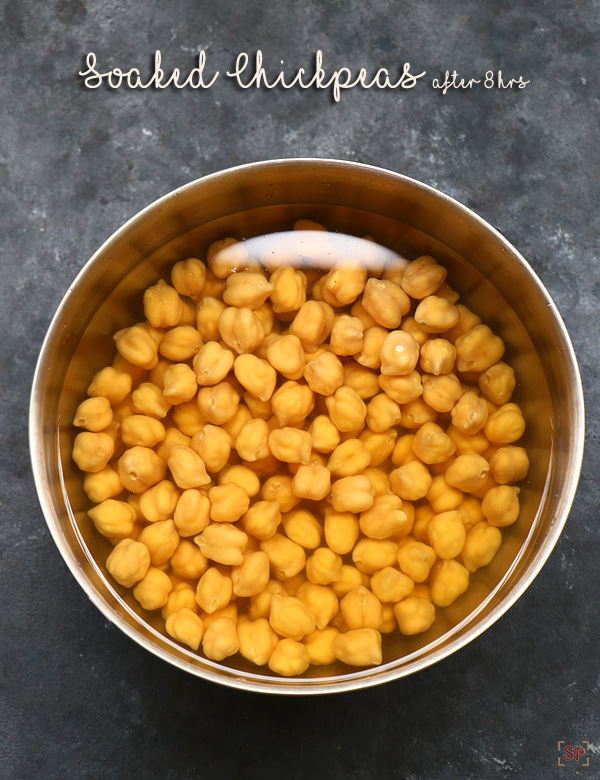
This is how it looks after 8 hrs.
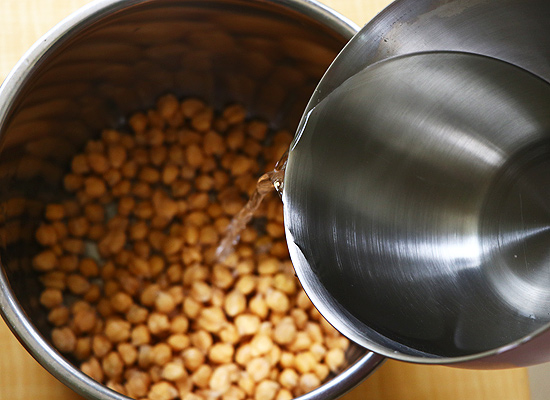
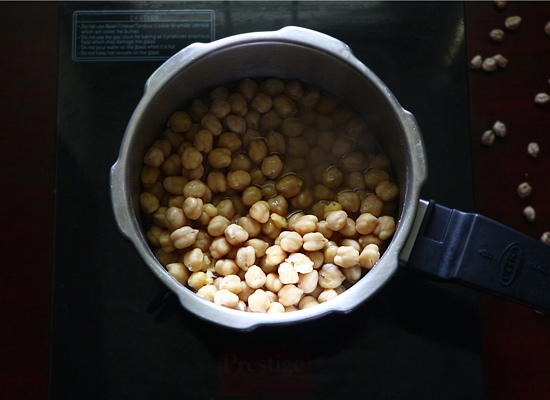
Rinse it well add it to instant pot.
Add 5 cups water to it.
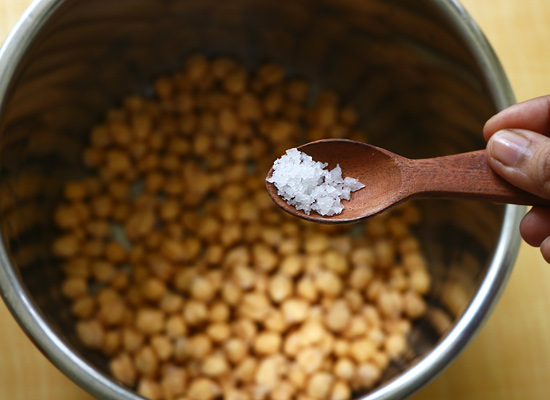
Add rock salt to it.
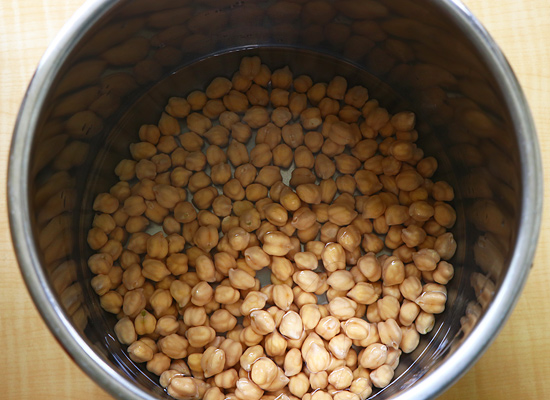
Mix it once.If you want you can add a pinch of turmeric powder to it.
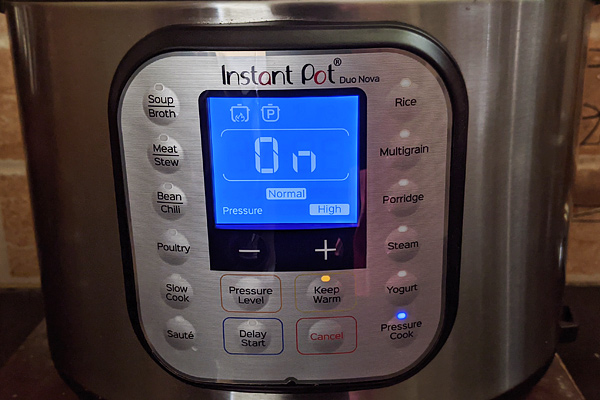
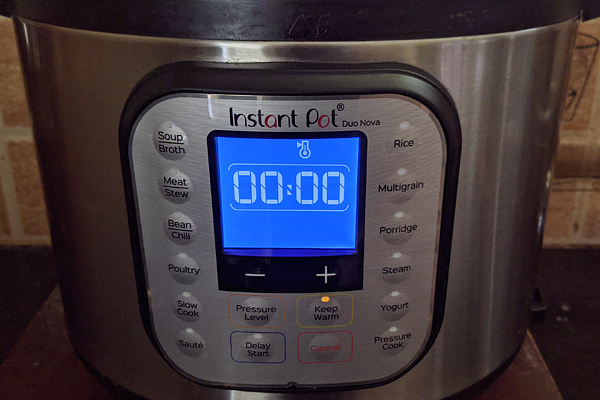
Close with lid.Set pressure cook mode in high for 15 mins.
Now the instant pot has started.It takes few mins to change from ON to timer and only when then the timer is shown the actual cooking time starts.
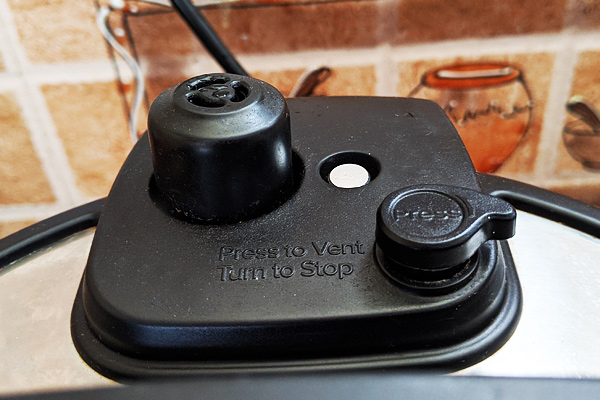
Inititally the steel button is down.
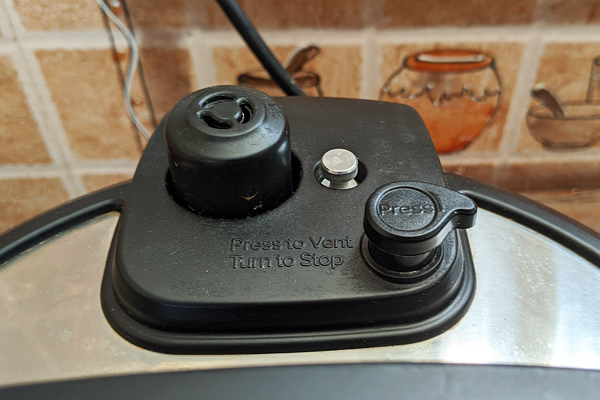
Inititally the steel knob is down and when it starts to cook it automatically goes up as shown.When the knob is up it means cooking is in process/started and when its down pressure is released and you are ready to open the lid.Do not open the lid when the knob is up.
Once timer is 0, it automatically goes to keep warm mode. Let the pressure release by itself, it takes around 15-20 mins.
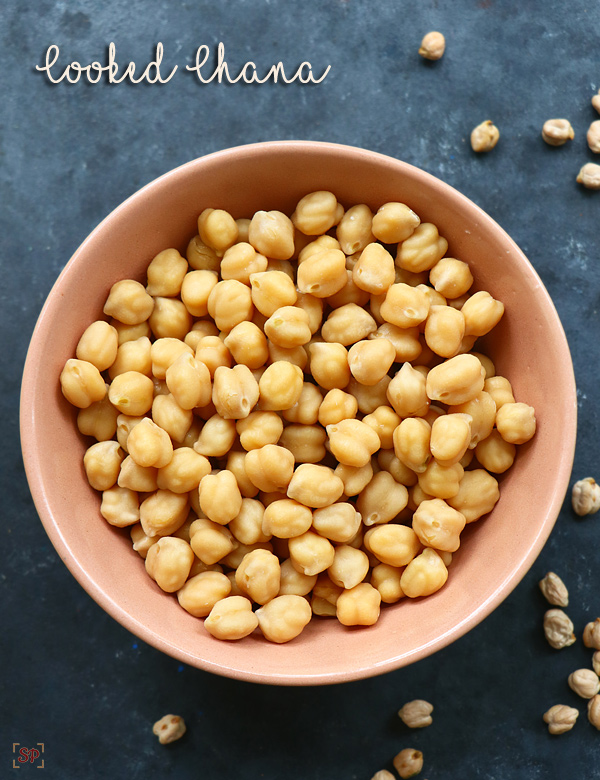
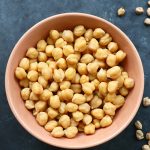
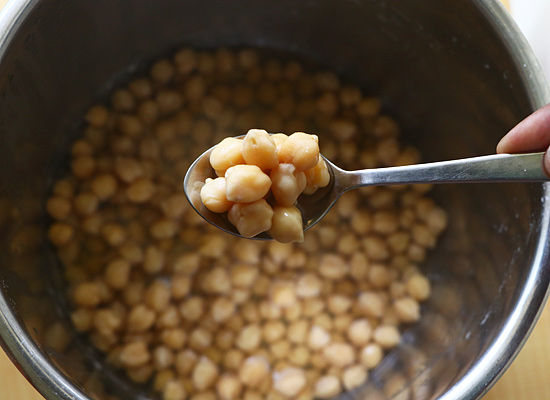
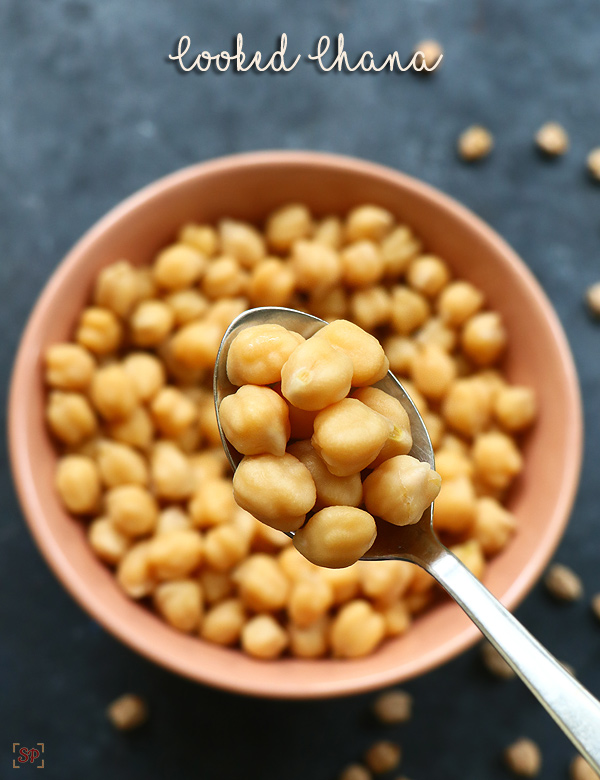
Cooked chana is ready!
Soft and not mushy chana is ready.
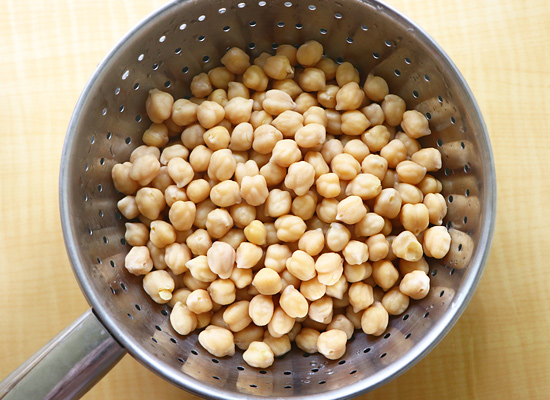
Drain water.
Press to check.It should be soft when pressed.
The collected water can be used for curries,rasam or soup etc.
Notes
If you like slightly crunchy chana then 10 mins would be enough but I prefer to cook them soft so usually 15 mins is my cooking time.
Always add salt while cooking chana.
Open the lid only after the steel knob goes down.
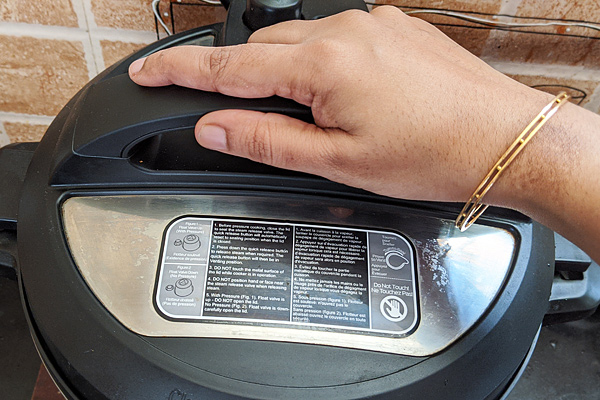
Always keep your fingers at a safe distance while manually pressure releasing.
Mode : Pressure cook Pressure level : High Timer : 15 mins Release : NPR(Natural pressure release) immediately
How to cook chana in Instant pot:
1.To begin with soak chickpeas in enough water for atleast 8 hrs or overnight.
2.This is how it looks after 8 hrs.
3.Rinse it well add it to instant pot.
4.After that add 5 cups water to it.
5.Add rock salt to it.
6.Mix it once.If you want you can add a pinch of turmeric powder to it.
7.Close with lid.Set pressure cook mode in high for 15 mins.
8.Now the instant pot has started.It takes few mins to change from ON to timer and only when then the timer is shown the actual cooking time starts.
9.Inititally the steel button is down.
10.Inititally the steel knob is down and when it starts to cook it automatically goes up as shown.When the knob is up it means cooking is in process/started and when its down pressure is released and you are ready to open the lid.Do not open the lid when the knob is up.
11.Once timer is 0, it automatically goes to keep warm mode. Let the pressure release by itself, it takes around 15-20 mins.
12.Cooked chana is ready!
13.Soft and not mushy chana is ready.
14.Drain water.
15.Press to check.It should be soft when pressed.
16.Finally reserve the collected water here. The collected water can be used for curries,rasam or soup etc.
To summarize soft perfectly cooked chana is ready!
My tips while making instant pot chickpeas:
If you like slightly crunchy chana then 10 mins would be enough I prefer to cook them soft so usually 15 mins is my cooking time.
Always add salt while cooking chana.
Open the lid only after the steel knob goes down.
Always keep your fingers at a safe distance while manually pressure releasing.
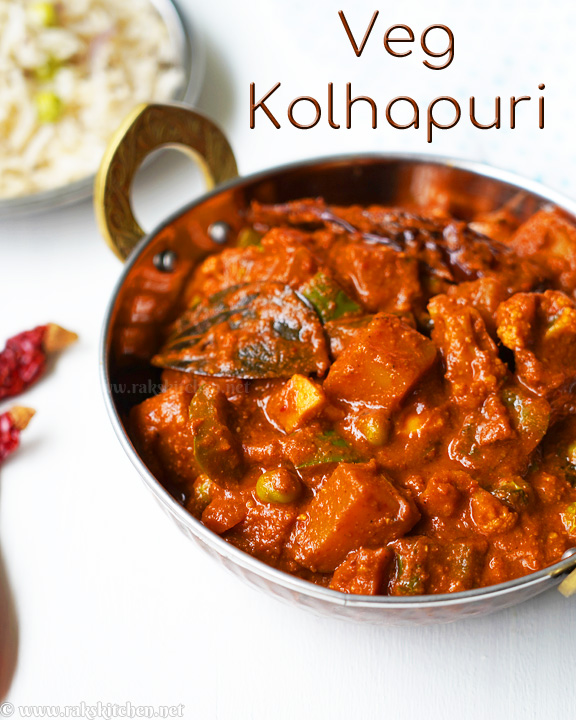
Veg kolhapuri is a spicy dish served popularly in restaurants. Basically a regional recipe from Maharashtra. Step by step photos & video.
Actually speaking, I have not tasted veg kolhapuri in restaurants if I am not wrong. Have got familiar because of the blogging world. Last weekend I remembered this dish and wanted to try. Was browsing many recipes. This is a spicy thick masala with a mixture of vegetables. Paneer is also added for tempting quotient.
I referred mainly here, just adapted according to the ingredients available at home. I adapted the method in a simpler way too. What makes vegetable Kolhapuri different from other sabji / gravy or masala? The veg kolhapuri masala is very uniquie in the region of Kolhapur. It’s main have red chillies, coriander powder, black pepper, cardamom, cumin, star anise, fennel seeds, bay leaf. Also it has dry coconut. I have seen few recipes that uses coconut, that too dry coconut in Maharashtrian recipes. So this also has some trace of dry coconut.
I skipped fennel seeds as people at home not a big fan of it. But, I could really taste the difference also there is fragrance from star anise, making it so flavorful. If you like moti elachi (black cardamom), you can add it. I have moti elachi at home, but it is too strong for me, so skipped it.
Veg kolhapuri preparation summary:
Mainly, onion is caramelized. Roasted desiccated coconut, red chillies, sauteed garlic, ginger and tomato. Grind everything with cashews.
Blend this to prepare a base masala.
Par boil vegetables.
Temper with the whole spices, cook the masala paste and veggies with spice powders and end with lemon juice, coriander garnish.
That’s it, but since there are many ingredients in the recipe, it may look elaborate. It’s worth the time as it makes a special side dish for roti, paratha and naan. Also with pulao and any flat bread.
As I browsed, I saw few variations in the recipe. Using magz, fennel seeds, cream also used in the recipe. Some uses the authentic homemade masala powder. So, this is my humble variation to the recipe.
Firstly, heat a pan and dry roast desiccated coconut until golden brown. Take care not to burn it. Set aside.
Add 2 tbsp oil, tip in the red chillies. Roast in low flame without changing colour. Remove for cooling down.
Add sliced onion, a pinch of salt. Saute in medium flame to caramelize it.
In goes peel cashews, garlic & chopped garlic, Fry for a minute.
Lastly, add cubed tomatoes and a pinch of salt. Cook for 4 mins roughly in low flame to make it soft.
Remove in plate and cool everything completely.
Parboiling vegetables:
Bring 2 to 2 & 1/2 cups water. Add diced potatoes, beans & carrot. Bring to boil.
Add peas and cauliflwer to it. Boil for 4 mins. Remove from water and set aside. Do not over cook.
Reserve the water in which we cooked the vegetables.
Prepare Veg kolhapuri
Grind the cooled sauteed items with little water to a smooth paste.
Heat the pan with remaining oil & butter. Add all the whole spices under ‘To temper’
Pour the ground paste. Mix for a minute. Sprinkle the spice powders except garam masala.
Cook for 3-4 minutes in medium to low flame until oil separates.
In goes capsicum, kasuri methi crushed in between palm. Add Par boiled mixed vegetables, garam masala powder.
Add about 1 & 1/2 cup of the reserved vegetable cooked water. Add required salt & mix well.
Add cubed paneer (I kept immersed in hot water until adding). Simmer for 5 mins. Mix and switch off flame.
Garnish with lemon & coriander leaves
Video
Notes
Do not over cook the vegetables
Note that the whole recipe uses kashmiri red chillies. Any other variety wont yeild same colour and spice.
Vegetable kolhapuri step by step:
Prepare masala base:
Firstly, heat a pan and dry roast desiccated coconut until golden brown. Take care not to burn it. Set aside.
Add 2 tbsp oil, tip in the red chillies. Roast in low flame without changing colour. Remove for cooling down.
Add sliced onion, a pinch of salt. Saute in medium flame to caramelize it. In goes peel cashews, garlic & chopped garlic, Fry for a minute.
Lastly, add cubed tomatoes and a pinch of salt. Cook for 4 mins roughly in low flame to make it soft.
Remove in plate and cool everything completely.
Parboiling vegetables:
Bring 2 to 2 & 1/2 cups water. Add diced potatoes, beans & carrot. Bring to boil. Add peas and cauliflower to it. Boil for 4 mins. Remove from water and set aside. Do not over cook. Reserve the water in which we cooked the vegetables.
Prepare Veg kolhapuri
Grind the cooled sauteed items with little water to a smooth paste.
Heat the pan with remaining oil & butter. Add all the whole spices under ‘To temper’. Pour the ground paste.
Mix for a minute. Sprinkle the spice powders except garam masala. Cook for 3-4 minutes in medium to low flame until oil separates. In goes capsicum, kasuri methi crushed in between palm.
Add Par boiled mixed vegetables, garam masala powder. Pour about 1 & 1/2 cup of the reserved vegetable cooked water. Add required salt & mix well.
Tip in cubed paneer (I kept immersed in hot water until adding). Simmer for 5 mins. Mix and switch off flame.
Garnish with lemon juice, coriander leaves.
Serve with pulao or flatbreads. We had with both roti & pulao and loved it.
“Tapioca Chips is a super easy recipe which you can make when sudden snack attack hit you. Cassava chips or Yuca Chips is one of the most popular recipe around the world.” If you like making homemade potato chips then making cassava chips takes it to the next level. Yuca chips or Tapioca chips is...
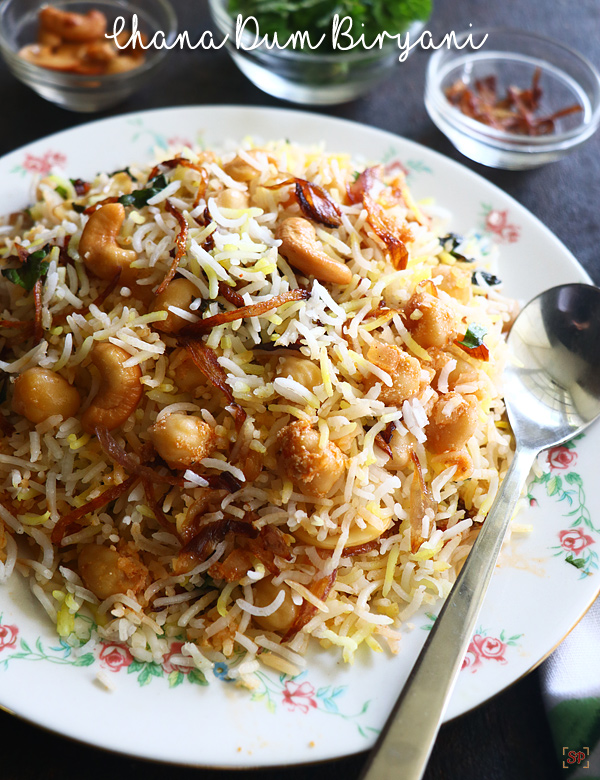
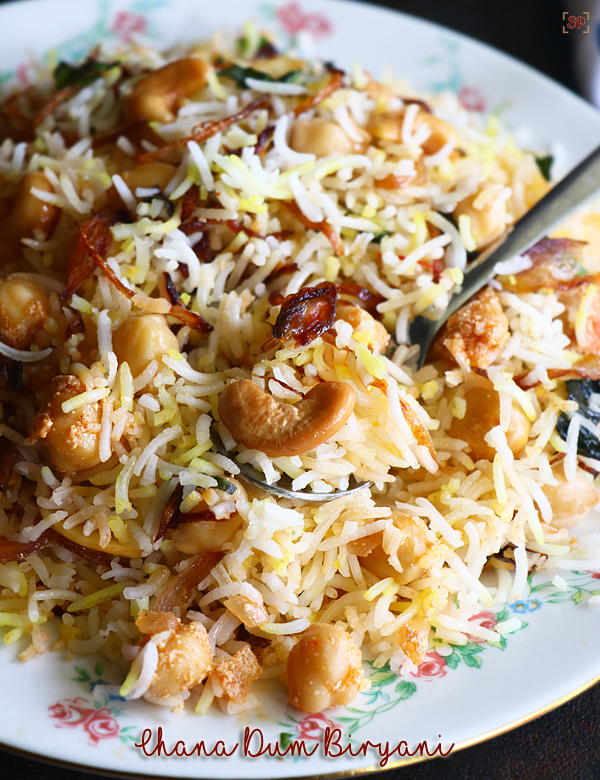
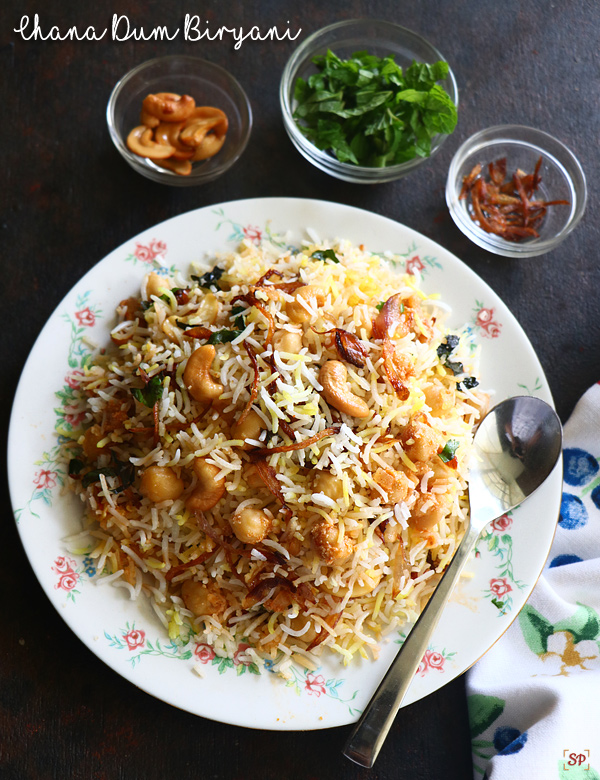
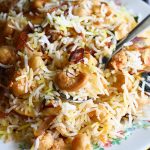
Chana dum biryani recipe with step by step pictures and video – a aromatic flavourful layered biryani using kabuli chana or white chickpeas, basmati rice and other spices.
Chana dum biryani recipe is also known as chole biryani or chickpea biryani. This chana dum biryani is a one pot protein rich variety rice. It is packed with aromatic spices along with saffron using the technique of dum cooking.
Generally we make biryani with vegetables but here I have chana as main ingredient. This healthy chana dum biryani is healthy as its rich in protein. Chana biryani or chole biryani is my most favorite. Rice cooked along with whole garam masala spices combined with prepared chana masala gravy, mint, coriander leaves, saffron milk layered and cooked in dum makes it a perfect weekend special especially kids will love it.
About chana dum biryani recipe:
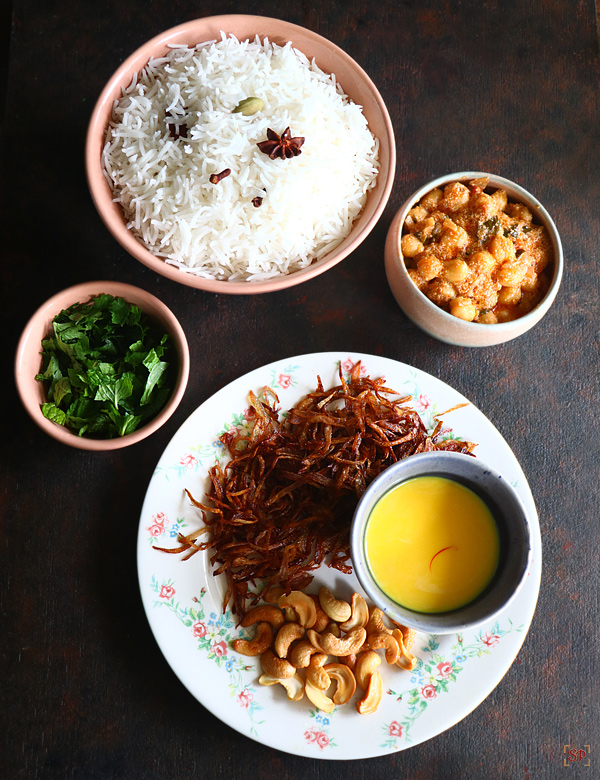
Pre – preparations : First soak saffron in warm milk, then after that whisk curd and set aside. Soak chana overnight pressure cook along with salt and water for 4-5 whistles then set aside. Fry cashews till golden , remove. Then fry onion till golden brown and set aside.
Cook basmati rice : Drain basmati rice and cook in open pot with water, salt along whole garam masala. Cook only till 3/4 th done.
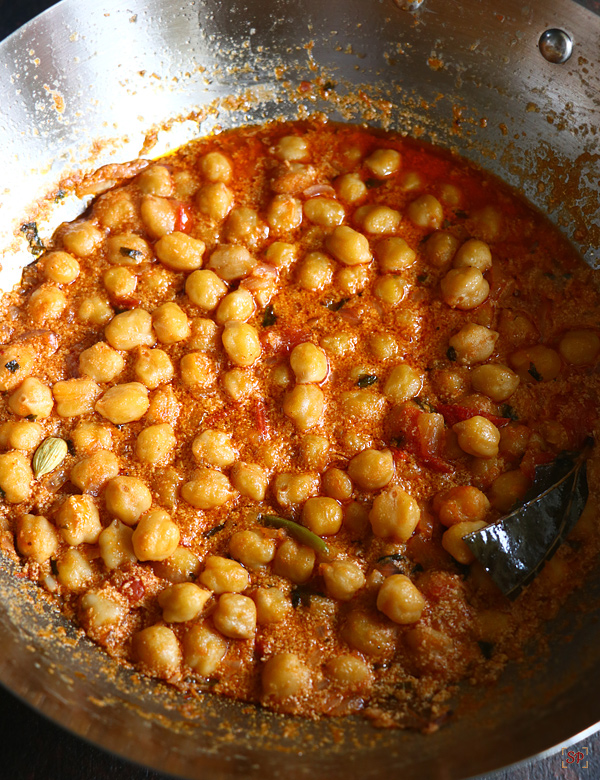
Chana gravy : Cook chana along with curd, spices , masala powders with a onion tomato base.
Layering : First oil the bottom of the biryani pot well. Then to begin with start with chana gravy then next layer add half of cooked rice along with mint,coriander leaves, fried onion etc. Next add remaining rice, remaining chana curry with mint,coriander leaves, fried onion, cashews, saffron milk.
Dum cooking : Place dosa tawa on flame and keep in lowest flame as possible. Then place the biryani pot along with a tight lid on the dosa tawa and dum cook for 10 mins.
Variations to chana dum dum biryani:
Instead of layering you can mix everything and dum cook for 10 mins too.
To make it vegan you can replace curd with coconut milk. Replace milk with water for soaking saffron.
You can skip tomato too if you prefer.
Dum biryani is a time consuming process I agree however with a little planing and prepreparations makes it a easy deal.
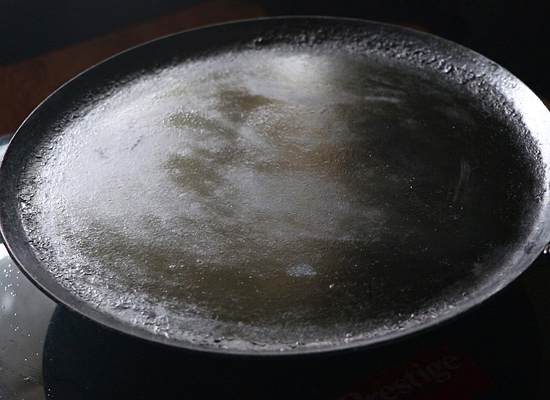
Both are triply and works best without sticking or burning. Praylady offeres free shipping now so avail the offer and enjoy.
Serving and and storage suggestion:
Serve chana dum biryani with onion raita or papad. This dum biryani keeps well for a day in room temperature and another day if kept in fridge. But it tastes best when served hot and with layers I would recommend finishing it off the same day itself.
If you have any more questions about this chana dum biryani recipe do mail me at sharmispassions@gmail.com
Follow me on Instagram, Facebook, Pinterest ,Youtube and Twitter .
Tried this chana dum biryani recipe recipe? Do let me know how you liked it.Tag us on Instagram @sharmispassions and hash tag it on #sharmispassions.
To begin with soak chana overnight or for atleast 8-10 hours.
Pressure cook along with enough water and salt for 5 whistles in low medium flame. Cooked chana should be soft when pressed but not mushy.
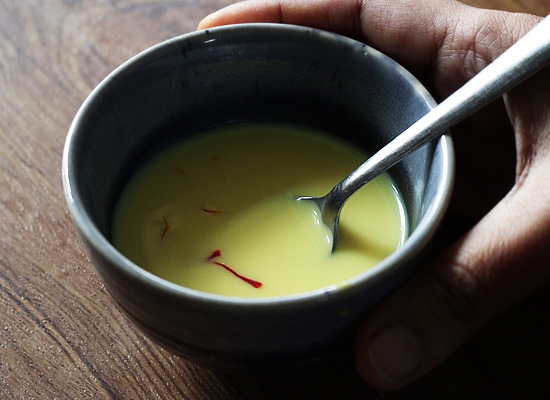
Soak saffron in warm milk, mix it well and set aside.
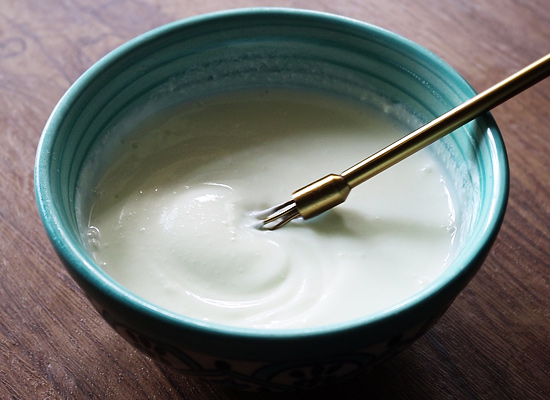
Whisk thick curd and set aside.
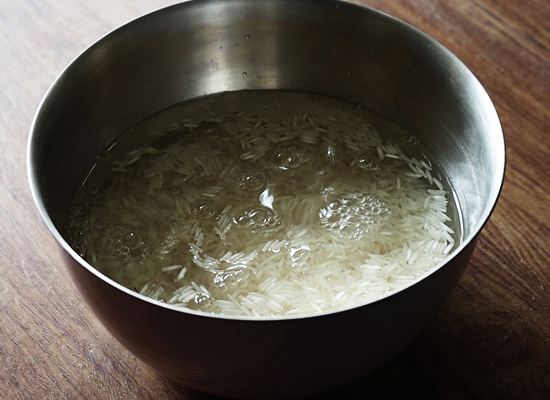
Soak basmati rice in water for 10 mins.Rinse well , drain and set aside.
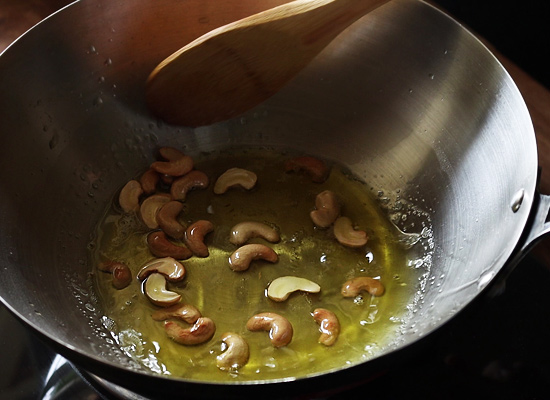
To a pan - heat oil , ghee add cashews fry until golden. Remove and set aside.
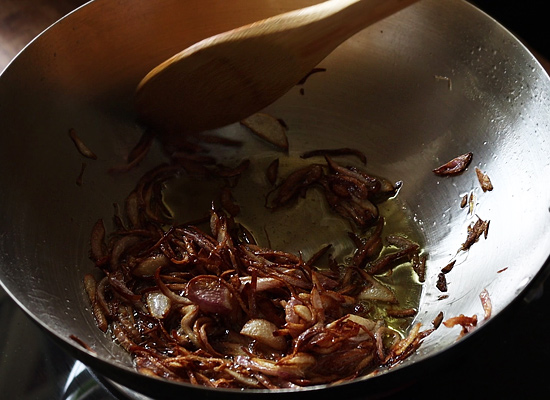
Now add sliced onion fry until golden brown and set aside.
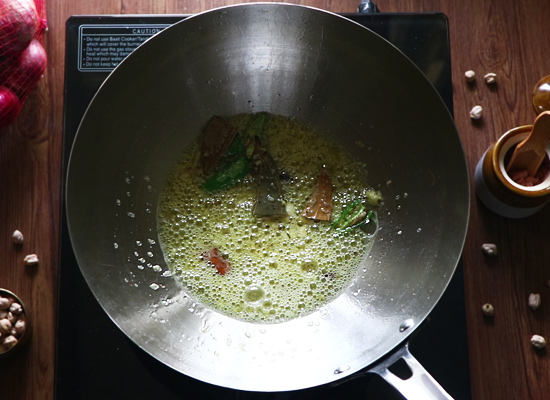
Now add all the whole spices along with green chillies, ginger garlic paste. Saute for a minute.
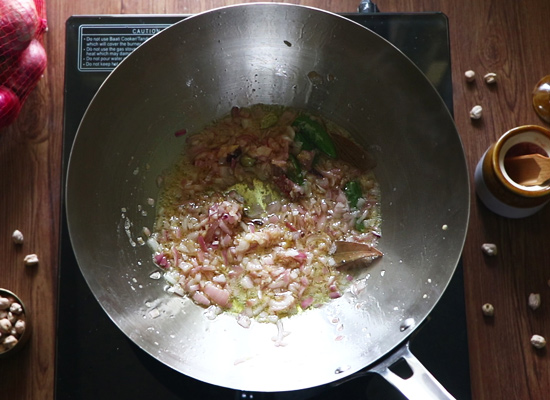
After that add onion fry until golden.
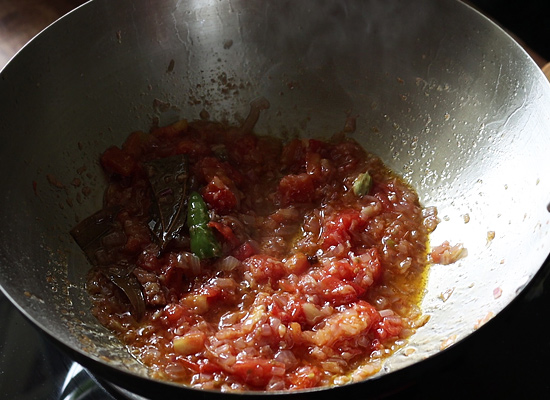
Next add tomato, fry until mushy and raw smell leaves.
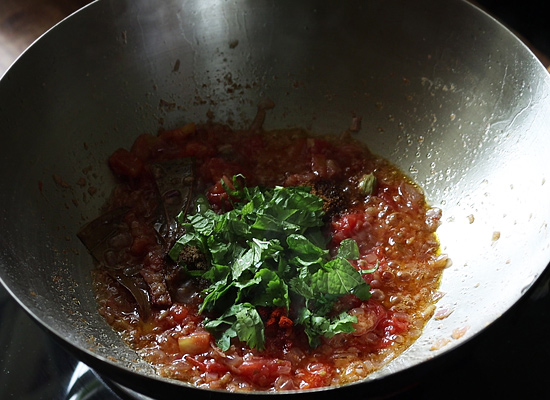
After that add red chilli powder, coriander powder, garam masala powder along with mint and coriander leaves. Give a quick saute, do not burn the spice powders.
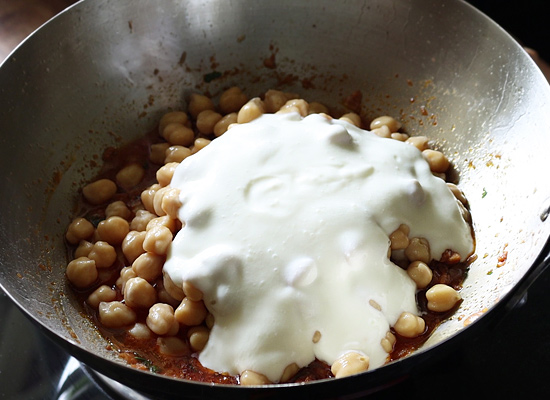
Add cooked chana along with whisked curd.
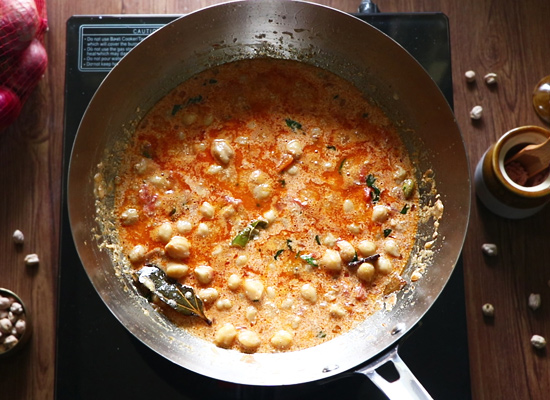
Mix it well. Let it start to boil.
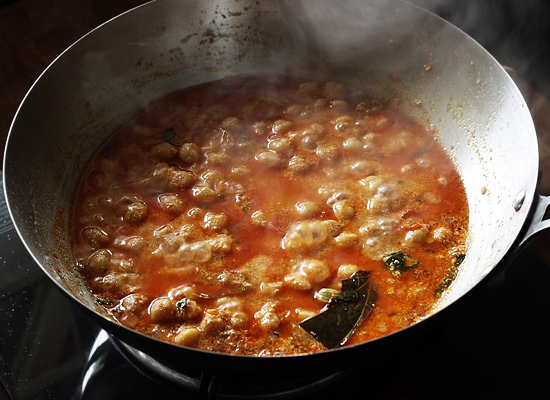
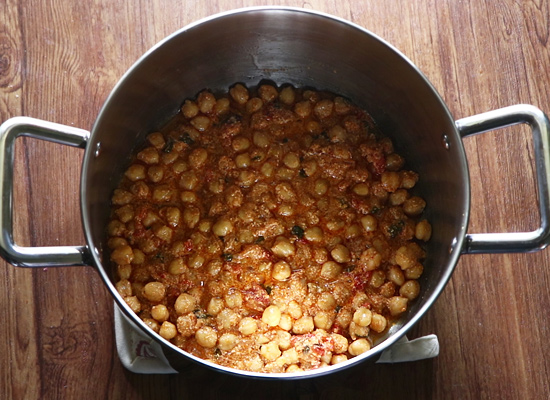
When it starts to boil cook covered for few mins until the mixture becomes slightly thick.
The curry has become thick. Switch off and set aside.
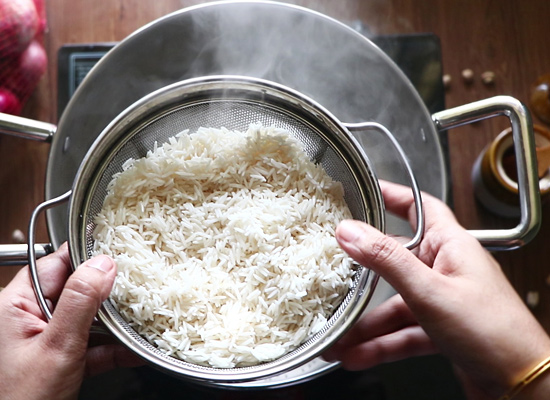
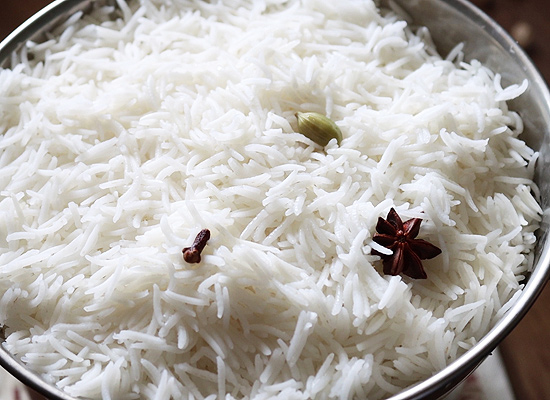
To a big pot add 4 cups water along with whole spices like star anise, cinnamon, cardamom, cloves along with salt.Let it boil then add soaked, drained rice.
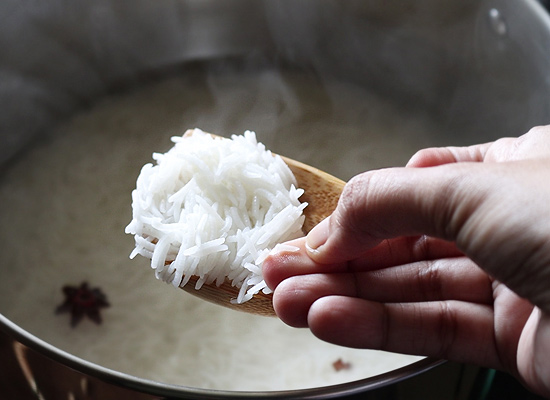
Cook exactly for 5-6 mins not more than that.
It should break like this and not become soft when pressed. Make sure rice is cooked only till 3/4th done.
Drain water and keep the cooked rice aside.
These steps should be done off the stove. Brush the bottom of the biryani pot with little oil.
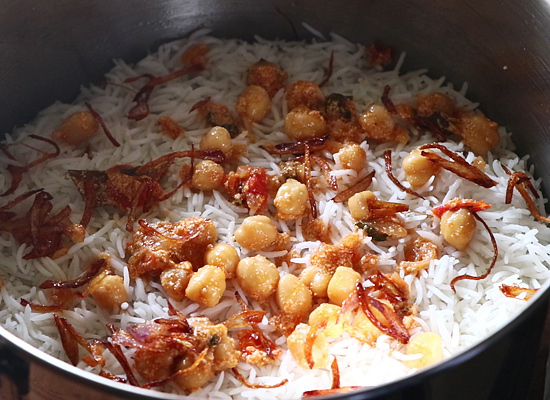
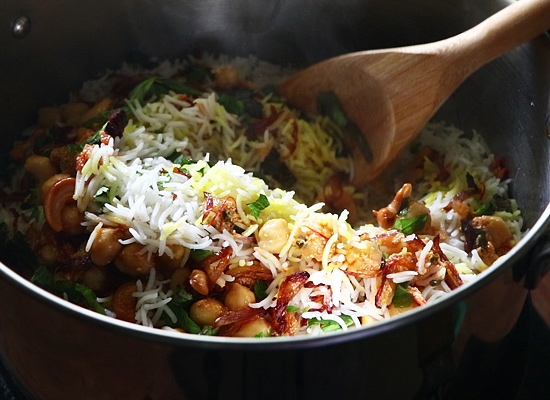
Add 3/4 th of prepared chana gravy to the pot.
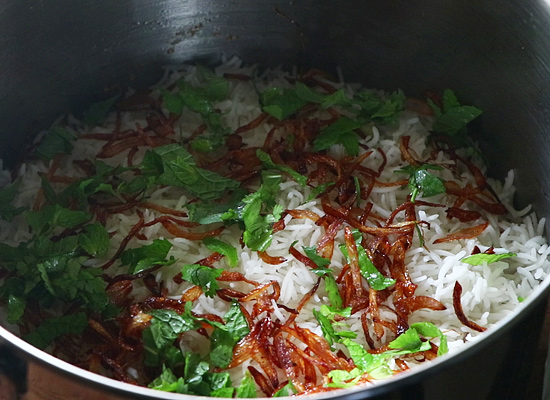
Now next layer:add rice along with fried onion and half of mint and coriander leaves.
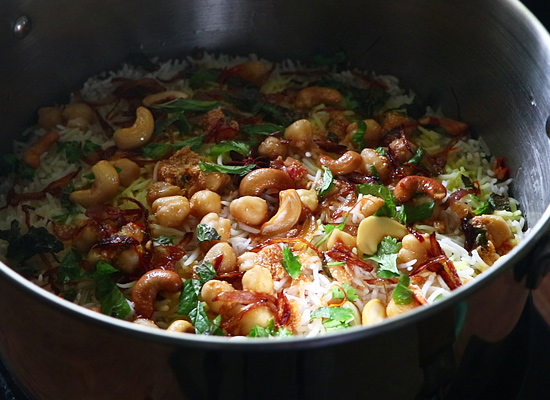
Next add rice as top final layer along with remaining 1/4 portion chana gravy.
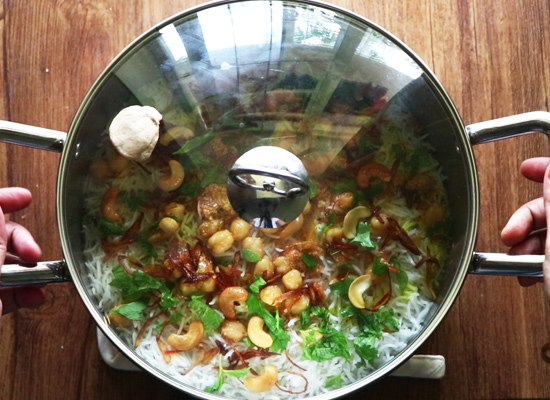
Add remaining fried onion,coriander, mint leaves along with essence, saffron milk.
Close with a tight lid.If there is any opening seal with chapathi dough. My lid is tight so sealed just the hole on the lid.
Heat dosa tawa. Keep the flame as lowest as possible.
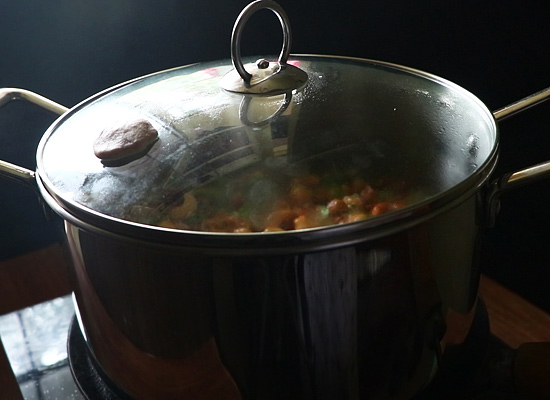
Keep the biryani pot on the dosa tawa.Dum cook in lowest flame for 10 mins. Switch off and set aside for for 5-10 mins undisturbed.
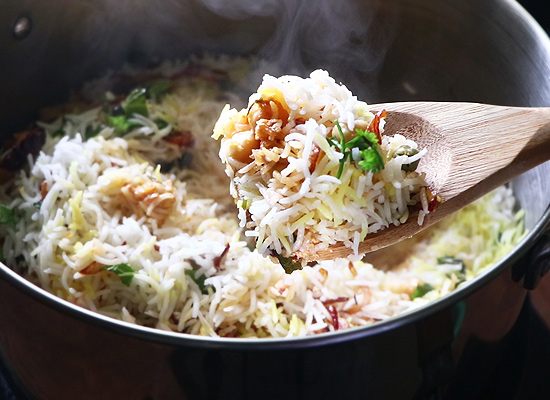
Finally open,the aroma is just so so good.
Fluff it gently. Do not overmix.
Serve immediately without mixing much so that the layers are not completely mixed.
Notes
Be very careful while cooking rice as if rice becomes mushy then dum cooking will not be possible.
Rice should be cooked only till 3/4 th and it should break when you press and not soft.
You can replace white chana with brown chana too or use a combination of it but make sure each is cooked soft.
In addition you can even add fennel seeds or cumin seeds along while cooking rice.
Use a heavy bottomed pot to make dum biryani.
Always brush the bottom with little oil to make it greasy and to avoid burning or sticking.
The spice level is medium if you want add more red chilli powder,green chillies to make it more spicy.
Chana dum Biryani Recipe Video
How to make chana dum biryani recipe:
1.To begin with soak chana overnight or for atleast 8-10 hours.
2.First pressure cook along with enough water and salt for 5 whistles in low medium flame. Cooked chana should be soft when pressed but not mushy. 3.Soak saffron in warm milk, mix it well and set aside.
4.Whisk thick curd and set aside.
5.Soak basmati rice in water for 10 mins.Rinse well , drain and set aside.Chana dum biryani is little time consuming but with a bit of prepreparations this can be made easily.
6.To a pan – heat oil , ghee add cashews fry until golden. Remove and set aside.
7.Now add sliced onion fry until golden brown and set aside.
8.Now add all the whole spices along with green chillies, ginger garlic paste. Saute for a minute.
9.After that add onion fry until golden.
10.Next add tomato, fry until mushy and raw smell leaves.
11.After that add red chilli powder, coriander powder, garam masala powder along with mint and coriander leaves. Give a quick saute, do not burn the spice powders.
12. Add cooked chana along with whisked curd.
13.Mix it well. Let it start to boil.
14.When it starts to boil cook covered for few mins until the mixture becomes slightly thick.
15.The curry has become thick. Switch off and set aside.
16.After that to a big pot add 4 cups water along with whole spices like star anise, cinnamon, cardamom, cloves along with salt.Let it boil then add soaked, drained rice.
17.Cook exactly for 5-6 mins not more than that.
18.It should break like this and not become soft when pressed. Make sure rice is cooked only till 3/4th done.
19.Drain water and keep the cooked rice aside.The cooked rice itself is so aromatic that the kids could’t wait for chana dum biryani to get ready.
20. These steps should be done off the stove. Brush the bottom of the biryani pot with little oil.
21.Add 3/4 th of prepared chana gravy to the pot.
22.Now next layer:add rice along with fried onion and half of mint and coriander leaves.
23.Next add rice as top final layer along with remaining 1/4 portion chana gravy.
24.Add remaining fried onion,coriander, mint leaves along with essence, saffron milk.
25.Close with a tight lid.If there is any opening seal with chapathi dough. My lid is tight so sealed just the hole on the lid.
26.Heat dosa tawa. Keep the flame as lowest as possible.
27.Keep the biryani pot on the dosa tawa.Dum cook in lowest flame for 10 mins. Switch off and set aside for for 5-10 mins undisturbed.
28.Finally open,the aroma is just so so good.
29.Fluff it gently. Do not overmix.
30.Serve immediately without mixing much so that the layers are not completely mixed.
Serve hot!
My tips while making chana dum biryani:
Be very careful while cooking rice as if rice becomes mushy then dum cooking will not be possible.
Rice should be cooked only till 3/4 th and it should break when you press and not soft.
You can replace white chana with brown chana too or use a combination of it but make sure each is cooked soft.
You can even add fennel seeds or cumin seeds along while cooking rice.
Use a heavy bottomed pot to make dum biryani. Always brush the bottom with little oil to make it greasy and to avoid burning or sticking.
The spice level is medium if you want add more red chilli powder, green chillies to make it more spicy.


 3.Soak saffron in warm milk, mix it well and set aside.