Monday, October 31, 2022

Mysore Bonda | Mysore Bajji

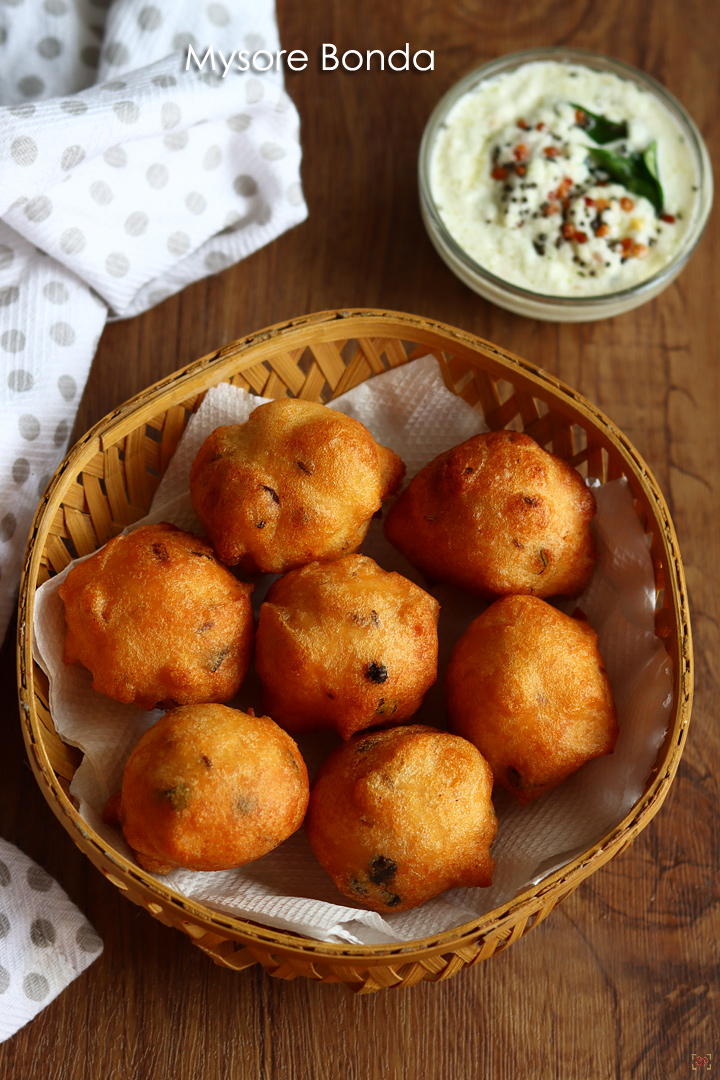
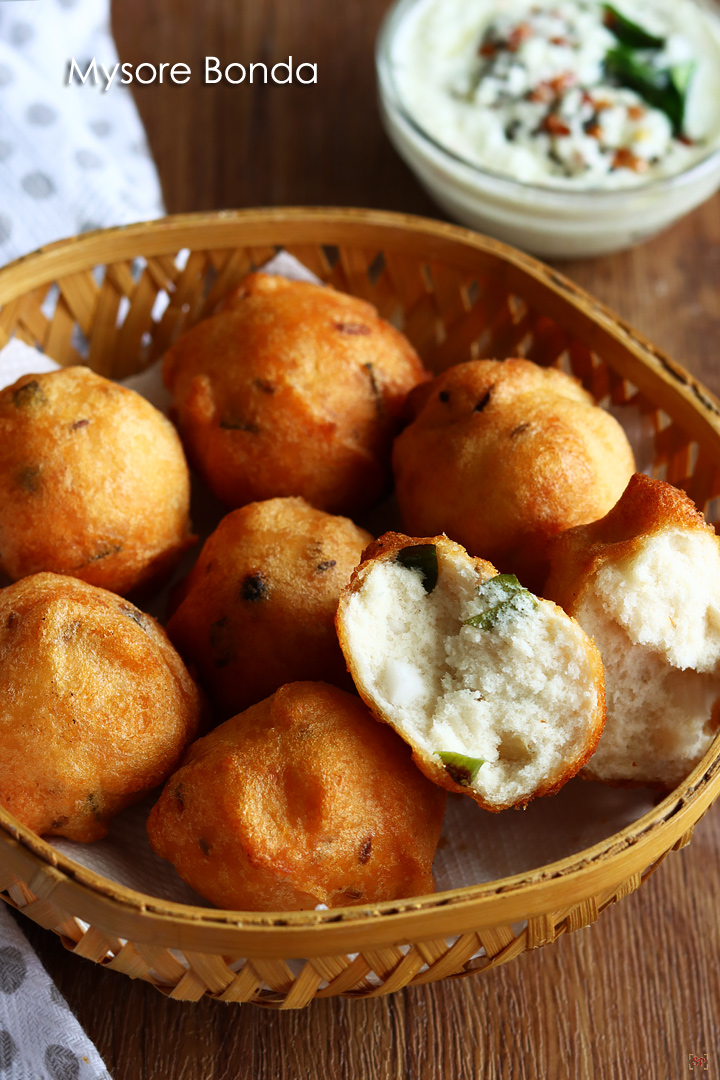
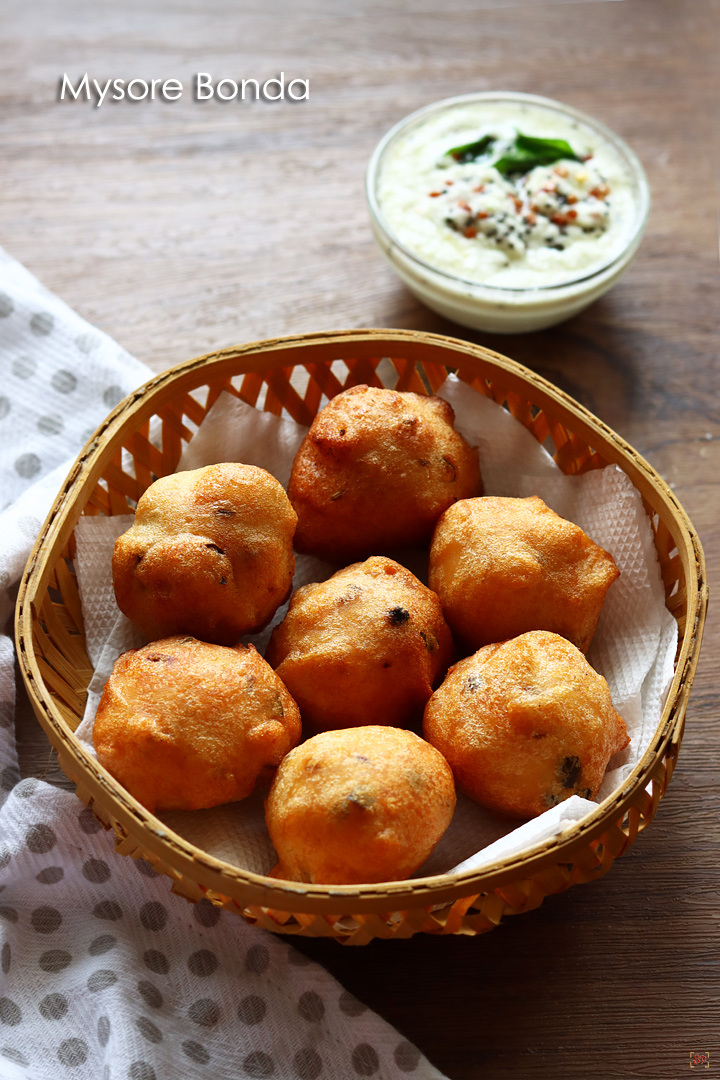
Mysore Bonda is a tasty, crispy outside & spongy inside snack made by deep frying dollops of urad dal flour batter. Mysore Bonda also called as Mysore Bajji is a traditional South Indian snack relished for evening tea along with chutney and during special occasions. Mysore Bonda Recipe is explained in this post with step by step pictures and video.
Mysore Bonda Recipe

Mysore Bonda is plain bonda without masala stuffing and a healthy snack compared to the packed junkies. Mysore Bonda, Mysore Pak, Mysore Rasam are all Mysore’s gift to the food world. Mysore Bonda is often confused with Mangalore bonda / bajji which is made with maida and curd as main ingredients. But the authentic version of Mysore Bonda as given here is made with urad dal batter.

About Mysore Bonda

Mysore Bonda is made by grinding urad dal to a thick batter, mixed with condiments & coconut pieces, spooned to kadai and deep fried. Mysore Bonda is a great source of protein good for bones and tasty too! I love the tint of coconut bits and pepper in the Bonda which makes it to go for one more!

Bonda Batter

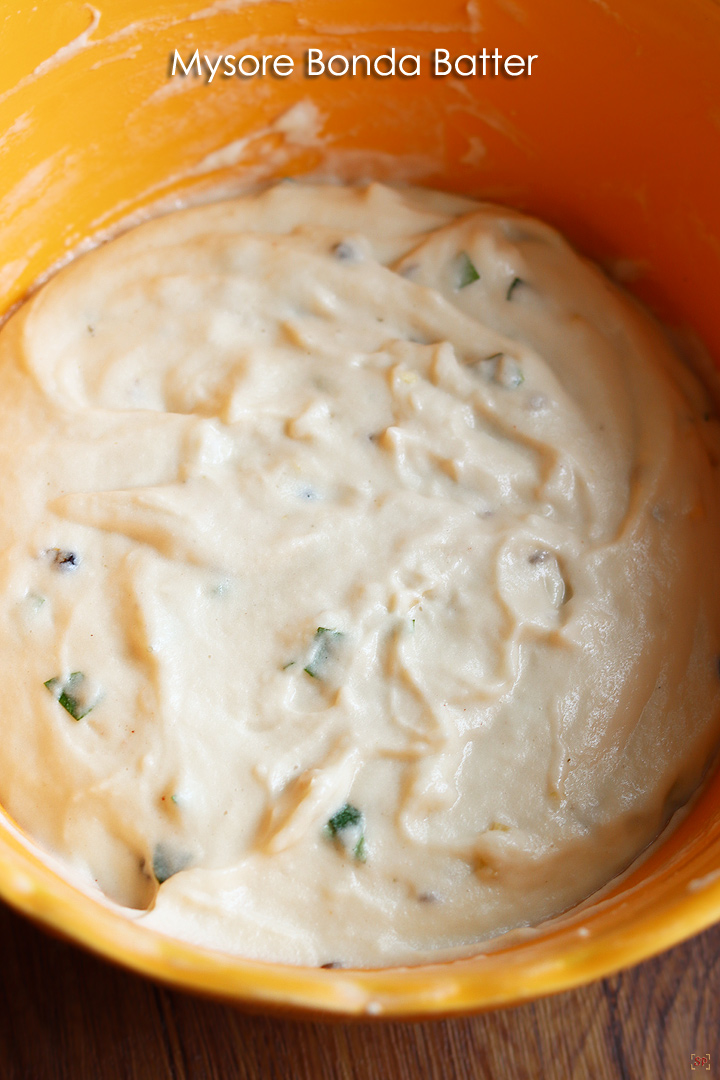
The bonda batter is the key for crispy outside and spongy inside bonda – the batter should be fluffy and light, when you add it to a bowl of water it should float like butter. So the trick is to soak urad dal in enough water for mentioned hours and grinding it with very little water until smooth and fluffy. If your batter is perfect in consistency when it is dropped in oil – in few seconds, the bondas starts to turn over to other side by itself which is such a delight to watch.

You can either grind it in mixie or grinder. I usually grind it in mixie if making in a small batch. Sometimes I reserve a portion of urad dal batter when I make batter for idli & dosa and store the batter for Mysore Bonda preparation at a later time to avoid grinding once more! You can store the batter in fridge with adding the condiments for 2-3 days. It serves as a great evening snack with tea or add it to your breakfast to make it special for weekends.

More similar recipes
Mysore Bonda Recipe

Is Mysore Bonda & Goli Baje the same?

Mysore Bonda is closest in resemblance to golibaje & medu vada – however there is subtle difference. Goli Bajeis the refined flour / maida version of Mysore Bonda. Vada is the donut shape version of Mysore Bonda with addition of some more spices. We can try this bonda with atta / wheat flour as well!

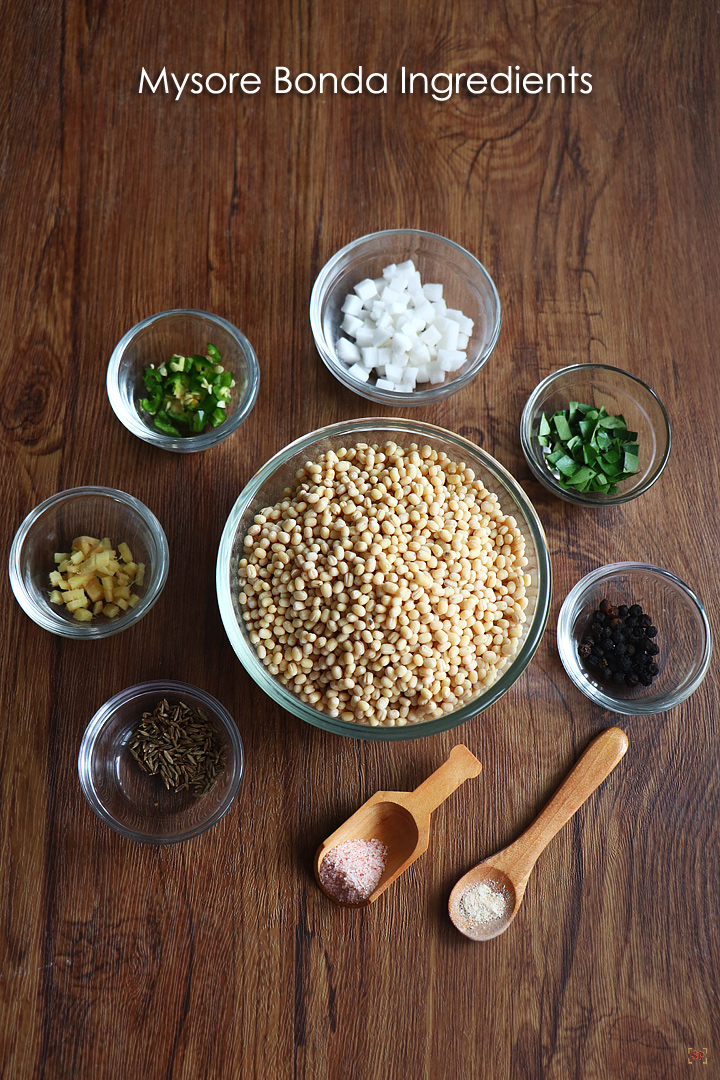
Mysore Bonda Ingredients

  • Urad Dal : Urad Dal is the main ingredient for this bonda also the authentic version – though you can use atta / refined wheat flour too! Also urad dal gives sponginess to the snack – hence I recommend making bonda with urad dal when you make it for kids & special occasions.
  • Condiments : Mysore Bonda does not need many ingredients – just pepper and salt would do! For flavour we add ginger, curry leaves, cumin seeds and for spice green chillies are added.
  • Veggies : Traditionally Mysore Bonda should have trace of fine cut coconut bits & curry leaves – I recommend adding them! Alternatively to make bonda healthier for kids, we can add fine pieces of carrot, peas, cabbage, onion as well!
Mysore Bonda Recipe

If you have any more questions about this Mysore Bonda Recipe do mail me at sharmispassions@gmail.com. In addition, follow me on Instagram, FacebookPinterest, Youtube and Twitter .

Tried this Mysore Bonda Recipe ? Do let me know how you liked it. Also tag us on Instagram @sharmispassions and hash tag it on #sharmispassions.
Print

Mysore Bonda

Mysore Bonda is a tasty, crispy & spongy snack made by deep frying dollops of urad dal flour batter. Mysore Bonda also called as Mysore Bajji is a South Indian snack relished for evening tea along with chutney. Mysore Bonda Recipe is explained in this post with step by step pictures.
Course Snack
Cuisine Indian
Keyword bajji recipes, bonda recipes, fry, fry recipes, rice flour recipes, snack recipes
Prep Time 2 hours 15 minutes
Cook Time 15 minutes
Total Time 2 hours 30 minutes
Servings 2
Calories 182kcal
Author Sharmilee J

Ingredients

  • 1 cup whole urad dal
  • 3/4 tsp cumin seeds
  • 1 tsp whole pepper
  • 1 tsp ginger finely chopped
  • 10 nos curry leaves finely chopped
  • 2 green chillies finely chopped
  • 4 tbsp coconut
  • a pinch hing
  • salt to taste
  • oil to deep fry

Instructions

  • To a mixing bowl add 1 cup urad dal.
  • Soak urad dal in enough water till immersing level for 3 hrs.
  • Rinse it well then drain water completely. Add it to a big mixer jar.
  • Add around 2 tbsp water first. To avoid mixer getting hot add ice chill water.
  • Add water little by little and grind to a fluffy batter. Scrap the sides sprinkle water and grind to avoid mixer getting stuck.
  • The batter should be smooth and fluffy.
  • Also the batter should be thick so be very careful while adding water. If the batter is runny the bondas will drink more oil and will become soggy.
  • Transfer the batter to the mixing bowl – add 1 tsp whole pepper,3/4 tsp cumin seeds,1 tsp ginger finely chopped,2 green chillies finely chopped,10 curry leaves finely chopped,4 tbsp coconut pieces finely chopped,salt to taste and 1/2 tsp hing
  • Mix it until well combined.
  • Dip fingers in water to avoid sticking.
  • Make a lemon sized ball.
  • Heat oil, drop a pinch of batter if it comes up immediately then oil is ready. Make small balls and carefully drop it in preheated oil. If the batter is perfect the bonda will start to turn over by itself.
  • Keep in medium flame and cook till both sides are golden.
  • Turn over and cook on both sides.
  • Deep fry until golden brown.
  • Remove the bondas and drain in tissue paper. Repeat to finish the batter.
  • Crispy bondas are ready!

Video

Notes

  • Make sure you grind the batter fine and fluffy. I used mixer for grinding the batter.You can even use grinder which will yield slightly more batter in volume.
  • Add salt only when you are ready to fry the bondas. Resting the batter with salt for more time will make the batter watery.
  • The bondas should be light for that you should grind the batter perfectly with less water.
  • Also if you are planning to store the batter then store it without adding anything. While you are ready to deep fry you can add it and deep fry it.
  • Use groundnut oil or refined oil for deep frying. I always use groundnut oil for cooking and deep frying.

Nutrition

Serving: 125g | Calories: 182kcal | Carbohydrates: 28g | Protein: 13g | Fat: 2g | Saturated Fat: 2g | Polyunsaturated Fat: 0.04g | Monounsaturated Fat: 0.1g | Sodium: 4mg | Potassium: 48mg | Fiber: 11g | Sugar: 0.3g | Vitamin A: 204IU | Vitamin C: 102mg | Calcium: 61mg | Iron: 4mg

Mysore Bonda Recipe – Step by Step

1.To a mixing bowl add 1 cup whole urad dal.
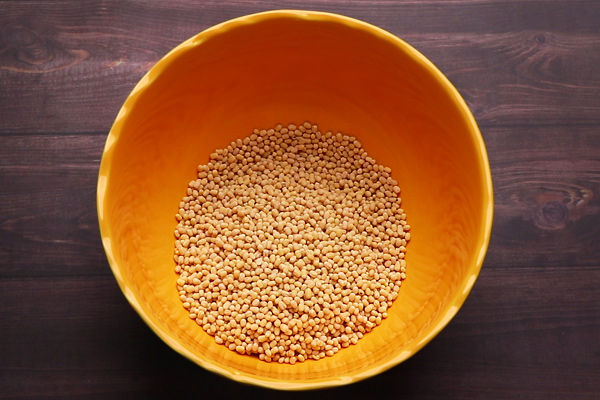
2.Soak urad dal in enough water till immersing level for 3 hrs.
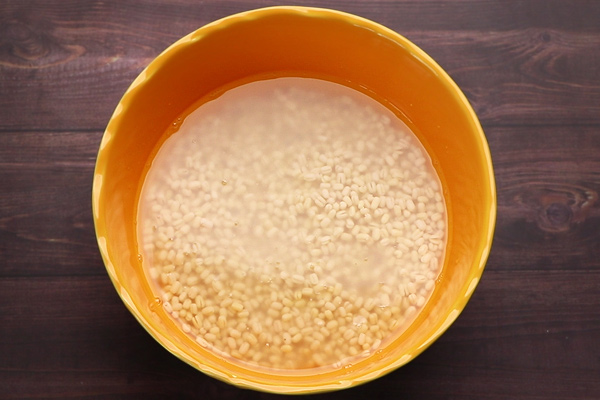
3.Rinse it well then drain water completely. Add it to a big mixer jar.
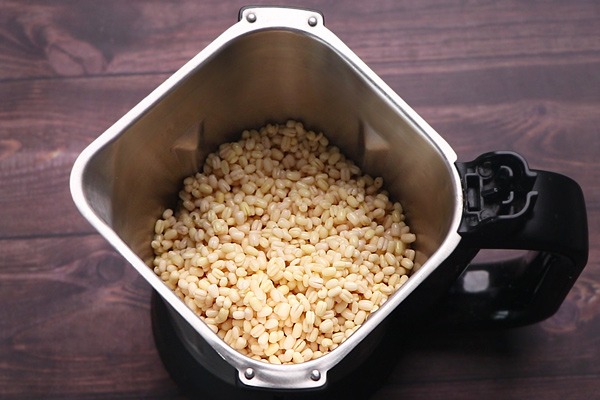
4.Add around 2 tbsp water first. To avoid mixer getting hot add ice chill water.
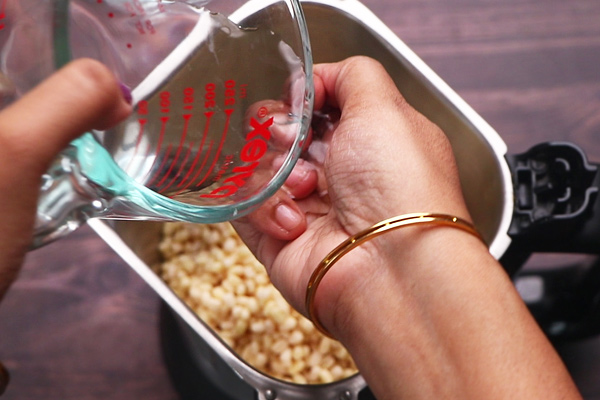
5.Add ice water little by little and grind to a fluffy batter. Scrap the sides sprinkle water and grind to avoid mixer getting stuck.
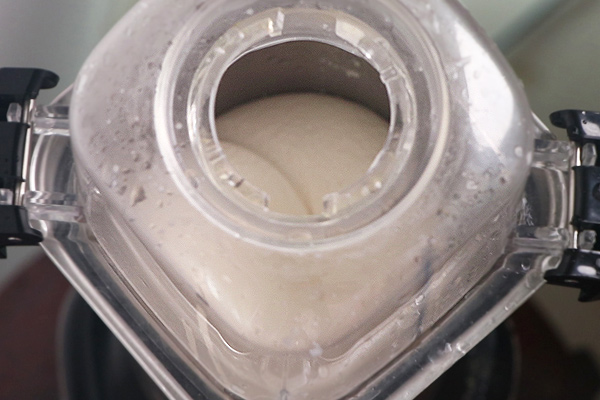
6.The batter should be smooth and fluffy.
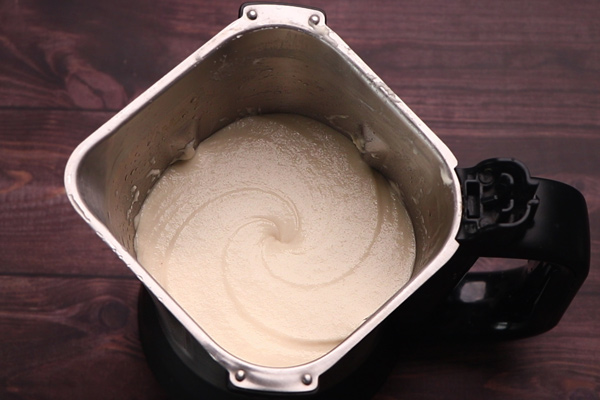
7.Also the batter should be thick so be very careful while adding water. If the batter is runny the bondas will drink more oil and will become soggy when deep fried.
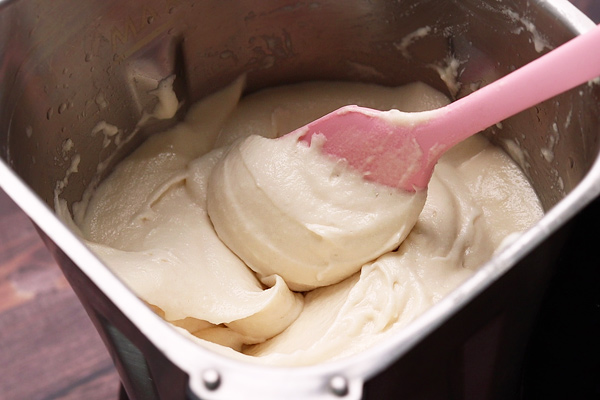
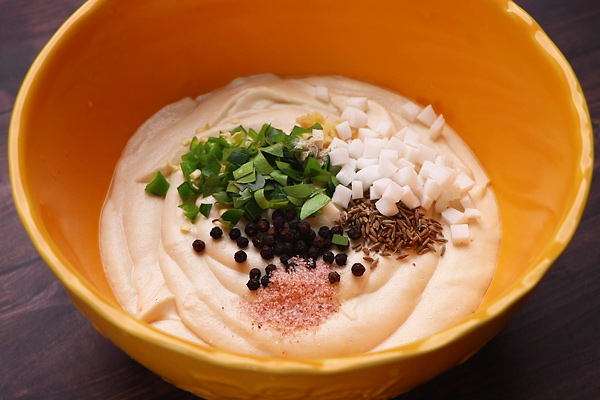
8.Transfer the batter to the mixing bowl – add

1 tsp whole pepper

3/4 tsp cumin seeds

1 tsp ginger finely chopped

2 green chillies finely chopped

10 curry leaves finely chopped

4 tbsp coconut pieces finely chopped

salt to taste

1/2 tsp hing
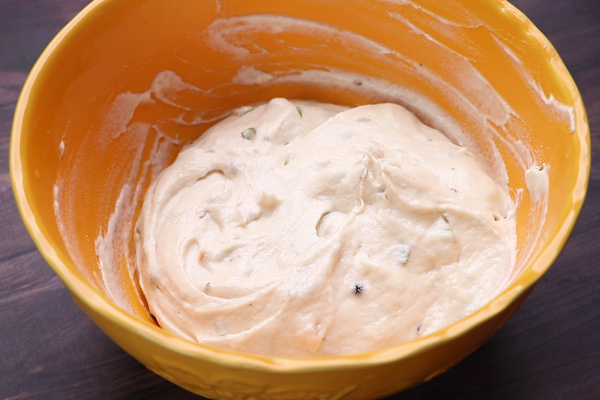
9.Mix it until well combined.
10.Dip fingers in water to avoid sticking.
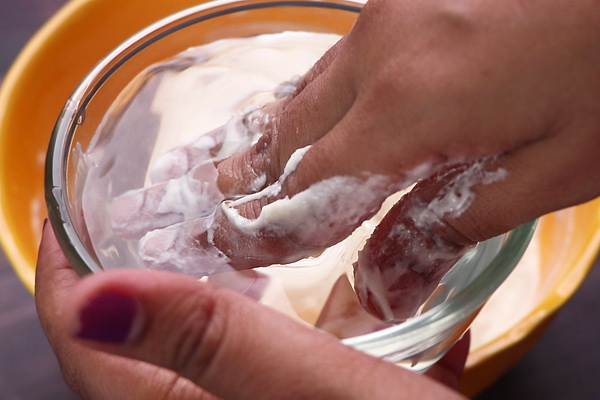
11.Make a lemon sized ball. You can make it tiny to make it tempting to toddlers.
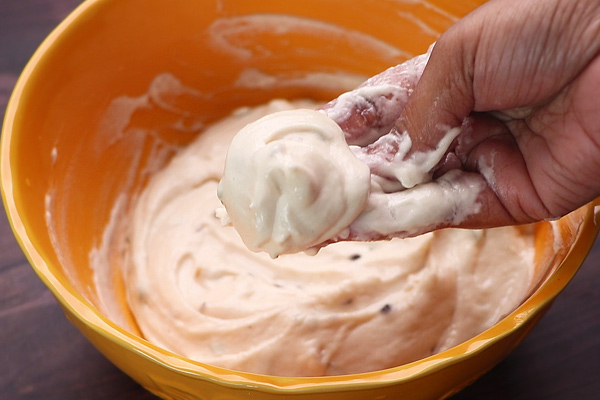
12.Heat oil, drop atiny pinch of batter if it comes up immediately then oil is ready. Make small balls and carefully drop it in preheated oil. If the batter is perfect the bonda will start to turn over by itself.
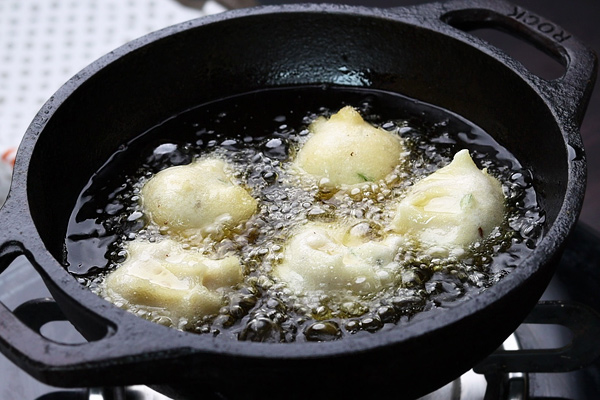
13.Keep in medium flame and cook till both sides are become crisp and golden brown.
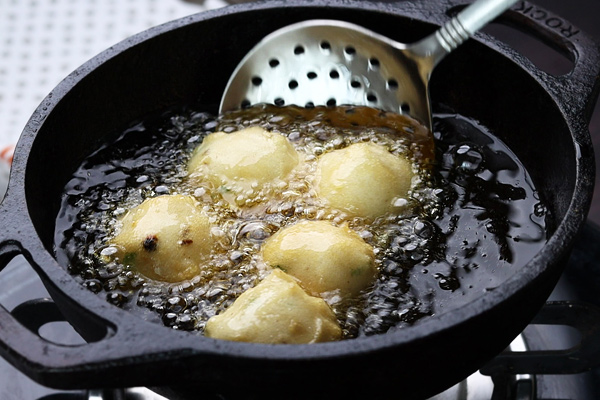
14.Turn over and cook on both sides.
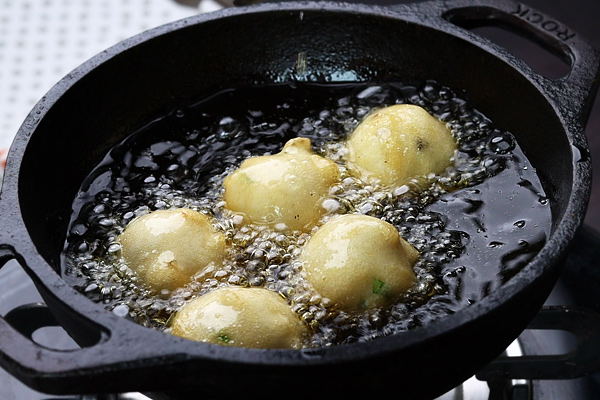
15.Deep fry until golden brown and crisp.
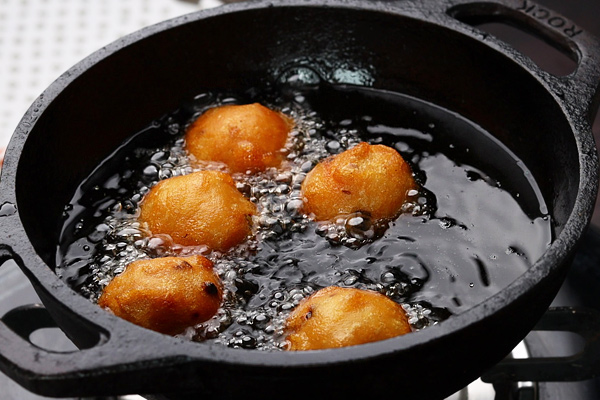
16.Remove the bondas and drain in tissue paper. Repeat to finish the batter.
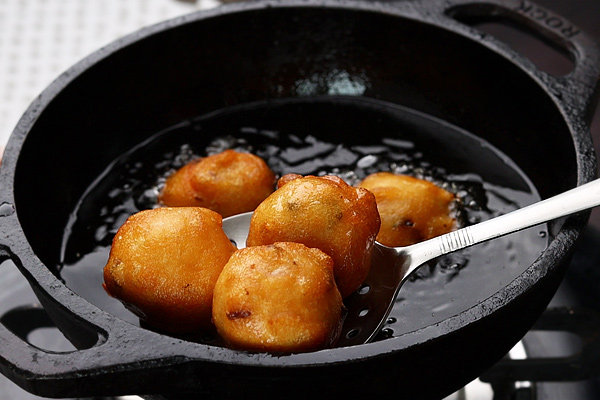
Crisp bondas are ready!

Expert Tips

  • Make sure you grind the batter fine and fluffy. I used mixer for grinding the batter.You can even use grinder which will yield slightly more batter in volume.
  • Add salt only when you are ready to fry the bondas. Resting the batter with salt for more time will make the batter runny.
  • Also if you are planning to store the batter then store it without adding anything. While you are ready to deep fry you can add the condiments and deep fry it.
  • Use groundnut oil or refined oil for deep frying. I always use groundnut oil for cooking and deep frying.
  • You can make the size small or big as per your preference.
Mysore Bonda Recipe

Serving & Storage Suggestions

Mysore Bonda with coconut chutney is match made in heaven for snack! Serve hot and make bondas with the batter as and when you need rather than making bondas altogether for later use.

I deal with the leftovers (normally there won’t be) by dunking the bondas in sambar, curd or rasam to make Sambar Mysore Bonda, Dahi Mysore Bonda and Rasam Bonda accordingly.

Variations

Mysore Bonda is traditionally made with urad dal. How ever you can try with wheat flour, refined wheat flour and a mix of urad (75%) & raw rice (25%) too. Add fine pieces of carrot, peas, cabbage, onion for a more veggie healthy version for kids.

FAQs

1.What is Mysore Bonda?

Mysore Bonda is a tasty, crispy outside & spongy inside snack made by deep frying dollops of urad dal flour batter. It traditional South Indian snack relished for evening tea along with chutney.

2.How do you make Mysore Bonda?

  • Soak urad dal for minimum 3 hours
  • Grind urad dal to a fluffy smooth batter
  • Mix with coconut bits, pepper, curry leaves and hing
  • Deep fry dollops of hand spooned batter – Bonda is ready!

3.Can we make Mysore Bonda with refined wheat flour / maida?

Mysore Bonda is traditionally made with urad dal and can be tried with wheat flour, refined wheat flour and a mix of urad (75%) & raw rice (25%) too. 

4.Can I air fry / bake Mysore Bonda?

Sadly no. It will not be as tasty & spongy as the deep fried bonda.

5.On what occasions you can make Mysore Bonda?

Mysore Bonda is a perfect, healthy snack with chutney in the evenings. We can make it on special occasions like Diwali, Regional New Year and for religious festivals.
Mysore Bonda Recipe

The post Mysore Bonda | Mysore Bajji appeared first on Sharmis Passions.


from Sharmis Passions https://ift.tt/j2MhZV9
via KITCHEN MASALA
Homemade Graham Crackers Recipe

Homemade Graham Crackers Recipe with Step by Step Pictures. Graham crackers flavoured with cinnamon and wheat flour goes well with tea.  Graham crackers recipe For those who are hearing about this for the first time. Graham crackers is nothing but a crispy biscuit with honey and cinnamon flavour. The biscuit is made with whole wheat...

Read More

The post Homemade Graham Crackers Recipe appeared first on Yummy Tummy.


from Yummy Tummy https://ift.tt/mb5y2H8
via KITCHEN MASALA
Mochi Doughnuts Recipe

"Glutinous Rice Flour Doughnuts Recipe - Mochi Doughnuts Recipe - Chapssaal Donuts Recipe with Step by Step Pictures. Crispy Chewy Balls of Heaven fried to perfection and coated with cinnamon sugar." Mochi Doughnuts Recipe I came across this recipe when i was going through my to do list. This recipe was suggested by one of...

Read More

The post Mochi Doughnuts Recipe appeared first on Yummy Tummy.


from Yummy Tummy https://ift.tt/zg8w3uA
via KITCHEN MASALA
Thursday, October 27, 2022

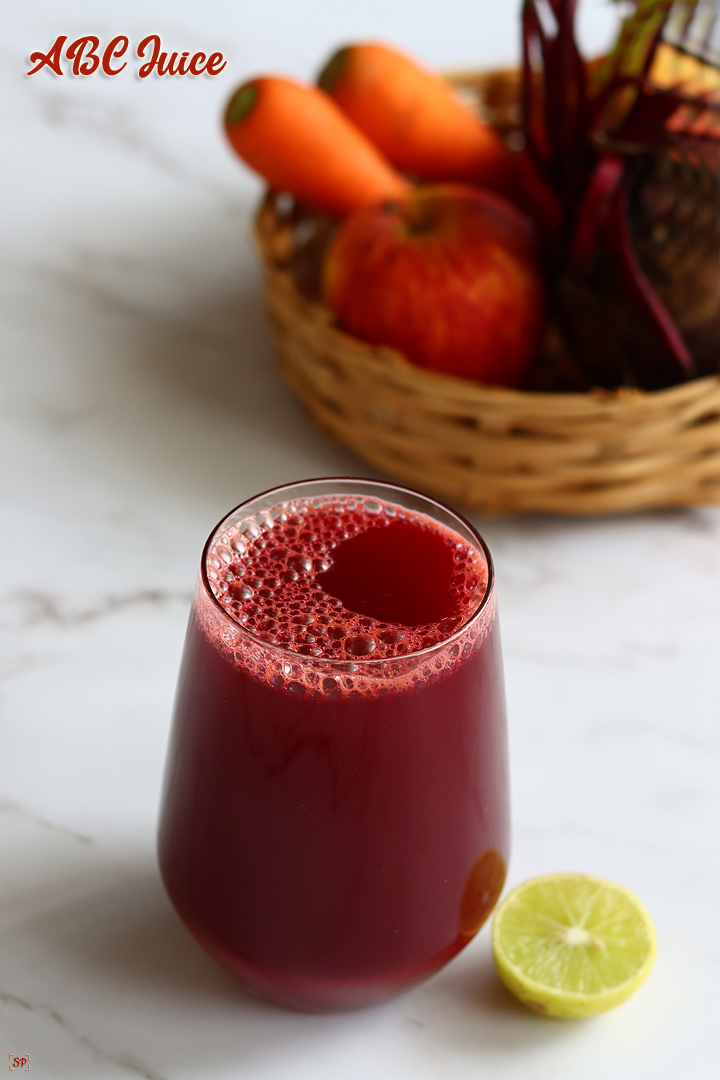
ABC Juice | Apple Beetroot Carrot Juice

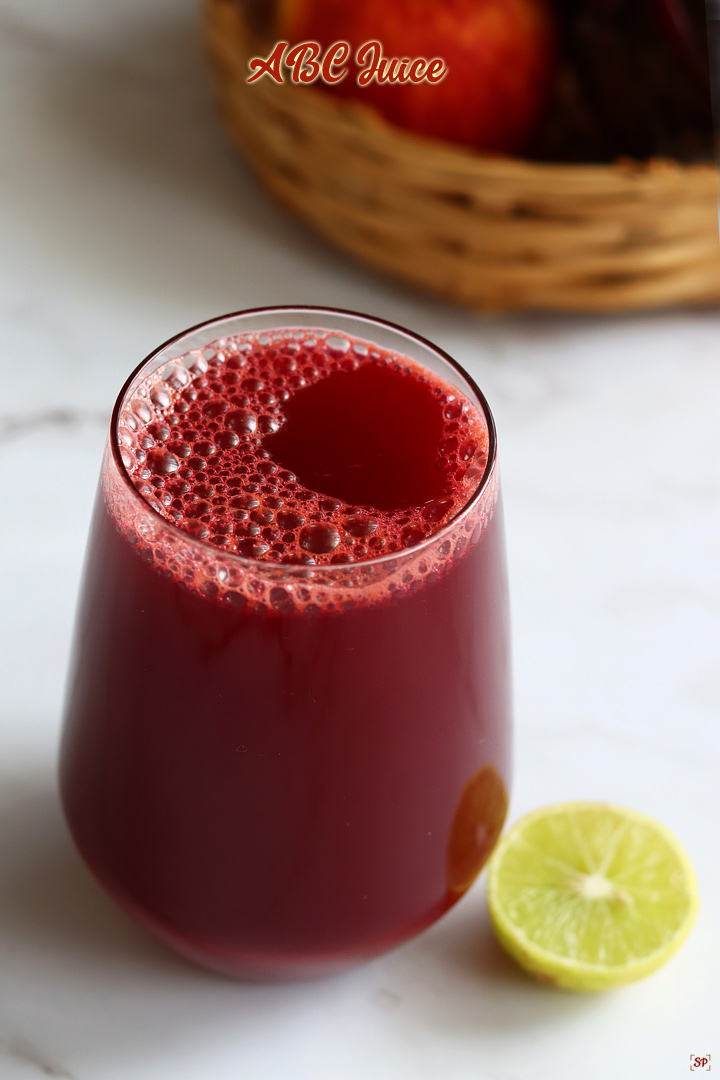
ABC Juice as it is popularly called as is a great detoxification juice. ABC Juice is made by blending Apple, Beetroot and Carrot along with a dash of salt, ginger and lemon for a perfect balance. ABC Juice Recipe is explained here with step by step pictures and video.

ABC JUICE

ABC Juice is a great option to include daily intake of fruits and vegetables in the form of juice. Even without the addition of sugar this juice tastes great with a punch of ginger and lemon. Kids had it without much fuss so am making it quite often these days. ABC Juice needs no juicer just a common mixer is needed which is available in every household.

ABC Juice | Apple Carrot Beetroot Juice

ABC Juice is a healthy & delicious energy drink made by blending apple, beetroot and carrot in a mixer or juicer. ABC Juice benefits are abundant and is a great alternate to the regular tea / coffee in the mornings. How to make ABC Juice at home is explained in this post with step by step pictures and video.

ABC Juice is a tasty resort to kids & those who do not like veggies or fruits. ABC Juice is a delight that can be enjoyed any time instead of carbonated cool drinks. Energize your day healthily with ABC Juice!

Check out Recipe Index for more recipes!

About ABC Juice

ABC Juice is the extract of the pulp of apple, beetroot and carrot which fills the nutrient needs of the day and detoxes the body. ABC Juice keep us energized, light and at the same time full from morning till late noon and a perfect health drink from kids to the aged.

ABC Juice can be consumed daily too and ideal for children instead of packed health drinks. ABC Juice is a great idea of beverage as health drink, cool drink, welcome drink and party drink.

ABC JUICE

ABC Juice Benefits

ABC Juice is getting popular these days with its bountiful benefits and to list some are:

  • Detox the body
  • Boosts the immunity
  • Slows ageing as it revitalizes the skin
  • Enhances digestion
  • Avoids bad breath
  • Ease menstrual pains

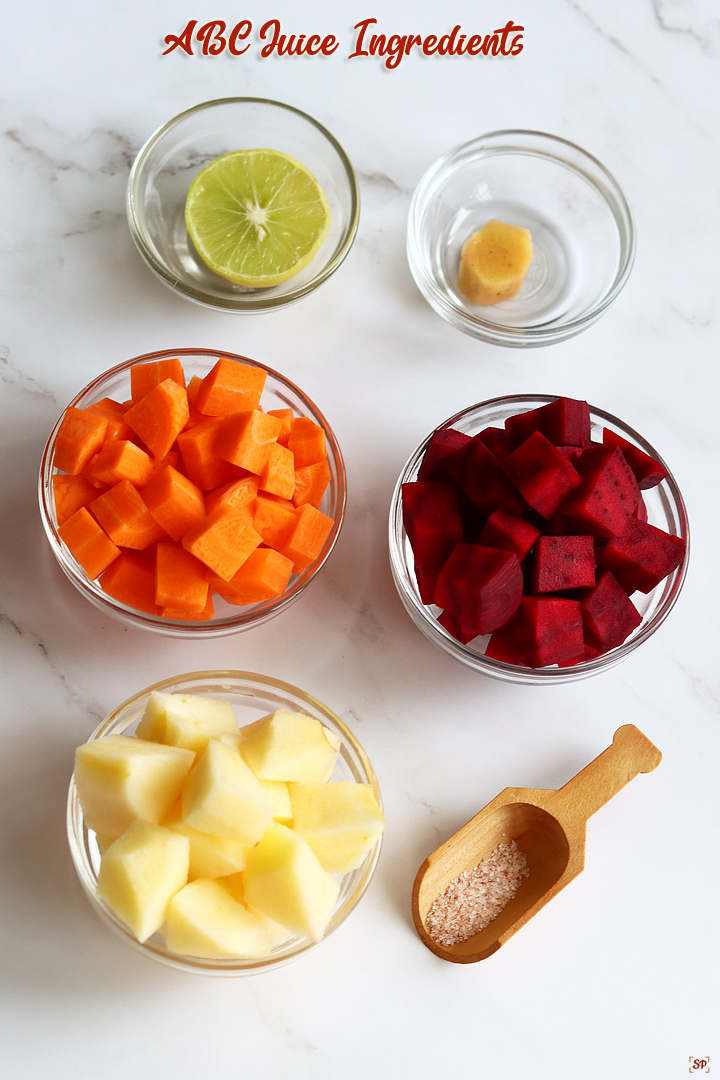
ABC Juice Ingredients

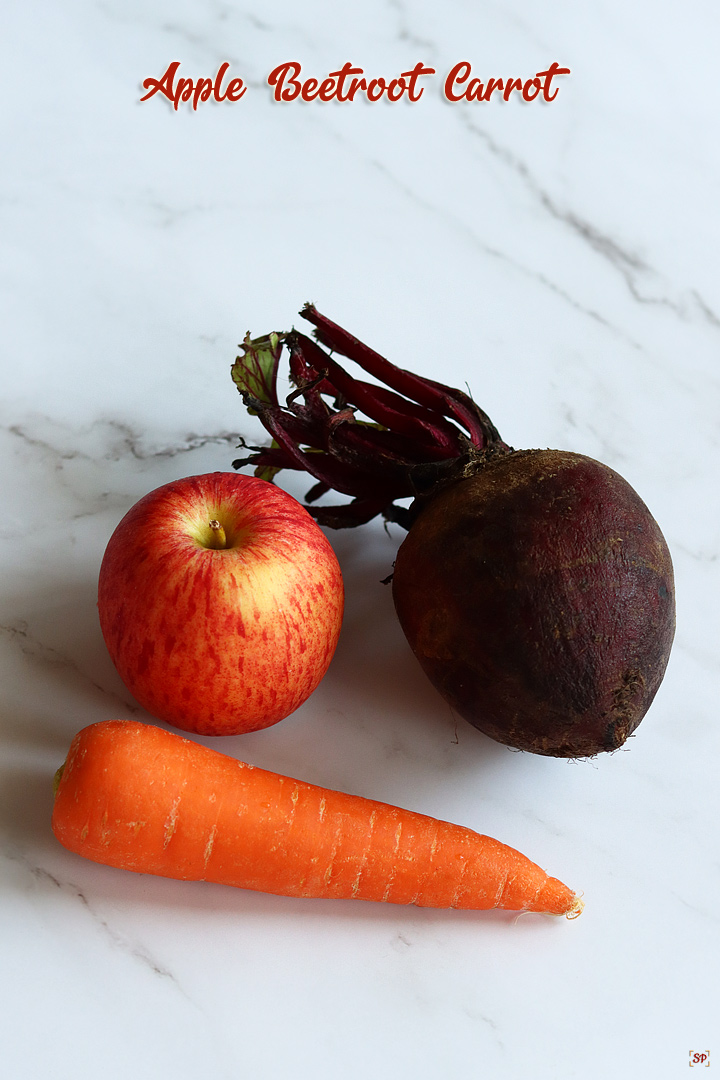
  • Apple : You can choose either green apple or red apples. I would recommend red apples to a great taste. You really don;t need to peel the skin but I an awlawys skeptical about the wax coating so usually remove the skin.
  • Beetroot : Use fesh, juicy organic beetroot. Add beetroot quantity only as mentioned else it will overpower in taste. Chop the head and tail, peel off the skin and chop into pieces.
  • Carrot : You can use Ooty carrots or Delhi carrots the red variety as per your choice. Choose tender juicy carrots. Cut the head and tail, peel the skin and chop them roughly.
  • Ginger – Rinse it throughly, remove the skin and chop it. Use ginger that is not much fiberous.
  • Lemon – Lemon is added to a give a slight tanginess to the drink.
  • Salt – Salt gives a perfect balance.
ABC JUICE

If you have any more questions about this ABC Juice do mail me at sharmispassions@gmail.com. In addition, follow me on Instagram, FacebookPinterest, Youtube and Twitter .

Tried this ABC Juice Recipe ? Do let me know how you liked it. Also tag us on Instagram @sharmispassions and hash tag it on #sharmispassions.

Print

ABC Juice | Apple Beetroot Carrot Juice

ABC Juice as it is popularly called as is a great detoxification juice. ABC Juice is made by blending Apple, Beetroot and Carrot along with a dash of salt, ginger and lemon for a perfect balance. ABC Juice Recipe is explained here with step by step pictures and video.
Course Drinks
Cuisine Indian
Keyword 30 mins recipes, drink recipes, Nutritional Drink
Prep Time 15 minutes
Total Time 10 minutes
Servings 2
Calories
Author Sharmilee J

Ingredients

  • 1 big apple 1 cup chopped
  • 1/2 small beetroot 1/2 cup chopped
  • 1 big carrot 1/2 cup chopped
  • 1 inch ginger piece
  • 1 tsp lemon juice
  • salt to taste

Instructions

  • Rinse apple, beetroot and carrot. Triom the edges peel of the skin then chop into cubes roughly. To a mixer jar – add 1 big apple ( 1 cup chopped), 1/2 small beetroot(1/2 cup chopped) and 1 big carrot(1/2 cup chopped). Add 1 inch ginger piece.
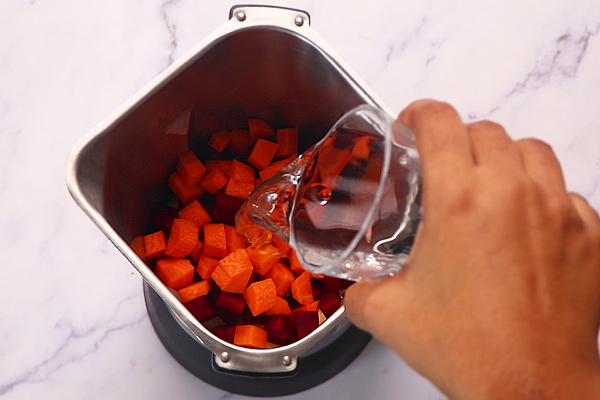
  • Add 1 cup water. You can add more water later if needed.
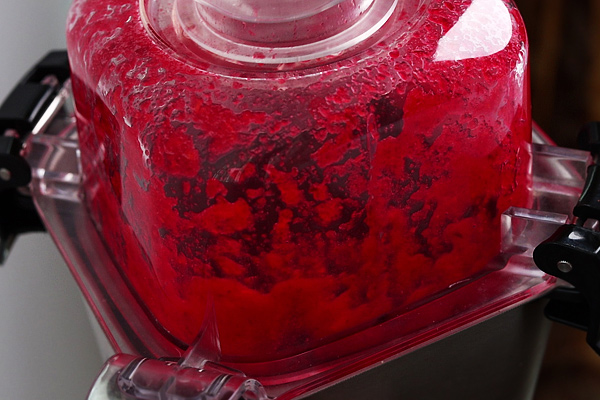
  • Blend it well until smooth. Add 1/2 more cup water while blending.
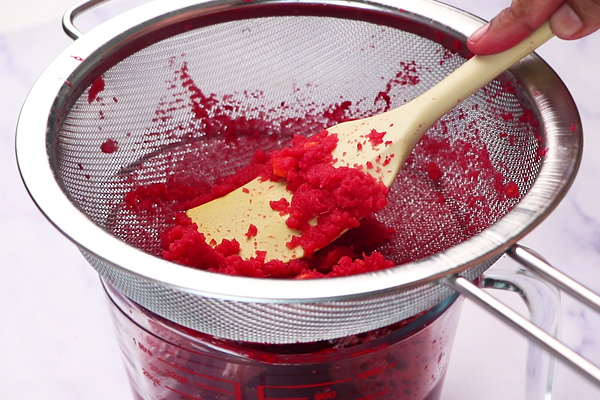
  • Pour the mixture to a strainer and press well with a spatula to extract juice completely.
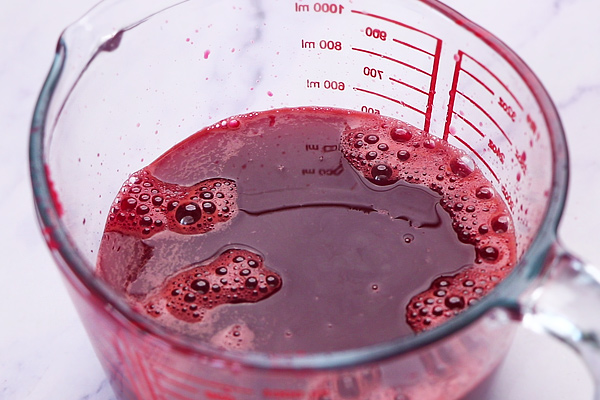
  • Juice is ready.
  • Add 1/4 tsp salt to taste.
  • Add 1 tsp lemon juice.
  • Mix it well.
  • Pour into serving glass and Serve!

Video

Notes

  • You can try to increase or decrease the ingredients as per your preference but adding more beetroot may be too overpowering.
  • Thin the juice by adding 1/4 cup more water.
  • You can add sugar if you prefer.
  • Add 1 tsp cane sugar or regular white sugar in that case you can skip ginger.
  • The natural sweetness from carrot and apple is just enough and wouldnt need additional sweetness I feel.
  • I used my regular mixie jar, you can use the juicer jar if you have as it has a internal strainer basket which helps in easy straining.
  • Use a fine holed strainer for straining the juice.
  • You can even add honey instead of sugar.

ABC Juice Step by Step

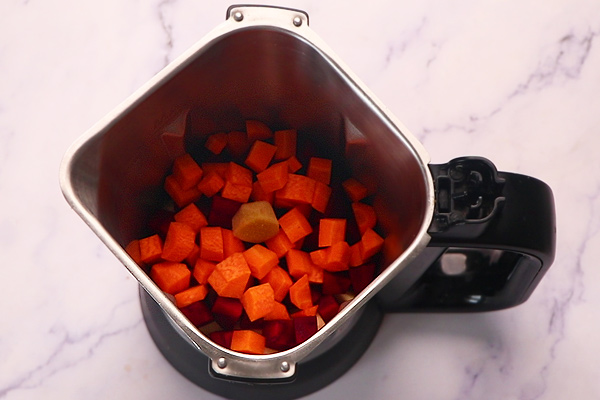
1.Rinse apple, beetroot and carrot. Triom the edges peel of the skin then chop into cubes roughly. To a mixer jar – add 1 big apple ( 1 cup chopped), 1/2 small beetroot(1/2 cup chopped) and 1 big carrot(1/2 cup chopped). Add 1 inch ginger piece.

add apple, carrot and beetroot along with ginger

2.Add 1 cup water. You can add more water later if needed.

add water

3.Blend it well until smooth. Add 1/2 more cup water while blending.

blend well

4.Pour the mixture to a strainer and press well with a spatula to extract juice completely.

strain and extract juice

5.Juice is ready.

strained juice is ready

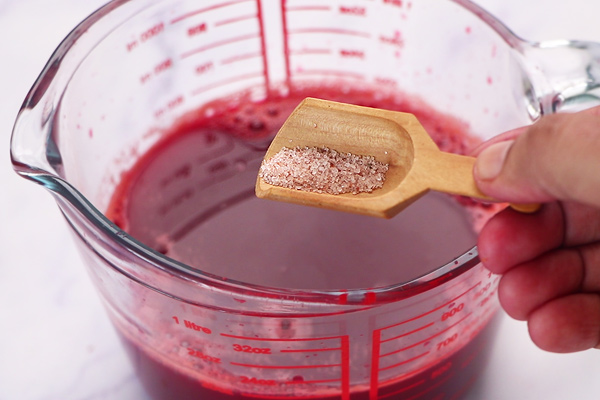
6.Add 1/4 tsp salt to taste.

add salt

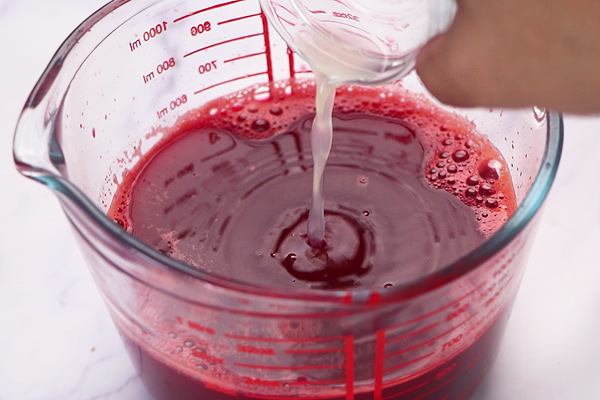
7.Add 1 tsp lemon juice.

add lemon juice

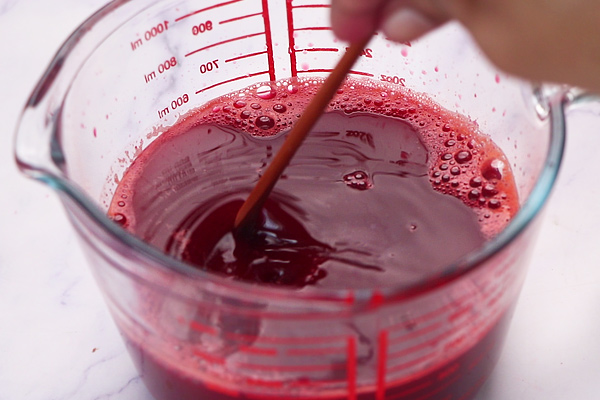
8.Mix it well.

mix it well

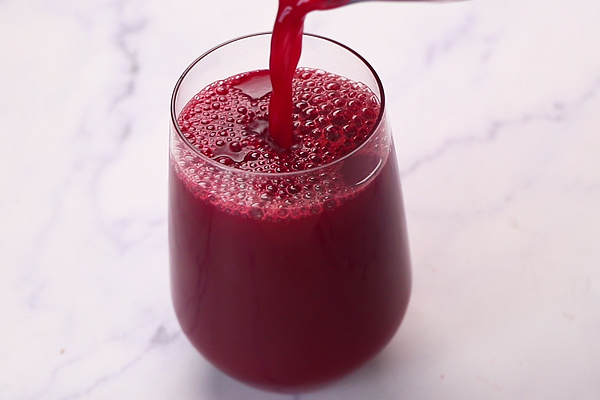
9.Pour into serving glass and Serve!

pour and serve

Expert Tips

  • You can try to increase or decrease the ingredients as per your preference but adding more beetroot may be too overpowering.
  • Thin the juice by adding 1/4 cup more water.
  • You can add sugar if you prefer. Add 1 tsp cane sugar or regular white sugar in that case you can skip ginger. The natural sweetness from carrot and apple is just enough and wouldnt need additional sweetness I feel.
  • I used my regular mixie jar, you can use the juicer jar if you have as it has a internal strainer basket which helps in easy straining.
  • Use a fine holed strainer for straining the juice.
  • You can even add honey instead of sugar.

Serving Suggestion

You can serve the juice as such or add few icecubes if you prefer. If you prefer sweetness then add honey or sugar. Store it in fridge and consume it within a day.

FAQS

1.How long can I store this juice?

You can store this juice in fridge for a day. But it is best to consume the juice fresh so I would not recommend storing it for more than a day.

3. Can I add in any other fruits or vegetables?

I would not recommend as this juice is a great combination by itself so adding other fruits may alter the taste and goodness of the juice.

3.When is the best time to drink this juice?

You can have this juice in the morning as a mid day drink or postworkout as it gives instant energy.

ABC JUICE

The post ABC Juice | Apple Beetroot Carrot Juice appeared first on Sharmis Passions.


from Sharmis Passions https://ift.tt/Z0eEMV6
via KITCHEN MASALA
Wednesday, October 26, 2022

Chocolate Cake Recipe

Best Chocolate Cake Recipe with Step by Step Pictures. Two layer chocolate cake taste delicious with chocolate buttercream.  Chocolate Cake Recipe  This chocolate cake taste so moist and rich. The cake itself is super dense and chocolaty. If you are looking for a best chocolate cake recipe then your search ends here. This chocolate cake...

Read More

The post Chocolate Cake Recipe appeared first on Yummy Tummy.


from Yummy Tummy https://ift.tt/I1rp4eK
via KITCHEN MASALA
Monday, October 24, 2022

Chinese Ginger Garlic Chicken Recipe

Chinese ginger garlic chicken recipe with step-by-step pictures. Simple stir-fry chicken recipe from China seasoned with soy sauce, salt, white pepper powder and flavoured with ginger and garlic. Chinese Ginger Garlic Chicken Recipe I came across this recipe from a Chinese cookbook. The steps for this recipe was very straightforward and simple which made me...

Read More

The post Chinese Ginger Garlic Chicken Recipe appeared first on Yummy Tummy.


from Yummy Tummy https://ift.tt/BhR8T17
via KITCHEN MASALA
Thursday, October 20, 2022

Omapodi Recipe | Sev Recipe

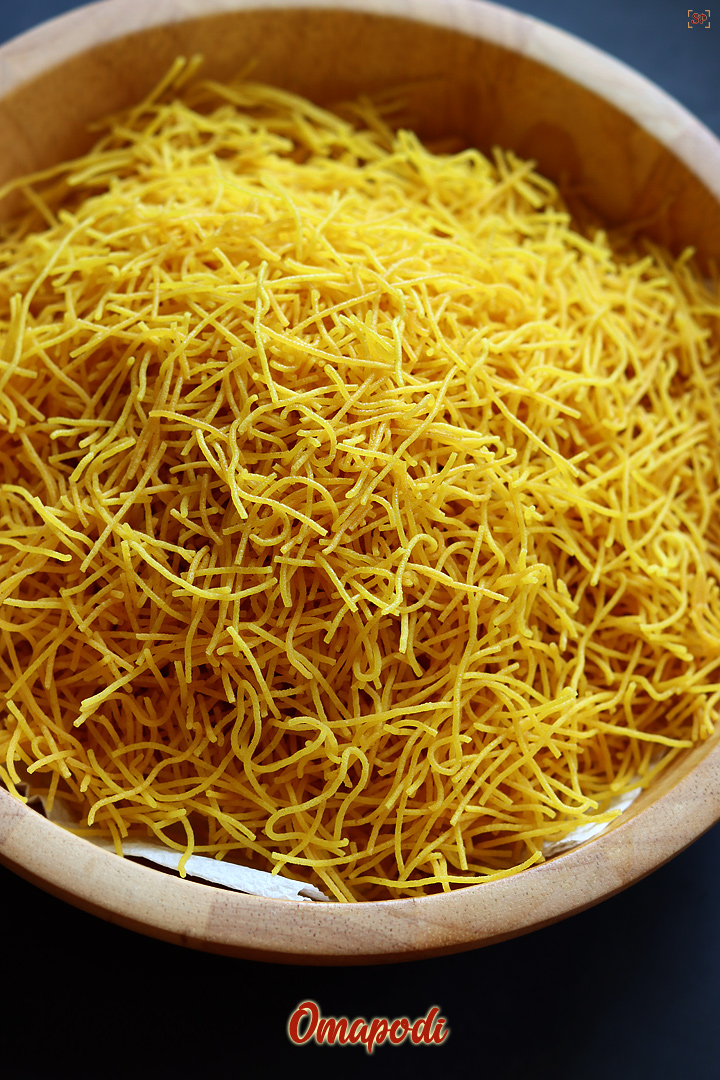
Omapodi is a crispy, delicious South Indian savoury snack with a flavour of ajwain made with besan flour, rice flour, butter and ajwain. Omapodi also called Sev is used for garnishing chats and can be eaten as such as teatime snacks. Omapodi Recipe is explained in this post with step by step pictures and video.

Omapodi is a crispy south indian snack made for Diwali or any festival. Omapodi is a quick savoury snack you can make anytime. Omapodi or Sev makes a perfect crunchy snack to go along with tea or coffee. It is one of the snack that reminds me of my childhood days.

About Omapodi

Omapodi is a snack that even beginners can try, no expertise needed. It is quick to make as there are no tricks, as the cooking time is very less because of the fine threads. If you are looking for a more healthier version you can check out millet sev.

This is one of the most commonly made Diwali snack. Omapodi can be eaten as such or can be used as garnish for chaats.

Omapodi Ingredients

  • Flour – A perfect ratio of gram flour : rice flour gives crispy omapodi.
  • Butter – Butter is added to give a soft melt in the mouth texture. Use fresh butter.
  • Ajwain – Ajwain or omam or carom seeds is the main flavouring agent in omapodi. Roasting and grinding makes the seeds brings out more flavour.
  • Turmeric powder – Turmeric powder not only gives good color, it also gives a niec mild flavour.
  • Oil – Hot oil is added to make omapodi more crispy.

More teatime snacks

If you have any more questions about this Omapodi Recipe do mail me at sharmispassions@gmail.com. In addition, follow me on Instagram, FacebookPinterest, Youtube and Twitter .

Tried this Omapodi Recipe ? Do let me know how you liked it. Also tag us on Instagram @sharmispassions and hash tag it on #sharmispassions.

Print

Omapodi | Sev Recipe

Omapodi is a crispy, delicious South Indian savoury snack with a flavour of ajwain made with besan flour, rice flour, butter and ajwain. Omapodi also called Sev is used for garnishing chats and can be eaten as such as teatime snacks. Omapodi Recipe is explained in this post with step by step pictures and video.
Course Snack
Cuisine Indian
Keyword diwali dishes, diwali recipes, diwali snacks, diwali snacks recipes, easy diwali snacks, rice flour recipes, savoury recipes, snack recipes
Prep Time 15 minutes
Cook Time 15 minutes
Total Time 30 minutes
Servings 4 people
Calories 294kcal
Author Sharmilee J

Ingredients

  • 1 cup besan flour
  • 1/4 cup rice flour
  • 1 tbsp butter at room temperature
  • 1 heaped tsp ajwain
  • 1/4 tsp turmeric powder
  • 1/2 tsp hot oil
  • salt to taste
  • oil for deep frying
  • water as needed

Instructions

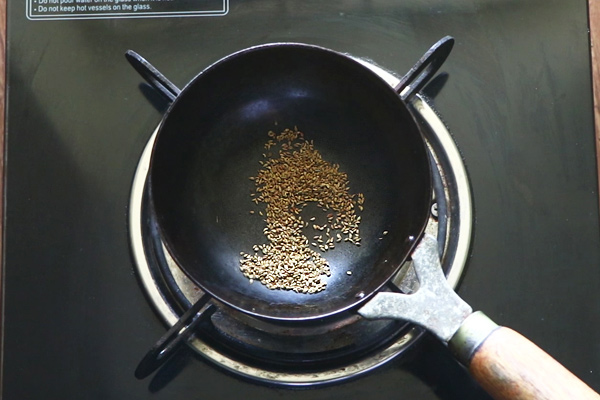
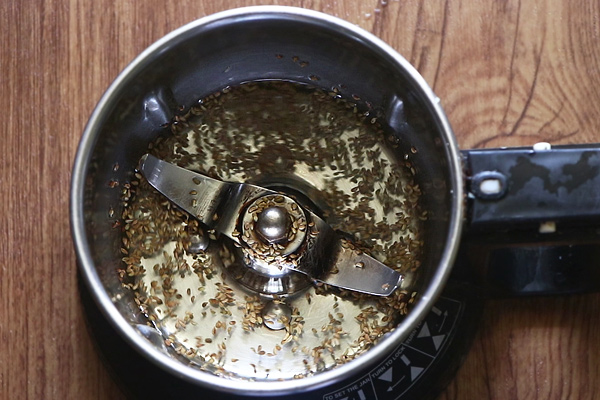
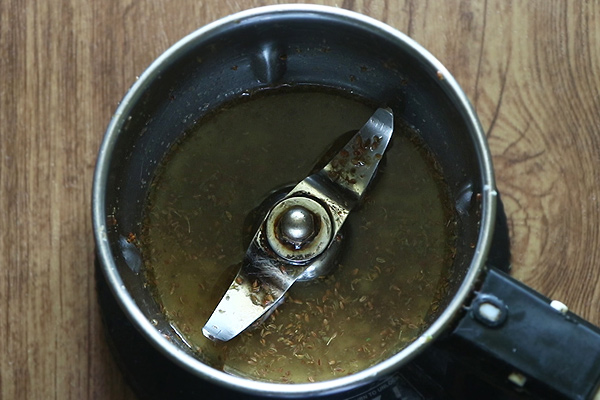
  • Dry roast ajwain for 2 mins till nice aroma comes, then add to mixer jar along with little water. Blend it well.
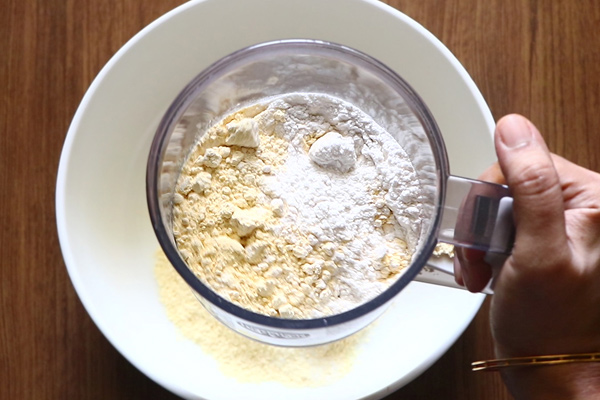
  • Then filter the ajwain water and keep aside. To a sieve add besan flour,rice flour Sieve it well, discard the remains.
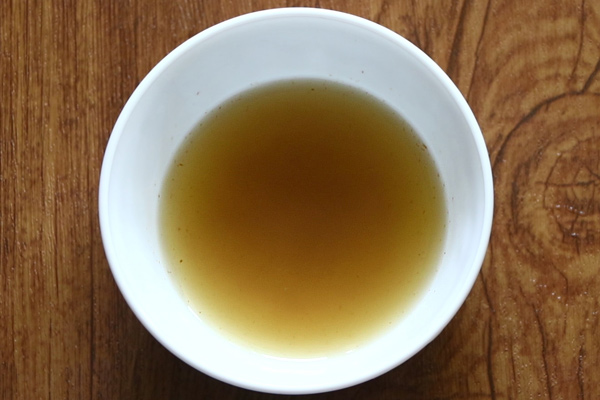
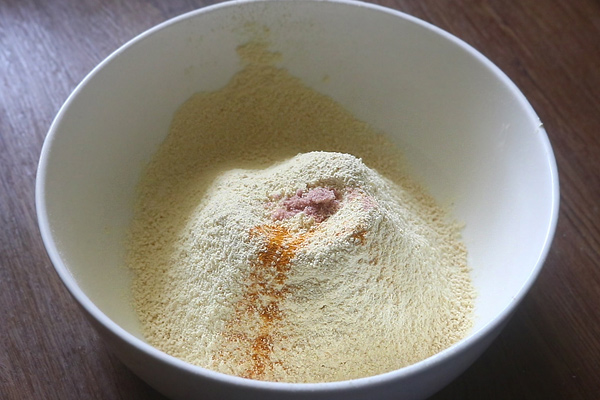
  • Add salt, turmeric powder, filtered ajwain water, hot oil, butter, required salt and mix this well first.
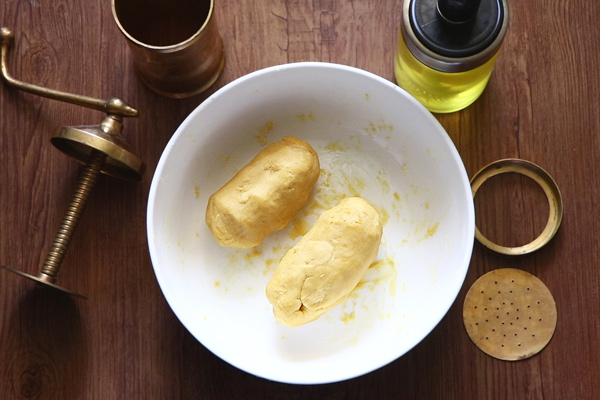
  • Add water little by little to form a soft slightly sticky dough. Make logs like this and keep it ready.
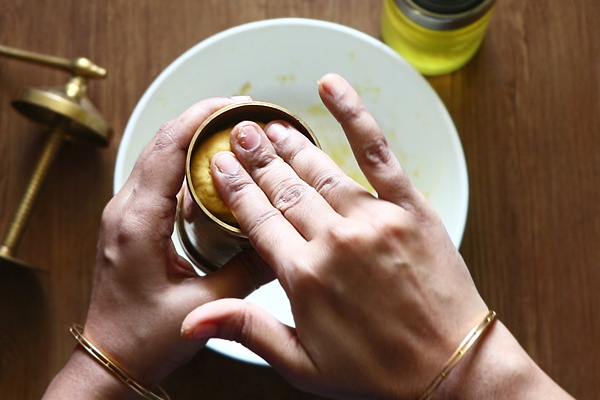
  • Grease the press with oil and then fill it till 3/4th.
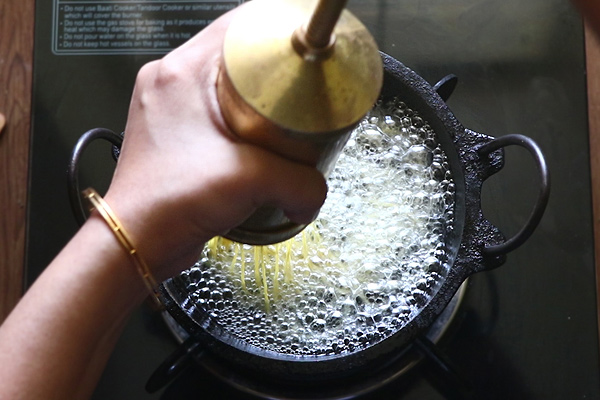
  • Meanwhile heat oil – To check if the oil is hot, pinch a small piece of dough and drop it in oil if it immediately comes to top then the oil is ready. Press it in the preheated oil starting from the corners like a circle finishing it up in the middle.
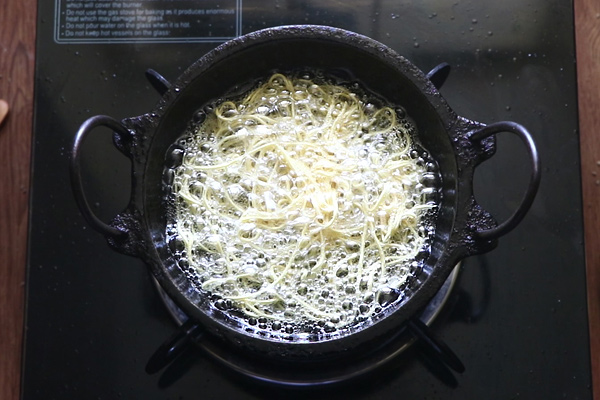
  • Once it is cooked on one side turn over to other side and cook till bubbles (shh sound) ceases.
  • Repeat this process for the rest of the dough. Finally break it and store in an clean dry airtight container. Enjoy Omapodi!

Video

Notes

  • Be very careful while adding water as the dough consistency is very important.
  • Do not let the dough rest for more time as it will get dry and pressing will be very difficult.
  • If it takes time then cover the dough with a wet cloth. Still if its difficult to press through, then sprinkle a little water to loosen the dough but very little.
  • I used my idiyappam press as I like my sev to be very fine. You can either use a big hole press or small one as you like it.
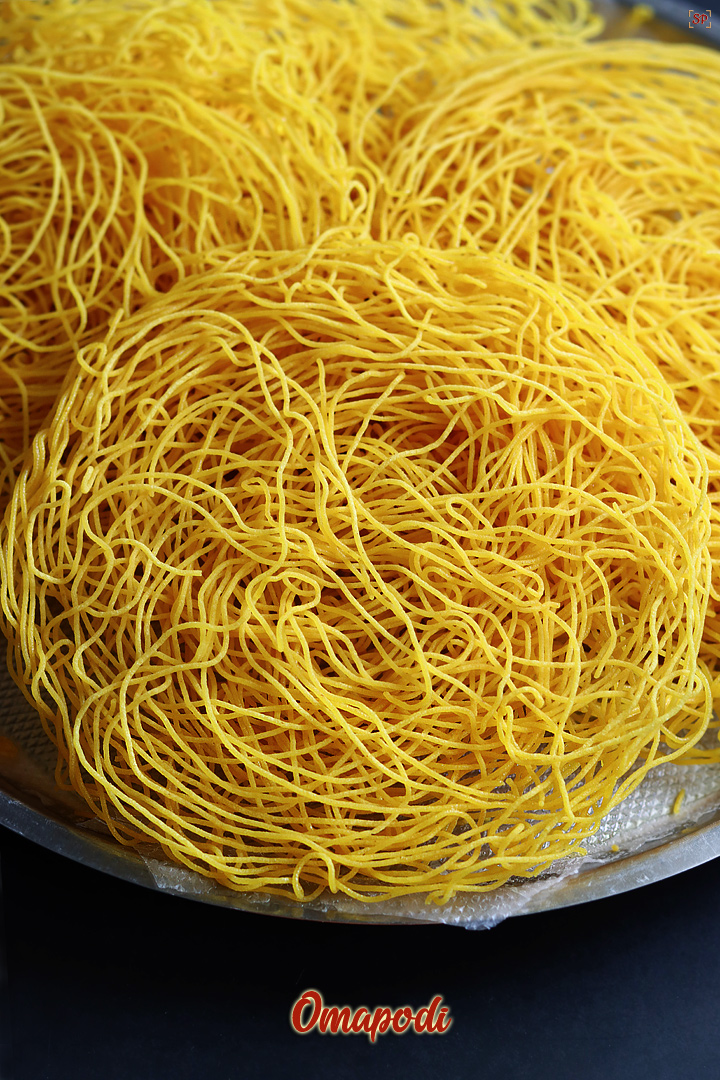
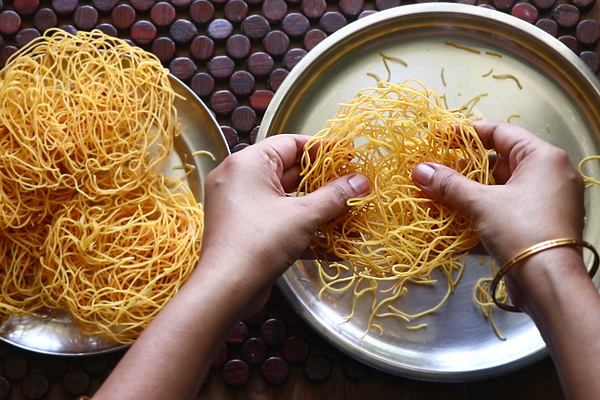
  • You get a big murukku kind while you take out it is very brittle so tends to break down to sev by itself.

Nutrition

Serving: 75g | Calories: 294kcal | Carbohydrates: 26g | Protein: 7g | Fat: 18g | Saturated Fat: 3g | Polyunsaturated Fat: 5g | Monounsaturated Fat: 9g | Trans Fat: 0.2g | Cholesterol: 8mg | Sodium: 1012mg | Potassium: 266mg | Fiber: 4g | Sugar: 3g | Vitamin A: 100IU | Vitamin C: 0.03mg | Calcium: 17mg | Iron: 2mg

How to make Omapodi

1.Dry roast 1 heaped tsp ajwain for 2 mins till nice aroma comes. Switch off adn cool down.

2.Then add to mixer jar along with little water say 1/4 cup.

3.Blend it well.

4.Then filter the ajwain water and keep aside.

5.To a sieve add 1 cup besan flour,1/4 cup rice flour. Sieve it well, discard the remains.

6.Add 1/4 tsp turmeric powder, filtered ajwain water, 1/2 tsp hot oil, 1 tbsp butter,required salt and mix this well first.

7.Mix this well first.

8.Add water little by little.

9.Mix well to form a soft slightly sticky dough. Make logs like this and keep it ready.

10.Grease the press with oil and then fill it till 3/4th.

11.Meanwhile heat oil – To check if the oil is hot, pinch a small piece of dough and drop it in oil if it immediately comes to top then the oil is ready.Press it in the preheated oil starting from the corners like a circle finishing it up in the middle. Press in concentric circles and only a thin layer.

12.Once it is cooked on one side turn over to other side and cook till bubbles(shh sound) ceases. Repeat this process for the rest of the dough.Finally break it and store in an clean dry airtight container.

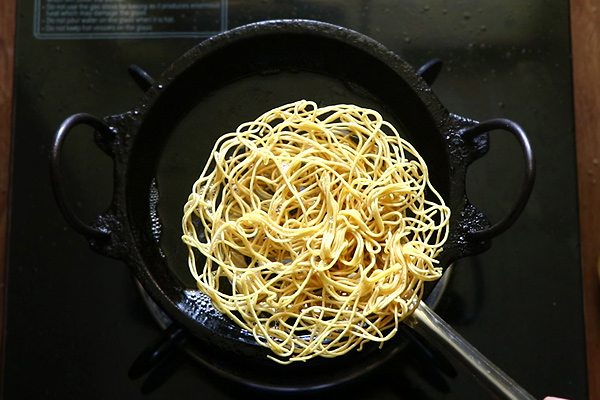
13.Coook until golden and crisp. USe a slotter laddle to remove. Drain in tissue.

14.Repeat to finish. Finally break it gently to store.

15.Plain Sev or Omapodi is ready!

Expert Tips

  • Be very careful while adding water as the dough consistency is very important.
  • Always check by dropping a small pinch of dough before pressing to check if oil temperature is perfect. If it comes up steadily then you can start pressing.
  • While pressing make sure to press in concentric circles and only a thin layer.
  • Gently flip over and cook. Omapodi does not take much time just few seconds each side is enough.
  • Do not let the dough rest for more time as it will get dry and pressing will be very difficult .If it takes time then cover the dough with a wet cloth. Still if its difficult to press through, then sprinkle a little water to loosen the dough but very little.
  • I used my idiyappam press as I like my sev to be very fine. You can either use a big hole press or small one as you like it.

Storing and Serving Suggestion

Always cool down completely before storing. Store it in a dry airtight container.

Omapodi can be served along with tea and had as such or can be used as a garnish for chats.

FAQs

1.What is Omapodi?

Omapodi is a crispy south indian snack made with besan flour, rice flour, butter and ajwain as main flavour. Ajwain or carom seeds is called as omam in tamil hence the name ‘omapodi’

2.Sev is brittle and breaks while frying. Why?

If butter is more you may not get perfect continuos threads while pressing. In that case add little more flour,sprinkle little water mix well and try again.

3.Dough is hard to press.What to do?

If the dough is to tight then pressing may be difficult. Sprinkle little water to make it loose then try again. If the dough becomes too loose, the sev may drink more oil so be careful.

The post Omapodi Recipe | Sev Recipe appeared first on Sharmis Passions.


from Sharmis Passions https://ift.tt/ebB9mkP
via KITCHEN MASALA