Refreshing Mango mint sorbet which needs no ice cream machine to make. Super easy to make and taste delicious. Mango Sorbet I thought that there is no more cool desert to make using mangoes, after I posted my Mango Icecream & Mango Froyo. But my experiment yesterday gave me this delicious instant sorbet. YES IT...
Exploring the world of cooking comes with passion. Be it the cookware or the recipe – the search continues. Happy to share with you one such encounter in this exploration. Life gets easy with click of a button! Cooking gets easy with Versatil clasp on! Choosing the right cookware makes cooking hassle free and enjoyable. One such definite choice of mine is Stahl Versatil Multi Pressure Cooker!
I am very excited to share the review of one of my most favorite brand Stahl the 30+ year brand which excels in design, quality and user centric cookwares. I already have a collection of Stahl cookwares and the Xpress Cooker and I absolutely love using them in my kitchen.
About Versatil Cooker
The Versatil works as a pressure cooker, pan and serveware. It comes with a glass lid that can be used for cooking, steaming and serving. The pressure lid comes with a double safety mechanism to ensure the most enjoyable and safe cooking experience.
Versatil comes in 2 sizes : 3L which serves 2-3 and 5L serving 4-6. As the name Versatil – the cooker can be used for multipurpose which works as a pressure cooker, cookware and a serveware.
The Versatil Pressure Cooker is designed to be a product that is the future of pressure cooking. It comes with a clasp-on lid that is easy to operate and a breeze to cook with. Made with the finest quality triply, the pressure cooker is fast, safe and an absolute beauty.
To be true I haven’t personally used any other clip on cookers but when this model was first introduced as usual I was just researching the model in shops / online though I had no idea of buying it. That is when I had a have a glance of it in my neighbours house and came to know that she was not satisfied with the model. So when I got an opportunity to review Versatil I was a little hesitant but when they told me to write a honest review I readily accepted it.
There may be many of you with a question there are other clip on cookers available in the market Why Stahl? and here is the answer:
Pros
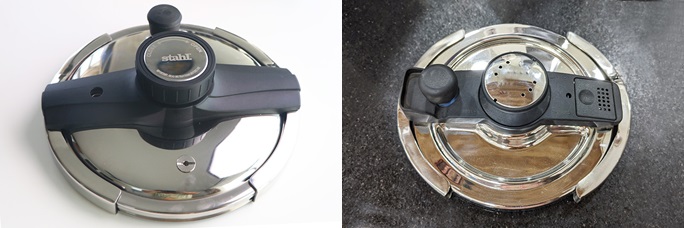
The main difference of this clasp on cooker comes in the lid. The Versatil clasp on lid is so smooth to operate which makes it stand a class part from other brands.
The pan is very elegant and classy looking also works perfectly as a cookware too. You can cook and serve it.
The cooker weight is placed away from the clasp arrangement in Stahl (left pic) which makes cooking mess free and go for years maintenance free. Other clip on options available in the market come with the weight on the clip-on lid(right pic) making the cooker messy, hard to maintain and clogs the mechanism within months of use.
Cons
The clasp on mechanism on the lid makes the lid a bit heavier however it is not a setback. Given the easiness of the clasp on, the heaviness is not a factor to consider at all.
Versatil Cooker Features
Look : It is elegant and beautiful with a dull finish inside and mirror finish look on the exterior.
Size : I chose the 3L as it is the perfect size for everyday cooking of variety of dishes for my family.
Material : Made of the safest and most durable triply stainless steel so less sticking and no burning at the bottom.
Maintenance : The versatil pans are dishwasher friendly. The clasp on lid is very easy to clean and wash too.
Add ons : Versatil cooker comes with 2 lids the clasp on lid and glass lid. The lids are designed to fit both the 5 liter and 3 liter Versatil pans. The pans are perfectly curved with spill proof edges for clean and effortless all round pouring. The Versatil is fitted with bakelite handles on both sides. These are tested for their durability and are completely heat proof.
Packaging
It comes well packed in a cardboard box with necessary safety measures. The glass lid is placed securely in the cooker and clasp on lid has a seperate cardbox inside. Even the cooker weight is placed seperately inside a small cardboard box.
For the first time use, rinse it well then wash in soap water atleast twice and wash it. Then dry it and and your cookware is all set for cooking.
The package includes a versatil pressure pan along with clasp on lid, glass lid and cooker weight. The pan has a beautiful dull finish inside and mirror finish look on the exterior with bakelit handles on both the sides. The glass lid has a steel rim on the edges and a bakelit on the top.
Sharmis Passions on Stahl
This was such a surprise for me to see Sharmis Passions beautifully engraved on the cooker. This is my first personalised piece of cookware that I have received. Thank you Stahl for this!
During my initial days when I started cooking I found cooker handling particularly opening and closing of the lid difficult and am sure everyone could have come experienced it. With this Stahl Versatil clasp on, beginners in cooking will feel cooking a breeze and joy.
Used for cooking, frying, steaming etc.
Frying
The cooker can be easily converted into a cookware by using the glass lid. I used it for making popcorn and as it has a heavy base it was perfect for popping corn. Deep frying can also be done as the base is flat the frying is even.
Steaming
I used a small steel stand below, added water and placed my idli stand to steam idlis. I have been using it as a idiyappam, momos and kozhakattai steamer too.
Cooking
Perfect for cooking rice dishes like biryani, pulao, one pot dishes or curries or gravies or everyday stir fries too.
Final word : I have been loving the cooker ever since I started using it. As it is a multicooker one piece of cookware is just enough in your kitchen to carry out all your basic cooking. Apart from its looks, ease of cooking I am pretty sure they will last a lifetime and a pure joy to use. So go ahead buy yours and happy cooking! Versatil Clasp on do not tug of war.
Chum chum is a popular bengali sweet which is made by stuffing rasgullas with khoya, nuts and rolled in coconut. Bengali Chum Chum Rasgullas one of the famous sweet and many of us favourite sweet in the world. It is a sweet which is made with chenna and shaped into balls and then these balls...
Refreshing watermelon feta salad with step by step pictures. This delicious salad is amazing for summer. Refreshing Watermelon Feta Salad Watermelon and feta is a perfect combination of sweet and salty. The coolness of the watermelon goes great with the salty feta. And the tart and sweet dressing makes this ever more delicious. Ingredients for...
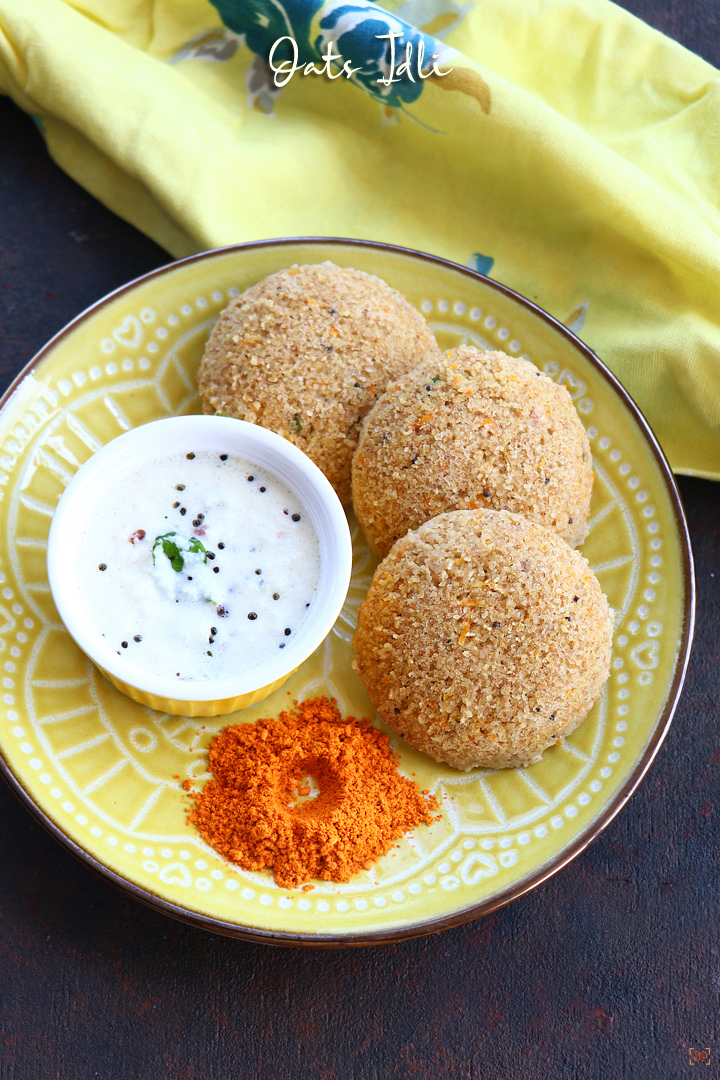
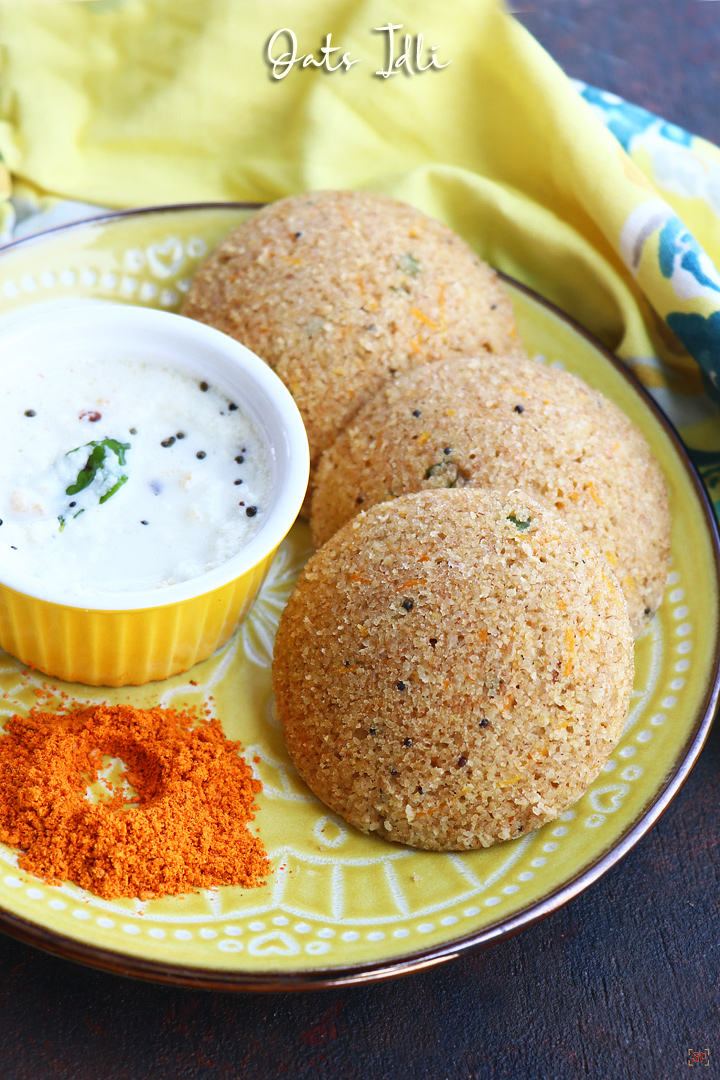
Oats Idli is a healthy variation and alternative to rice idlis. Oats Idli does not need fermentation and hence a more quick and instant version of making Idli. Oats Idli tastes very close to rava idlis with the additonal tag of healthy. Oats Idli can be served with sambar, or any chutney and podi. Oats Idli making is explained in this post with step by step pictures and video.
Oats Idli is a quick and healthy alternate to regular white idli. Oats Idli comes out soft and fluffy with the addition of the right measure of ingredients.
About Oats Idli
Oats Idli has become a routine menu these days. I have tried Oats Idli few times and finally came up with this ratio which works perfectly. I have used wheat rava instead of white rava which makes it all the more healthier.
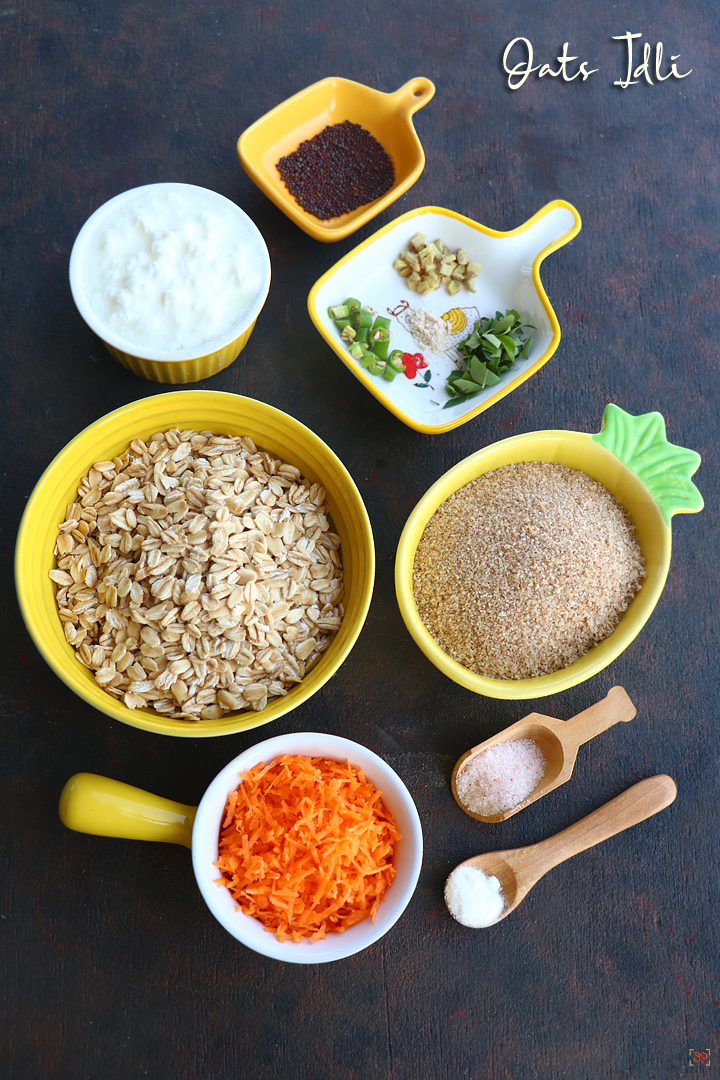
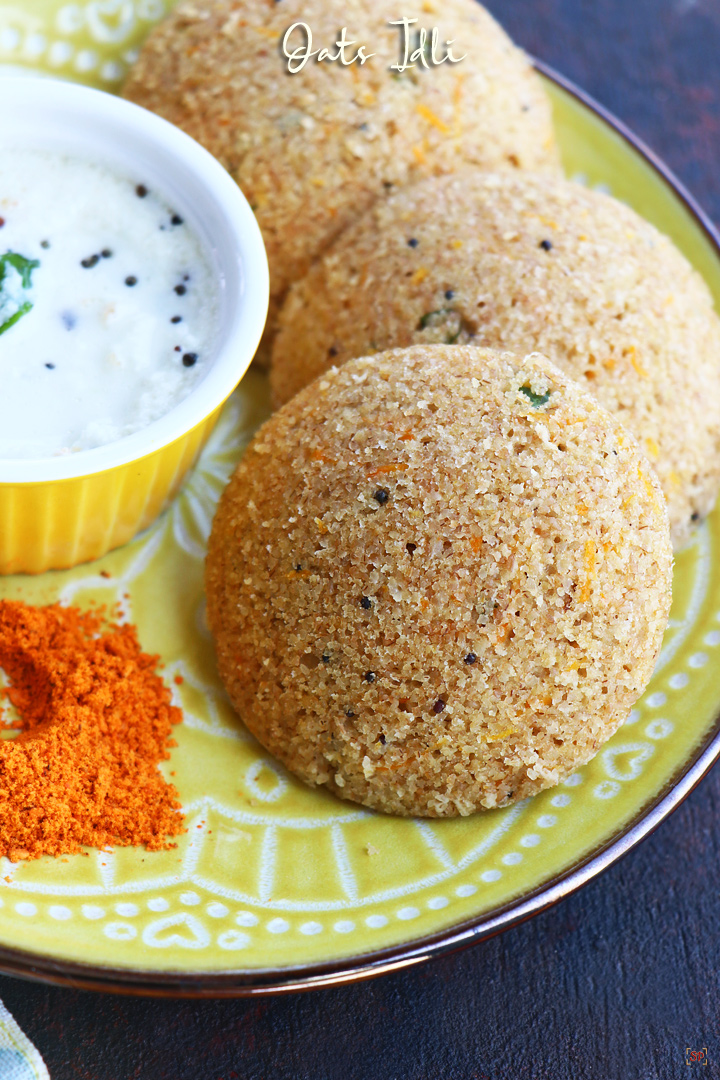
Oats Idli is prepared using oats, semolina, yogurt(curd), herbs and spices etc. If you have tasted and liked rava idli then oats idli will sure become your favorite too.
I am fond of oats and love to try different varieties with it and one such successfull experiment is this Oats Idli. This Oats Idli is a great life saver when you have no time to soak and grind idli batter.
This Oats Idli recipe is very simple with basic available ingredients in your pantry. Also this recipe can be customised with the addition of other ingredients and veggies too.
Oats : You can use either rolled oats or quick cooking oats. But make sure to first pulse it to make it slightly coarse.
Semolina : You can use white rava or wheat rava. I have used wheat rava for a more healthier option. If using broken wheat pulse it to make it fine then add it.
Curd : Use thick curd for soft, fluffy idli.
Spices & Herbs : A basic tadka is prepared using mustard, curry leaves, ginger, green chillies and hing.
Veggies : I have used grated carrots.You can add chopped cabbage, onion and coriander leaves too.
Leavening agent: Baking soda or eno fruit salt is added to get soft idlis.
If you have any more questions about this Oats Idli Recipe do mail me at sharmispassions@gmail.com. In addition, follow me on Instagram, Facebook, Pinterest, Youtube and Twitter .
Tried this Oats IdliRecipe ? Do let me know how you liked it. Also tag us on Instagram @sharmispassions and hash tag it on #sharmispassions.
Oats Idli is a healthy variation and alternative to rice idlis. Oats Idli does not need fermentation and hence a more quick and instant version of making Idli. Oats Idli tastes very close to rava idlis with the additonal tag of healthy. Oats Idli can be served with sambar, or any chutney and podi. Oats Idli making is explained in this post with step by step pictures and video.
CourseBreakfast
CuisineIndian
Keyword30 mins recipes, healthy idli, healthy recipes, how to make instant oats idli, Idli recipes, oats breakfast recipes, oats brownie
Prep Time15minutes
Cook Time10minutes
Total Time25minutes
Servings12Idlis
Calories
AuthorSharmilee J
Ingredients
1cupoatsrolled oats or quick cooking oats
1/2cupwheat ravaYou can use white rava also
1/2cupcurd
1/2 + 1/4cupwater
1/4cupcarrotgrated
1/4tspbaking soda
To temper
2tspoil + to grease
1tspmustard seeds
1nogreen chillifinely chopped
1/2tspginger
apinchhing
2tspcurry leavesfinely chopped
Instructions
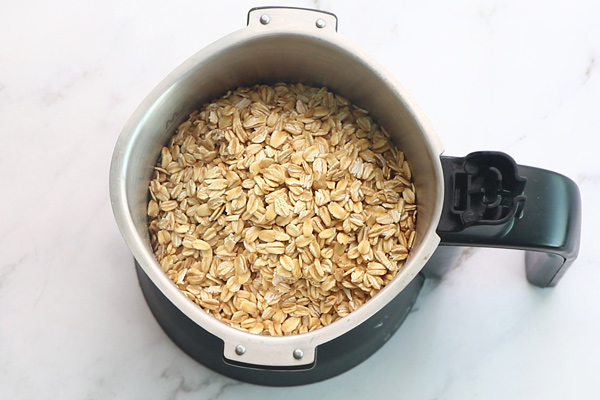
To a dry mixer jar : add 1 cup rolled oats.
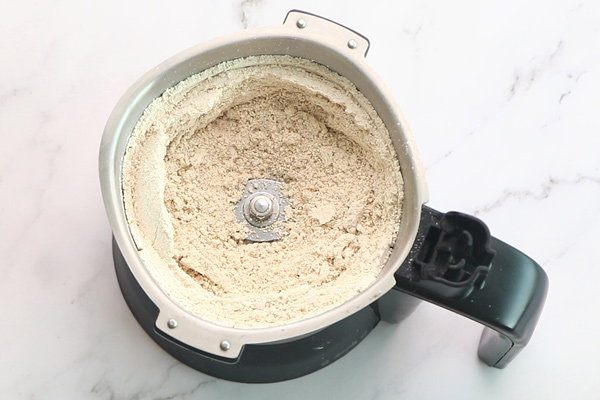
Grind it few times to get a slightly coarse oat flour. Set aside.
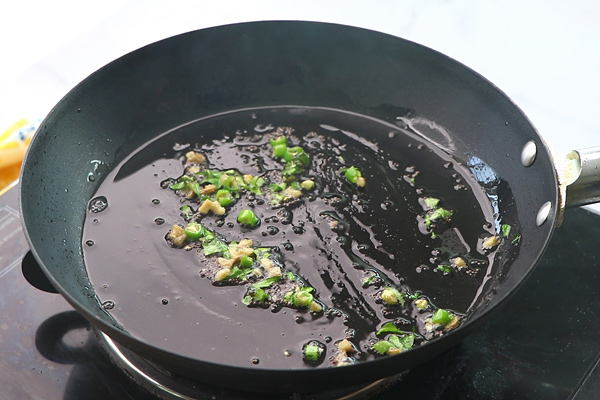
To a pan : heat 2 tsp oil then add 1 tsp mustard seeds let it crackle. Then add 1 no green chilli, 1/4 tsp ginger, 1 tsp curry leaves all finely chopped and hing. Saute for few seconds.
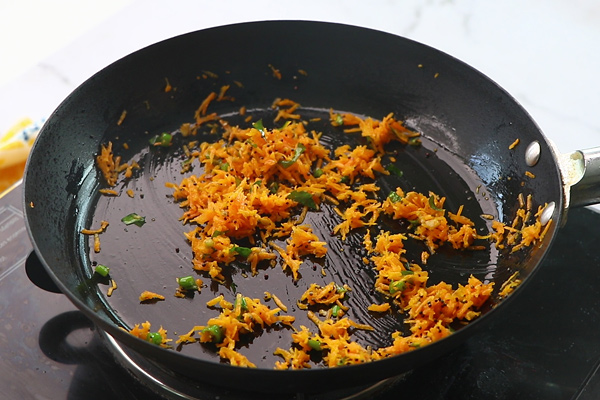
Add 1/4 cup carrot finely grated. Saute for a minute.
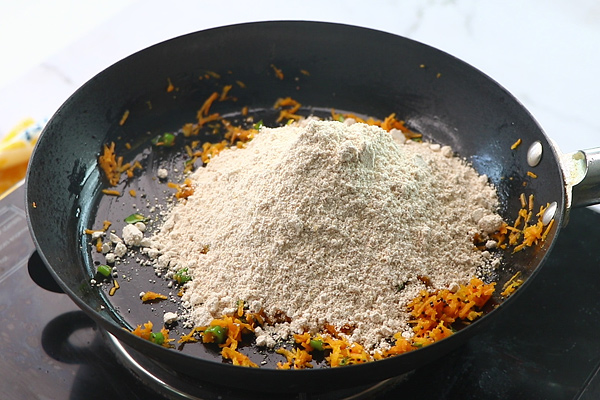
Add prepared oat flour.
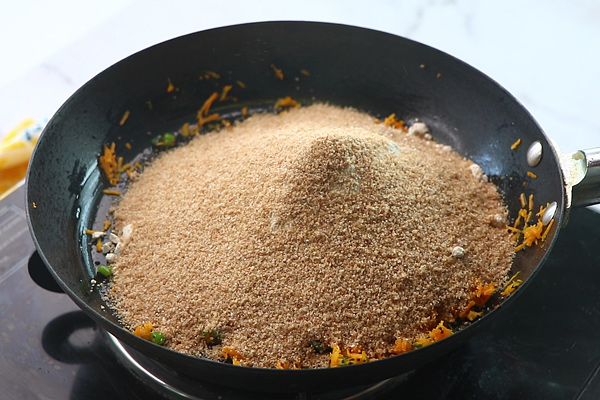
Add 1/2 cup wheat rava.
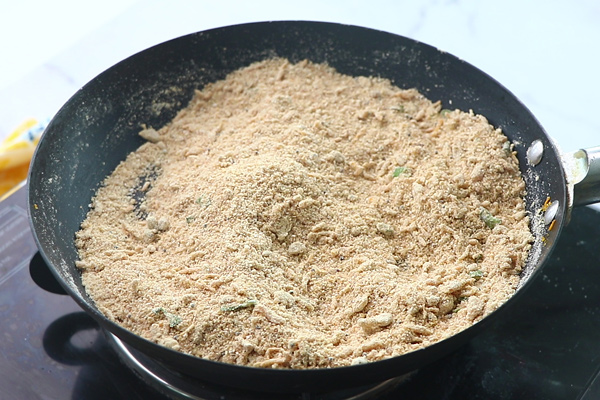
Mix it well. Saute for 2 mins and switch off.
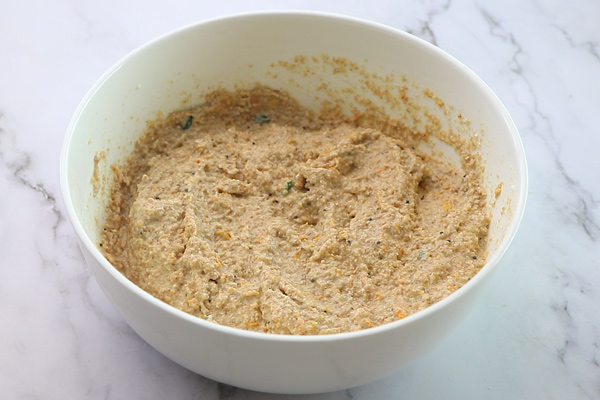
Cool down then transfer to a bowl – add 1/2 cup thick curd, 1/2 cup water and salt as required.
Mix it well.
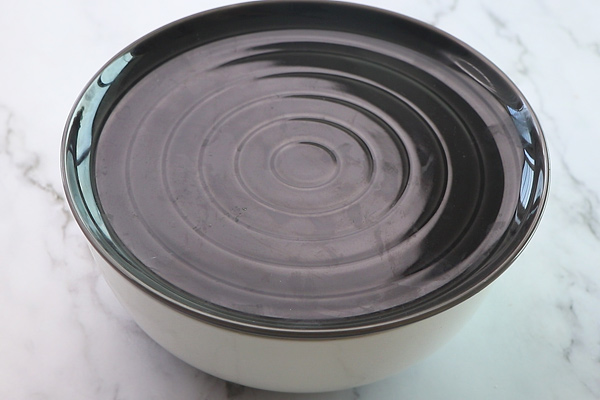
Keep covered for 5 mins.
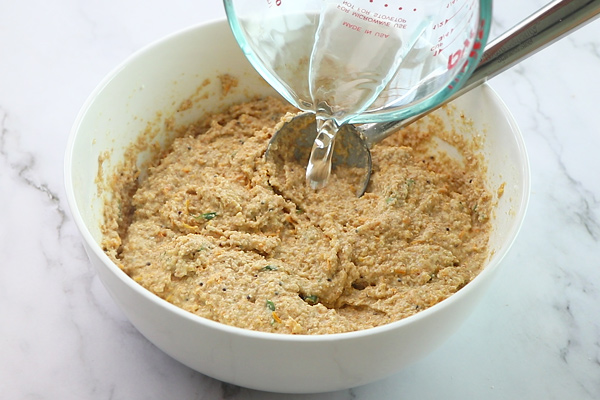
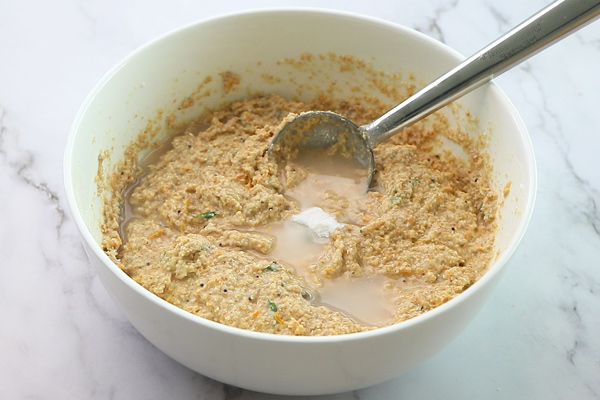
Open and mix – it must have become thick now add 1/4 cup water.
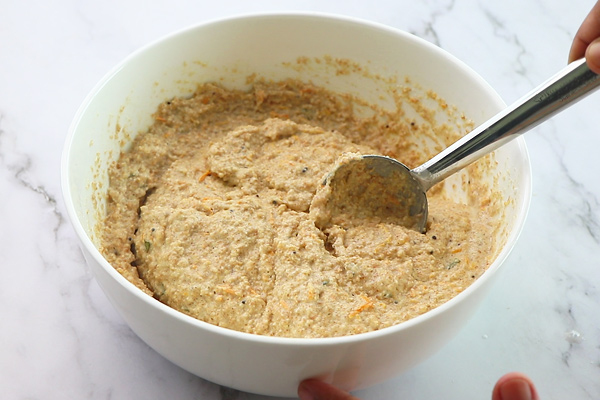
Add 1/4 tsp cooking soda. Be quick after cooking soda is added.
Mix gently so not overmix.
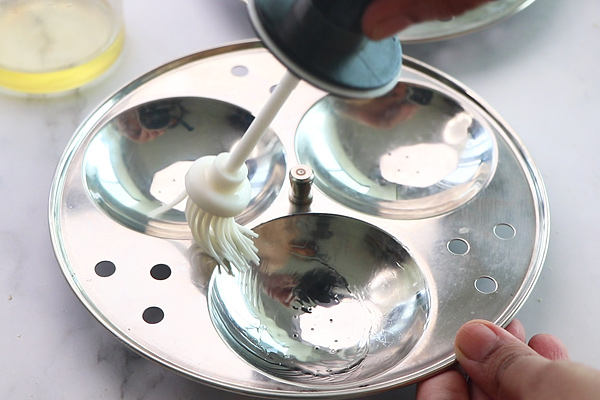
Grease idli plates with oil.
Then immediately add batter to each hole in the idli plate. Repeat to finish for the other plate too.
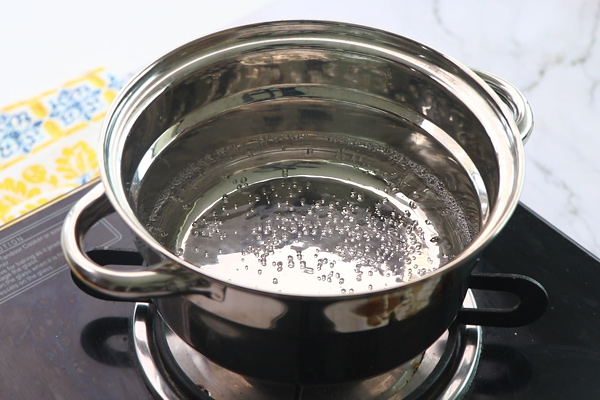
Add 2 cups of water to idli steamer. Heat water, let it start to boil.
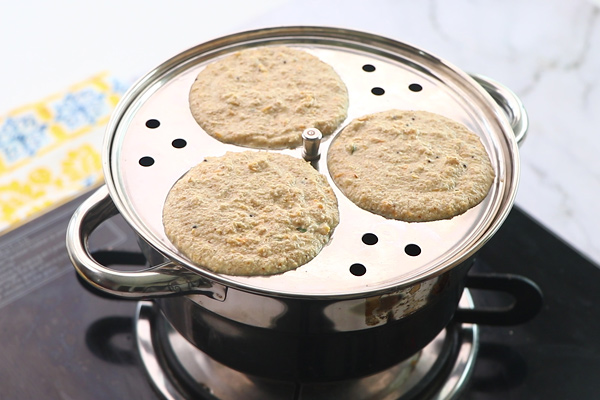
Place the idli plates inside.
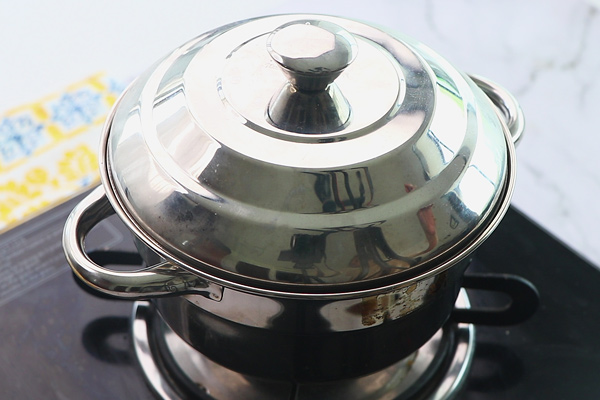
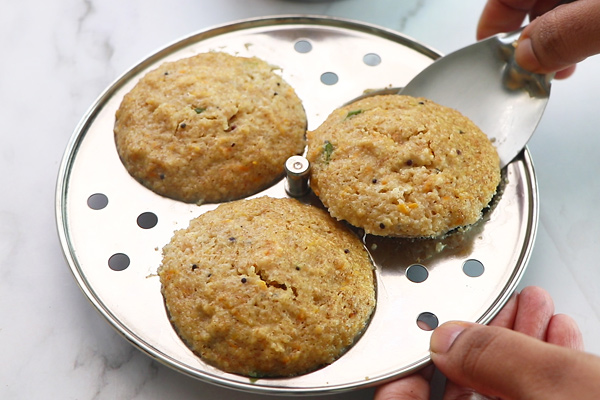
Cook covered for 10-12 mins or until the idlis are done. Remove then set aside for 2 mins atleast before removing.
Dip a laddle in water.
Gently remove the idlis. Dip the laddle in water as and when it sticks.
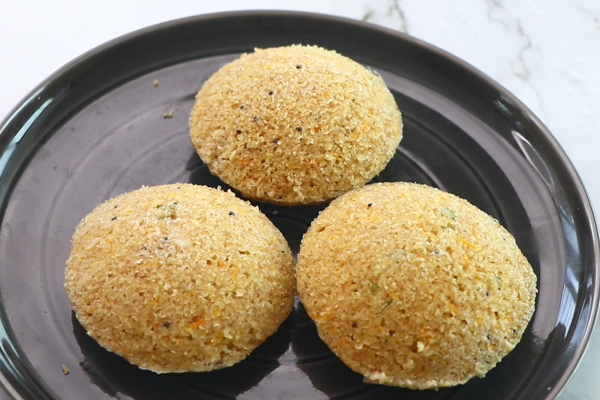
Oats Idli is ready to serve. I got around 12 idlis.
Serve hot with your favorite chutney or idli podi.
Video
Notes
The batter will be slightly thick in consistency it will resemble normal idly batter, a little sticky.
If you skip the baking soda you will not get the porous texture as in the pics.
Any other veggie like cabbage can also can be added.
If so saute the cabbage like we do for carrots then add it.
I’ve modified the quanity of curd after few trials, so you can enjoy ur tasty and guilt free idlis.
Oats Idli Recipe Step by Step
Prepare Oat Flour
To a dry mixer jar : add 1 cup rolled oats.
2.Grind it few times to get a slightly coarse flour. Oat flour ready, Set aside.
Make tempering
3.To a pan : Heat 2 tsp oil then add 1 tsp mustard seeds let it crackle. Then add 1 no green chilli, 1/4 tsp ginger, 1 tsp curry leaves all finely chopped and a pinch of hing. Saute for few seconds.
4.Add 1/4 cup carrot finely grated. Saute for a minute.
5.Add prepared oat flour.
6.Add 1/2 cup wheat rava.
7.Mix it well. Saute for 2 mins and switch off.
Preparing Oats Idli Batter
8.Cool down then transfer to a bowl – add 1/2 cup thick curd, 1/2 cup water and salt as required.
9.Mix it well.
10.Keep covered for 5 mins.
11.Open and mix – it must have become thick now add 1/4 cup water.
12.Add 1/4 tsp cooking soda. Be quick after cooking soda is added.
13.Mix gently do not overmix.
Add batter
14.Grease idli plates with oil.
15.Then immediately add batter to each hole in the idli plate. Repeat to finish for the other plate too.
Prepare Idli Steamer
16.Add 2 cups of water to idli steamer. Heat water, let it start to boil.
Steam Oats Idli
17.Place the idli plates inside.
18.Cook covered for 10-12 mins or until the idlis are done. Remove then set aside for 2 mins atleast before removing.
19.Dip a laddle in water.
20.Gently remove the idlis. Dip the laddle in water as and when it sticks.
21.Oats Idli is ready to serve. I got around 12 idlis.
Serve hot with your favorite chutney or idli podi.
Expert Tips
The batter will be slightly thick in consistency it will resemble normal idli batter, a little sticky.
If you skip baking soda you will not get the porous texture and the idlis may turn out slightly hard.
After baking soda is added do not rest the batter for more time. If the resting time is more then your idlis will be flat and not fluffy.
Adjust water according to the consistency of the batter, the batter should be slightly thick just like idli batter so adjust accordingly.
If the oat flour is more powdery then the idlis will have a more chewy taste and texture.
Variations
Any other veggies like cabbage, onion can also can be added. Make sure to finely chop and add it. If so saute onion, cabbage then add it.
You can alternatively add white semolina instead of wheat semolina.
I have used rolled oats, but you can replace it with regular quick cooking oats too.
You can even add finely chopped coriander leaves in the batter for flavour.
Instead of baking soda you can add 1/4 tsp eno fruit salt.
Instead of 1/2 cup curd, you can use 3/4 cup slightly thin buttermilk too.
Storing and Serving Suggestion
Oats Idli keeps well for a day in room temperature. You can store it in fridge for next day, and while serving sprinkle few drops of water steam for 2 mins and then serve.
This Oats Idli can be served with chutney or sambar and is ideal to pack it uo for lunchbox too.
FAQs
1.What is Oats Idli?
Oats Idli is a quick instant version of idli prepared using using oats, semoline, yogurt(curd), herbs and spices etc.
2.What kind of oats should I use?
You can use either rolled oats or quick cooking oats. But make sure to first pulse it to make it slightly coarse to make oats flour then use it.
3.Can I use readymade oat flour?
Yes you can use readymade oat flour if it has no other addictives added to it.
4.What is the substitute for curd?
You can use slightly thin buttermilk. Else you can use cashew or almond butter. If not add 1 tsp lemon juice instead of curd.
5.What variety of semolina to use?
You can use wheat semolina or white semolina as per your preference. But make sure the semolina variety you use is fine.
Chicken keema dosa with step by step pictures. Crispy dosa stuffed with spicy chicken keema filling. Chicken Keema Dosa Recipe One of my collegue used to tell me about this dosa which he had in one of the local street shop. The way he explained made me to do it so badly. Infact I...
How to make restaurant style cone dosa. Learn how to make cone dosa restaurant style. Cone Dosa This is one of my favourite way of enjoying regular dosa, it is fun and somehow it taste more delicious than normal dosa. About this Recipe Cone dosa is a popular South Indian breakfast item. Dosas are...
Healthy ladies finger dosa made by grinding together rice and ladies finger. This dosa is very good for kids. Ladies Finger Dosa My perimma who has contributed so many yummy recipes on my blog, gave me this healthy recipe as well.This is such an easy and tasty dosa recipe. Plus not to mention it...
Soft and spongy dosa made with homemade dosa batter topped with chopped onions and sprinkled with idli podi. This Onion dosa taste delicious with any chutney. Onion Dosa Recipe I always wanted to post Onion Dosa recipe in my blog. I know it is simple to make, but this is my favorite..Eat it always..So...
Thinai Dosa or Foxtail millet dosa is a healthy option for regular dosa. This is super delicious and is easy to make as well. Thinai Dosa Recipe I always wanted to post recipes using whole grains like millet, kambu and stuffs like that, I always buy them when i go for shopping but keeps forgetting...
Healthy jowar or cholam idli and dosa recipe which taste delicious and is highly nutritious. Jowar Idli & Dosa Recipe Cholam idli and dosa is one recipe which i made recently and loved it instantly. It is a simple recipe and taste really delicious. The batter made is multi purpose, you can make idli, dosa,...
Paper dosa is a crispy dosa made with dosa batter. Crispy dosa with step by step pictures. Paper Roast Dosas are one of the staple dish in our house..Amma don’t make those thick dosa always, because we are not a fan of it.. She makes paper thin dosa always…If you are wondering whether...
Kerala style chicken curry recipe with step by step pictures. Perfect chicken curry taste amazing with roti and rice. Kerala Chicken Curry Whenever I decided to cook any side dish for my roti, appam or idiyappam, i never make the same curry again, each time i try to make it differently. Few days back...
Rose Syrup with step by step pictures. This easy syrup is made using sugar and rose extract and taste delicious. Homemade Rose Syrup Rose Syrup is a staple in my home. My little one is too fussy and making her drink a glass of milk is a challenge for me. So finally i came up...
Refreshing orange cream popsicles with step by step pictures. This creamy orange popsicles taste so amazing. Orange Cream Popsicle Recipe It is popsicle time, i have been making many many popsicle recently. I enjoy making them. They are easy to make, moreover very tasty and healthy. I have few more coming on its way. About...
Healthy and nutritious strawberry oats milkshake with step by step pictures. This is such a wholesome shake. Strawberry Oats Milkshake I love strawberries. But the place I live don’t stock this awesome berry always. Luckily now it is available all over here, every fruit shop is filled with this. Last week I grabbed couple...
Elaneer payasam or tender coconut kheer with step by step pictures. Delicious kheer made using tender coconut flesh and coconut milk. Tender Coconut Payasam Tender Coconut Kheer is on menu today. I am telling you, it is one of the most delicious and simple kheer you could make. Kheer, also known as payasam, is a...
Potato, peas & corn sandwich with step by step pictures. Healthy and filling sandwich which taste delicious. Potato Corn sandwich I was thinking what to make for lunch, i felt like having something cheesy, but was too lazy to make pizza because i have to whip up pizza dough and stuffs like that. So...
Delicious soft zucchini banana muffins which is eggless and easy to make and taste so good for breakfast or brunch. I have seen so many recipes of baked goodies in which they use zucchini, at first i thought it is weird, but then I realised that we add carrots in baking and it taste...
Easy and quick side dish for rice is this brinjal bell pepper masala. This taste amazing with roti, rice or any main dish. Brinjal bell pepper masala This is a great side dish for rice, taste amazing with roti as well. About this Recipe Brinjal is generally categorised as a vegetable, but brinjal is a...
Delicious thick milkshake made using strawberries. Strawberry milkshake is easy to make and taste so good. Strawberry Milkshake This has become my all time favourite milkshake and a family favourite too..I have become quite famous for this milkshakes. It is so frothy and so creamy without ice cream. Great for breakfast or a light...
Jelly ice cream recipe with step by step pictures. Creamy vanilla ice cream made using eggs the authentic way. Jelly ice cream This is my mums all time favorite ice cream..Whenever we go to any ice cream parlour, she used to order this all time. I like to go adventurous with my food and I...
This is a no churn vanilla ice cream recipe which is made using just 3 ingredients. No Churn Vanilla Ice Cream Recipe No churn three ingredient ice cream is getting a trend all over internet. You can make any flavours using the base, it taste creamy and delicious. This recipe is very basic you don't...
Vanilla Ice cream recipe with step by step pictures. Commercial vanilla ice cream recipe made using cmc, gms which gives you store bought creamery style ice cream at home. Vanilla Ice Cream using GMS, CMC I wanted to try a proper ice cream recipe which we get in stores. Finally got this recipe for my...
Refreshing watermelon drink which is a perfect thrist quencher on this hot summer days. This watermelon fizz can be made with or without alcohol. Watermelon Fizz Summer has arrived and watermelons are available in abundance here..I love watermelon a lot, sometimes I am totally amazed how a massive fruit contains 98% of water stored...
Sundal made using soy beans or soya beans. Highly nutritious soya bean sundal perfect for this navrathri. Soya bean sundal This is a different type of sundal from regular one. It is much tastier than regular ones. It makes a great side dish for rice as well. Makes a great recipe for navrathri, Try this...
Dragon fruits are super nutritious fruit and this juice is a perfect way to include dragon fruit in your diet. Dragon fruit juice with step by step pictures. Fresh Dragon Fruit Juice Recipe It is getting hot here. I don't feel like eating anything hot, the one thing which i want is juices, milkshakes, ice...
Refreshing mango mastani is a delicious mango drink topped with ice cream and nuts. Mango Mastani Recipe Mango mastani is nothing but a thick milkshake with a scoop of ice cream on top. Then it is topped with nuts and dried fruits. And it is served with a spoon, best had cold. About this Recipe...
Chocolate Chikku milkshake with step by step pictures. Chocolate Sapota milkshake recipe made using chikku fruit, cocoa and milk. Chikku Chocolate Milkshake We often go to an ice cream bar and my favorite thing to order there is a milkshake called as chicago. It tasted so yummy, For years i never got what they...
Strawberry froyo recipe with step by step pictures. Frozen yogurt made with strawberries taste delicious on hot summer days. Strawberry Froyo I love frozen yogurt desert, not only they are healthy but it is delicious and full of fruits. I have made a mango frozen yogurt before and this one is a little different...
Papaya Juice with step by step pictures. Delicious and refreshing papaya juice with a hint of lemon taste to it. Papaya Juice Recipe It is getting hot here. I don't feel like eating anything hot, the one thing which i want is juices, milkshakes, ice cream and lots and lots of water.Have started buying...
Kadai Paneer is a great sidedish for chapathi roti made with paneer cooked in tomato based gravy along with onion, capsicum and freshly grinded spices. Kadai Paneer Recipe with step by step pictures for easy understanding and reference. Kadai Paneer can be made either with gravy or dry, I have shared 3 versions of kadai paneer recipe here.
Kadai paneer is one the popular dishes at many restaurants or hotels.
About Kadai Paneer
This Kadai Paneer is uniquely flavoured with freshly ground masala making it stand apart from the regular paneer dishes. This can be made 2 ways semi dry and gravy. Both the versions tastes great which I have already posted. This is a smoked version of kadai paneer as we taste in restaurants.
This can be made in a number of ways. Here is an easy version I often make at home mostly for dinner which hubby and kids love it.
What is Kadai Paneer?
Kadai Paneer is a simple fragrant gravy made with paneer, capsicum and onion tomato base along with a freshly ground spice mix. The dish gets its name as it is made in a special indian wok called kadai. Kadai is one of the basic kitchen essential cookware in any Indian kitchen. Though you can cook kadai paneer is pans also kadai is the best option.
How to make Kadai Paneer?
To begin with first marinade paneer with the basic spice powders. Toast the paneer and set aside. Next add capsicum, onion, toast for 2 mins then set aside.
First in a kadai dry roast coriander seeds with red chillies until its aromatic, remove then add onion, tomato saute until mushy. Add sauted onion, tomato along with coriander, red chillies and grind it to a fine paste along with required water. Heat oil – temper jeera, add ginger garlc paste saute for a minute then add the paste boil it along with salt. Boil for few mins then add roasted onion, capsicum and paneer. Mix it then add fresh, kasoori methi and coriander leaves. Place a bowl with smoked charcoal, add ghee to it and close tightly with lid. Open and your flavourful smoked kadai paneer is ready!
Kadai Paneer 2 ways
Kadai Paneer Dry – Kadai Paneer dry is made by cooking onion, tomatoes and capsicum cubes.
Kadai Paneer Gravy – To make Kadai Paneer Gravy, tomato puree is added and simmered along with paneer cubes, onion and capsicum.
Kadai Paneer Masala
Kadai masala is made by grinding a special spice mix which has red chillies and coriander. I used kashmiri red chillies to get a vibrant and appetizing color. Roasting and grinding the spices gives it a nice flavour and taste to the gravy. Usually coriander seeds and red chillies are grind seperately but this time I roasted and added it along with onion tomato, it was not only easy but the paste was smooth adding more taste to the gravy too. This masala is so flavourful that you need not add garama masala too.
If you have any more questions about this Kadai PaneerRecipe do mail me at sharmispassions@gmail.com. In addition, follow me on Instagram, Facebook, Pinterest ,Youtube and Twitter .
Tried this Kadai PaneerRecipe ? Do let me know how you liked it. Also tag us on Instagram @sharmispassions and hash tag it on #sharmispassions.
Kadai Paneer is a great sidedish for chapathi roti made with paneer cooked in tomato based gravy along with onion, capsicum and freshly grinded spices. Kadai Paneer can be made either with gravy or dry, I have shared 3 versions of kadai paneer recipe here.
To begin with first add salt, turmeric powder and red chilli powder to paneer cubes.
Toss well to mix. Set aside.
Heat oil in a pan -add paneer cubes toast until golden. Remove and set aside.
Now add onion, capsicum toast for 2 mins, remove and set aside.
To a kadai add coriander seeds and red chillies.Dry roast until aromatic.
Transfer to a bowl and set aside to cool.
Now add onion , tomato.
Saute until mushy and raw smell leaves.Remove and set aside to cool.
Transfer to the same bowl with roasted coriander and red chillies. Cool down completely.
Grind it with little water to a fine paste.Set aside.
Now to the same kadai add more oil, temper jeera add ginger garlic paste saute for a minute.
Add grinded paste.
Let it boil for few mins.Adjust with water if its too thick.
Add toasted paneer, onion and capsicum.
Mix well then add fresh cream, kasoori methi(crush and add) and coriander leaves.
Now burn few charcoal pieces directly in flame. Be at a safe distance while doing this as it might splutter. Switch off.
Remove from fire using a tong place it in a small bowl.
Now keep this bowl in the center of the gravy, immediately add a tsp of ghee to it.
Close tightly with lid. Leave it undisturbed for a minute atleast.
Open and your smoked kadai paneer gravy is ready.
Serve with Roti.
Video
Notes
Toasting onion, capsicum and adding it at the final stage retains the crunch. Do not add and boil for more time then it will become soft and ruin the taste.
Also add kashmiri red chillies for more bright color.
Use tofu instead of paneer for a vegan option.
Garnish with ginger julienne if you like the flavour.
I added green capsicum, you can add a mix of color capsicum too as per your liking.
Use tomatoes that are ripe.
Kadai Paneer Recipe Step by Step
1. To begin with first add salt, turmeric powder and red chilli powder to paneer cubes.
2.Toss well to mix. Set aside.
3.Heat oil in a pan -add paneer cubes toast until golden. Remove and set aside.
4.Now add onion, capsicum toast for 2 mins, remove and set aside.
5.To a kadai add coriander seeds and red chillies.Dry roast until aromatic.
6. Transfer to a bowl and set aside to cool.
7.Now add onion , tomato.
8.Saute until mushy and raw smell leaves.Remove and set aside to cool.
9.Transfer to the same bowl with roasted coriadner and red chillies. Cool down completely.
10.Grind it with little water to a fine paste.Set aside.
11.Now to the same kadai add more oil, temper jeera add ginger garlic paste saute for a minute.
12.Add grinded paste.
13.Let it boil for few mins.Adjust with water if its too thick.
14.Add toasted paneer, onion and capsicum.
15.Mix well then add fresh cream, kasoori methi(crush and add) and coriander leaves.
16.Now burn few charcoal pieces directly in flame. Be at a safe distance while doing this as it might splutter. Switch off. Skip steps 16-19 if you don’t want smoky flavour.
17.Remove from fire using a tong place it in a small bowl.
18.Now keep this bowl in the center of the gravy, immediately add a tsp of ghee to it.
19.Close tightly with lid. Leave it undisturbed for a minute atleast.
20.Open, remove the bowl and your smoked kadai paneer gravy is ready.
Serve with Roti.
Expert Tips
Toasting onion, capsicum and adding it at the final stage retains the crunch. Do not add and boil for more time then it will become soft and ruin the taste.
Also add kashmiri red chillies for more bright color.
Use tofu instead of paneer for a vegan option.
Garnish with ginger julienne if you like the flavour.
I added green capsicum, you can add a mix of color capsicum too as per your liking.
Use tomatoes that are ripe.
Variations
You can replace paneer with mushrooms or any vegetable of your choice.
Instead of adding with onion, tomato you can powder rooasted coriander seeds, red chillies seperately and add it too.
Serving & Storage
Serve kadai paneer wit h Nan, Roti or Chapathi or any Indian flatbread.
Kadai paneer can be serve with mild pulao or plain basmati rice and dal too.
This kadai paneer gravy keeps well for 1 day in room temperature and 2-3 days in fridge.
Kadai Paneer Recipe Dry
Kadai Paneer is a a spicy tomato based sidedish for chapathi or even rice.This is the easiest paneer recipe that I make when I want to make a quick fix for lunch or dinner.I am fond of trying out new paneer dishes because I’m bored of trying the same PB masala so this recipe is my latest addiction.
I have updated the recipe and the pics with stepwise as few readers had requested for it long back.One fine lazy afternoon, googled to find out other paneer recipes and this kadai paneer caught my eye, and set out to try it. It turned out to be a hit at home. Paneer cooked in tomato coriander sauce simmed in a kadai – do u need any other tempting description?!
Dry roast coriander seeds and red chillies seperately and grind it with tomato to a fine paste.Dry roasted coriander seeds and red chillies can be coarsely powdered seperately and added too. But I find it easy to combine with tomatoes and grind, either way no big difference in taste.
Heat half a tsp of oil, add cubed paneer and toast it until it turns golden brown. Transfer the toasted paneer to hot water for 5mins, drain and keep aside(this is to retain the softness of the paneer). Heat remaining oil in a pan, add green chillies and ginger garlic paste saute for a minute.
Then add onions, tomato cubes and saute till raw smell leaves and onions turn slightly browned. Then add the tomato puree(with coriander seeds and red chillies grinded). Add chilli powder, garam masala powder and dhania powder, give a quick stir.Add required salt.
Add kasoori methi ,Next add the capsicum and saute till its cooked but retain its crunchiness dont let it become very soft. Add 1/4 cup water and allow it to boil and thicken.
Sprinkle little water if its too dry.Add the paneer cubes mix well. Add chopped coriander leaves, gives quick stir and switch off.
Tips
This is semidry kadai paneer.It is thick but not dry its saucy that it can pair with chapathi or even with rice.
Kadai paneer can be made gravy kind too by adding 2 more tomatoes and switching off when the gravy consistency is reached.
Dont skip the kasoori methi as it gives a nice and unique flavour to the gravy.
Kadai Paneer Gravy
Kadai Paneer Gravy is my most favorite, its absolutely delicious the juicy paneer with the crunchy onion and capsicum…yummmm.
Most of the times when I am left to order for just myself at restaurants I would blindly go in for Naan and Kadai Paneer Masala yes that my most favorite combo. Rice, Dal, Phulkaand Kadai Paneer Gravy fixed the special lunch for us.
Chop tomatoes roughly and grind it to a fine puree,Set aside.Cube paneer into bite sized pieces.
Dry roast coriander seeds and red chillies for few mins until nice aroma comes.Cool down, transfer to mixer and grind it to a slightly coarse powder,Set aside.Heat oil, add onions, ginger garlic paste.
Saute till onions turn slightly browned.Next add the spice powder and saute for 2mins.Then add tomato puree.
Saute till raw smell leaves, then add little water and let it boil.Add garam masala powder and required salt.While it boils in another pan add little oil,toast capsicum and onion for 2mins,Set aside.
Once the gravy becomes thickish add fresh cream and mix well.Let the gravy boil for 2mins in low flame.
When the gravy starts giving a nice aroma, and the consistency is semi thick add toasted onion capsicum and give a quick stir.Add paneer cubes and give a quick stir.Finally garnish with corainder leaves,kasoori methi and switch off.
Serve with veg pulao or plain steamed basmati rice.
Tips
This is medium spicy with the measurement I have given. You can adjust according to your taste buds.
Adding cream gives a creamy and rich restaurant flavour.I used homemade fresh cream.
The consistency should be flowing and creamy.
You can add half and half milk and fresh cream.
Toasting capsicum, onion and adding at the final stage gives a nice crunch as in restaurants.
You can make the spice powder and store it but freshly ground spice mix gives great flavour.
I used homemade paneer so it was very soft and absorbed the flavour well.


 I have updated the recipe and the pics with stepwise as few readers had requested for it long back.One fine lazy afternoon, googled to find out other paneer recipes and this kadai paneer caught my eye, and set out to try it. It turned out to be a hit at home. Paneer cooked in tomato coriander sauce simmed in a kadai – do u need any other tempting description?!
 Ingredients


