“Instant Fish Curry or meen kulambu recipe made using sambar powder is one of the easiest recipe you could ever make. All you need is 4 ingredient to make this curry.” Instant fish curry or fish curry using sambar powder. You can make this curry in just few minutes and it needs just 4 ingredients....
“Fragrant Chicken Biryani cooked inside a bamboo which taste so amazing and it is super easy to make. Layer of rice and chicken masala steamed together inside a piece of bamboo which creates this masterpiece.” I was eyeing for this recipe for a very long time. Finally came across the bamboo mould when i was...
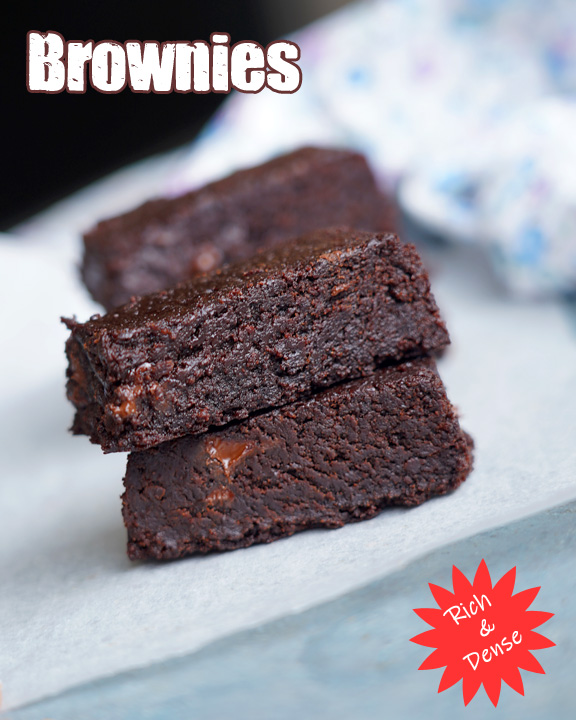
Dense brownie recipe with step by step photos. Egg free and easily adaptable to vegan version. Perfect homemade brownie for your chocolate cravings.
I noted down this recipe when I was looking out for recipes using psyllium husk. However, this recipe just uses 1 tsp of it, But I wanted to try this brownie as it is the one I crave for. Very close to my favorite brownie from Famous Amos. Only that this more dense and rich. The original recipe is vegan, but I made it using dairy products. May be because of that it was bit buttery & sweeter side.
Earlier, my brownies were more like cake, though it was delicious. But I wanted something dense, with more texture, gooey and chocolatey. Chocolate chips added in this will help with gooey texture here and there. The amount of butter and sugar takes care of the dense texture. Best part is, no baking powder or baking soda in this. So it helps in achieving this fudgy brownies.
Still it is not chewy or hard. How could it be with all the butter. I made less in quantity. Glad I did not do any extra ganache or topping as it is good by itself. If you want you can try any caramel or chocolate ganache. I suggest to reduce 1/4 cup of sugar in that case so that it is not too sweet as already this brownie is sweet.
For variations, you can use all vegan replacements. Dark cocoa powder and dark chocolate chips can be used. Check out my other eggless cake recipes.
Rich dense brownie recipe with step by step photos. Egg free and easily adaptable to vegan version. Perfect homemade brownie for your chocolate cravings.
Homemade ragi flour a method to make fingermillet or ragi powder at home using mixie. Sprouted fingermillet flour how to make pictorial.
Homemade ragi flour with step by step pictures and video. Sprouted fingermillet flour at home using mixie.
Ragi or fingermillet is very nutritious and it is always said that the nutrition doubles up when any millet or bean is sprouted. I agree it takes time and effort to make homemade flours but I tell you, after making am sure you will feel content, happy and will never look back at storebought flours.
Ragi is an easily digestable millet hence its first started solids for babies. Ragi is very good especially for kids and elders and no wonder its the first grain introduced to babies.
Generally there are 2 methods for makeing fingermillet flour at home :
Method 1 : (Elaborate) – This is the method I have shared here which takes little longer but worth the time and effort. In this method to begin with we first pick out all the specks if any then rinse the millet well until the water is clear then soak for a day, drain water completely then sprout it for a day or so. Then we sundry until completely dry, then roast in kadai and finally powder it.
Method 2 : (Quick) – This method comes handy when you have no soaking or sprouting time. Remove speck, rinse the millet well then drain water completely. Sun dry well finally roast and powder it.
The first method is nutritious as the millet is sprouted. You can use fingermillet flour for a lot of recipes.
Storage :
Keeps well in room temperature for about 3 months. You can extend shelf life by storing in fridge, in fridge it keeps well for about a year also.
Homemade ragi flour a method to make fingermillet or ragi powder at home using mixie.
CourseMain Course, Side Dish
CuisineIndian
Prep Time3days
Cook Time15minutes
Total Time3days15minutes
Servings2cups
AuthorSharmilee J
Ingredients
1/2kgfingermillet
Instructions
Take 1/2 kg fingermillet in a bowl.
Pick out speck if any. You can even spread it on a plate and remove. Do in batches.
Discard the speck.
Add water rinse it well.
Drain water,discard it.
Rinse well, drain water until water is clear like this.
Drained water is clear.
When you see clear water while rinsing then you can stop rinsing.
Now soak in water.
Keep covered for atleast 8 hrs or even overnight.
Rinse it one more time. Then drain water completely.Add the millet to a hot box, spread it. You can even tie in a cloth, squeeze excess water and keep it in a colander. Hot box makes sprouting faster.
Close it tightly and set aside undisturbed for a day or atleast for 10 hours.
This is the tiny sprout I got after 10 hours. If you wish to get longer sprouts then you can rest for one more day but make sure the millet does not get spoiled.
Spread it in a plate to a thin layer so that it gets dried easily. Sun dry for a day or two. Make it a thin layer otherwise it takes time to get dried.
Add to kadai and dry roast for 3-5 mins. I did it in 2 batches.
Spread it on a plate. Cool down completely.
Finally powder it until fine.Do it in batches to avoid heating of mixie which will in turn create moisture. I wouldn't recommend sieving. But if you wish you can sieve it if the flour is very coarse.
Spread it on a plate, cool completely then store in a clean dry jar.
Homemade ragi flour ready!
Notes
If you sieve the flour make sure to use fine sieve. Then collect the coarse particles and again grind it along with next batch.
Use good quality millet so buy from a trusted source.
If you feel there is no speck / dirt in the millet then you can even roast it directly. I have heard my friends do this.
If you have any more questions about this homemade ragi flour do mail me at sharmispassions@gmail.com
In addition, follow me on Instagram, Facebook, Pinterest ,Youtube and Twitter .
Tried this homemade ragi flour? Do let me know how you liked it. Also tag us on Instagram @sharmispassions and hash tag it on #sharmispassions.
How to make homemade ragi flour:
1.Take 1/2 kg fingermillet in a bowl.
2.Pick out speck if any. You can even spread it on a plate and remove. Do in batches.
3.Discard the speck.4.Add water rinse it well.
5.Drain water,discard it.
6.Rinse well, drain water until water is clear like this.
7.Drained water is clear.
8.When you see clear water while rinsing then you can stop rinsing.
9.Now soak in water.
10.Keep covered for atleast 8 hrs or even overnight.
11.Rinse it one more time. Then drain water completely.
12.Add the millet to a hot box, spread it. You can even tie in a cloth, squeeze excess water and keep it in a colander. Hot box makes sprouting faster.
13.Close it tightly and set aside undisturbed for a day or atleast for 10 hours.
14.This is the tiny sprout I got after 10 hours. If you wish to get longer sprouts then you can rest for one more day but make sure the millet does not get spoiled. Half of homemade ragi flour is done here.
15.Spread it in a plate to a thin layer so that it gets dried easily. Sun dry for a day or two. Make it a thin layer otherwise it takes time to get dried.
16.Add to kadai and dry roast for 3-5 mins. I did it in 2 batches.
17.Spread it on a plate. Cool down completely.
18.Finally powder it until fine.Do it in batches to avoid heating of mixie which will in turn create moisture. I wouldn’t recommend sieving. But if you wish you can sieve ragi flour if the flour is very coarse.
19.Spread it on a plate, then cool completely later store in a clean dry jar.
Homemade ragi flour ready!
My tips while making homemade ragi flour:
If you sieve the ragi flour make sure to use fine sieve. Then collect the coarse particles and again grind it along with next batch.
Use good quality millet so buy from a trusted source.
If you feel there is no speck / dirt in the millet then you can even roast it directly. I have heard my friends do this.
You can even give to a nearby mill and grind the flour.
“Best Ever Homemade Bagels is super crusty outside and fluffy & chewy in the middle. This homemade bagels is perfect to serve with a cup of coffee or tea or enjoy as a breakfast with some cream cheese.” Bagels are super amazing. I love making bagels and any bread, not only they are therapeutic to...
Tutti frutti bread using Panasonic bread maker. Normal oven baking method included. Full video, step by step photos.
I know tutti frutti in two ways in my childhood. One in maida cake (Maida burfi) and the other is in bread. All I could remember was it used to be sweet and have this here and there. Later only Dilkush buns. But first comes these two in my favorite. Who cared about maida those days. Now also I have not cut maida from my life but have reduced as much as possible. Atleast for myself and Vj it have reduced.
During Christmas was searching for tutti frutti in Fairprice. I was feeling bad about not able to visit Mustafa like before (atleast once or twice in a month we visit). During the holiday season, they stock tutti frutti if luck is in our favor. Last to last week during pongal shopping, while billing, I was telling Vj how I miss tutti frutti seeing the paan masala and gulkand near by the billing counter.
My idea was trying out Beeda if tutti frutti was there. Unbelievably, there was one small tutti frutti pack too hiding behind these things. I was super excited and literally grabbed that pack. But sadly, no paan was there. I am sure I will find soon and try before this pack is over.
Coming to todays post, I was super excited to try this and set up everything to make and shoot it. After I added ingredients and the process started, I switched off the lights and planned to resume the shoot once the cycle is over. Only to realize after two hours when I went back to check, that I switched off the entire switch board extension in which I plugged in the bread machine too. What a bummer
Again then I switched on and restarted the machine. It is slightly less in rising, but nevertheless it turned out good. Otherwise the entire ingredients would have gone for waste! With the precious tutti frutti, hehe.
Place all the ingredients except yeast and tutti frutti in the bread machine pan.
Fit the pan in the machine. On the top compartment, add yeast in it’s appropriate dispenser.
Mix a tsp of flour to tutti frutti and add it to the Raisin / Nut dispenser.
Choose 3 from Menu, with Light crust or Medium crust option and Choose Raisin – Yes.
Press start to begin the process. It will take care of kneading, resting, kneading again with tutti frutti, yeast. Then it will let it rise and lastly the process of baking.
Once done, take out the pan immediately and invert over the wire rack.
Cool down minimum 30 mins. I wrap a towel over it to soften the crust so that it is easy to slice as well as avoid drying.
Slice into fairly thick slices and cool down completely before storing.
Video
Notes
I dust the tutti frutti with flour to avoid it sticking to the dispenser. You can skip if you are making manually.
Adjust water content (10-15 ml) more if needed.
Instead of adding milk, you can use 10 gm milk powder too. In that case increase water by 10 ml.
Tutti frutti bread method:
Mix a tsp of flour to tutti frutti.
Measure milk and water. Place all the other measured ingredients except yeast and tutti frutti in the bread machine pan. Fit the pan in the machine.
On the top compartment, add yeast in it’s appropriate dispenser. Choose 3 from Menu, with Light crust or Medium crust option and Choose Raisin – Yes. Press Start to begin the process.
It will take care of kneading, resting, kneading again with tutti frutti, yeast. Then it will let it rise and lastly the process of baking.
Once done, take out the pan immediately and invert over the wire rack.
Cool down minimum 30 mins. I wrap a towel over it to soften the crust so that it is easy to slice as well as avoid drying.
Slice into fairly thick slices and cool down completely before storing.
Making bread manually:
Mix flour, sugar, salt, yeast in a large mixing bowl.
Make a dent in middle, add luke-warm water, milk, tutti frutti and melt butter in it.
Knead well for 10 -15 mins until smooth, to bring out the gluten effect. It should become elastic. This step is important for the fine texture of bread.
Grease the bowl with butter and place the dough in it. Cover it with cling wrap and set aside in warm place for 1 hr.
After an hour, it will be doubled in size.
Punch down and gently shape it to a smooth loaf shape.
It should fit in your bread pan. Transfer to a greased bread pan.
Cover the pan with a clean kitchen towel or greased cling wrap. Let it rest for 15 mins.
Preheat the oven at 180 deg C for 10-15 mins or until the temperature is reached.
Brush the surface of the bread Pop bread loaf with the pan into the oven.
Bake for 15 – 20 mins or until the the crust is golden.
Remove from the pan, cool down for 30 mins covered in a towel before slicing.


 4.Add water rinse it well.


