Thursday, January 7, 2021

Season steel cookware, How to season stainless steel cookware

Season steel cookware an easy method that you can use to season steel cookware anytime you want and make it work like nonstick.

season steel cookware

A best seasoned steel cookware works more like a nonstick cookware. Even before I had the craze in stainless steel cookware I did not own much of nonstick cookwares. I had only 2-3 which I got for review and freewares for induction stove.

These days I am so into cookwares especially stainless steel and iron cookwares. I am using both branded and nonbranded cookwares but I take time to choose my cookware.

How to choose stainless steel cookware :

I always prefer to buy cookwares in person so that I can feel, touch it before buying. These are the pointers I take into account before buying steel cookwares:

First make sure its heavy bottomed. This has two criteria :

  • Triply only at the bottom – It has a heavy base and has triply coating only at the bottom perfect for pulao, biryani etc. The only disadvantage with these cookwares is after many years of usage the triply bottom may come out. Though this has not happened to me so far, I have heard my friends say so.
  • Triply throughout the cookware – These are triply fully means even the sides. Though these are a bit expensive, it is worth as it can last for many many years.

How to season steel cookware:

To begin with first rinse the cookware in soap and water first. Heat it with hot water then dry it well. Keep the cookware on the stove, switch it on. Drizzle oil so that oil is on all sides of the wok. Wipe off with kitchen cloth or tissue. Wipe so that oil spreads on all sides of the wok. Heat in low flame until it starts to smoke. Just few seconds do not heat more as it might cause discolouration. So be careful while you do this step. First time alone do this seasoning twice. After that you can do this once a month or when you feel the cookware sticks.

Brands to choose :

These are my favorite brands of cookwares  and they are not in order of my preference:

  1. Bergner – This is one of the popular brands and I have a fry pan which mittu gifted me for my birthday. Its been 2 years and it works so good. Though expensive it is sure worth the cost.
  2. Meyer – Again another popular brand of cookware and I have few cookwares in this brand. These cookwares are really good but some series are lighter on the sides which results in browning easily. So I would suggest to choose the one according to your needs and preference. The saute pan is my favorite and its a bit heavy to lift with one hand.
  3. Praylady – This is my recent addition to my kitchen and should say in this price range, the quality is so good. It is not so expensive unlike the other international brands so I would definitely recommend buying it.
  4. Vinod – This is my all time favorite brand of cookware. Vinod offers cookwares in all price ranges so thats the best thing about this brand. It has both expensive cookwares  and cheaper ones. It doesn’t mean the cheaper ones have low quality, they are equally good. The expensive ones have triply all over and the cheapeer ones have only the base as triply thats the main difference.
  5. Non branded – Other than the branded cookwares I still have few cookwares which I bought from local shops. And I have my favorites there too, like few kadais which I use for my daily cooking.

The above said review does not involve any sponsorship, I have written it based on my own experience.

Branded or nonbranded try to season steel cookwares before first use for best results.

Similar Posts

Some of my friends are not even aware of seasoning steel cookwares so thought to make a seperate post for it here.

season steel cookware

If you have any more questions about this season steel cookware post do mail me at sharmispassions@gmail.com
Follow me on Instagram, Facebook, Pinterest ,Youtube and Twitter .

Tried this ? Do let me know how you liked it.Tag us on Instagram @sharmispassions and hash tag it on #sharmispassions.

Print

Season steel cookware

Season steel cookware an easy method that you can use to season steel cookware anytime you want and make it work like nonstick.
Cuisine Indian
Prep Time 5 minutes
Cook Time 5 minutes
Total Time 10 minutes
Author Sharmilee J

Instructions

  • To begin with rinse the cookware in soap and water first. then heat it with hot water then dry it well.Keep the cookware on the stove, switch it on. I used my new wok here.
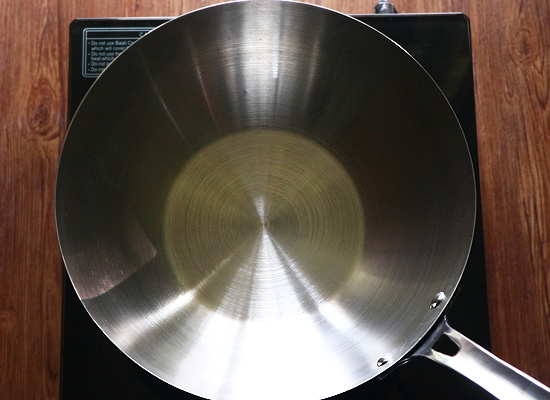
  • Drizzle oil so that oil is on all sides of the wok.
  • Wipe off with kitchen cloth or tissue.
  • Wipe so that oil spreads on all sides of the wok.
  • Heat in low flame intil it starts to smoke like this. Just few seconds do not heat more as it might cause discolouration. So be careful while you do this step just switch off when it starts to smoke like this. Now you steel cookware is seasoned. First time alone do this seasoning twice. After that you can do this once a month or when you feel the cookware sticks.
  • Your steel cookware is ready to use. It works more like nonstick. Enjoy and happy cooking.

Season steel cookware video

How to season steel cookware:

1.To begin with rinse the cookware in soap and water first. then heat it with hot water then dry it well.Keep the cookware on the stove, switch it on. I used my new wok here.
prepare cookwaree

2.Drizzle oil so that oil is on all sides of the wok. You can use any cooking oil. I used groundnut oil. You can use coconut oil to season too.season steel cookware - drizzle oil

3.Wipe off with kitchen cloth or tissue. To season steel cookware this step is really important. wipe off

4.Wipe so that oil spreads on all sides of the wok.season steel cookware

5. Heat in low flame until it starts to smoke like this. Just few seconds do not heat more as it might cause discolouration. So be careful while you do this step just switch off when it starts to smoke like this. Now you steel cookware is seasoned. First time alone do this seasoning twice. After that you can do this once a month or when you feel the cookware sticks. This is how I season steel cookware. season steel cookware heat in low flame

Now your steel cookware is ready to use. It works more like nonstick. Enjoy and happy cooking.

How to season steel cookware is often asked by readers so thought to post it.


season steel cookware

The post Season steel cookware, How to season stainless steel cookware appeared first on Sharmis Passions.


from Sharmis Passions https://ift.tt/2L2UChl
via KITCHEN MASALA

Butter Mochi Recipe

HA”Hawaiian Butter Mochi is a classic hawaiian treat made using glutinous rice flour and butter. Butter Mochi cake taste so chewy and buttery.” Looking for Similar Recipe, Check out Sweet Bean Mochi Butter Mochi is very new to me. I have never tasted it or heard about it before. It is very recently I heard...

Read More

The post Butter Mochi Recipe appeared first on Yummy Tummy.


from Yummy Tummy https://ift.tt/39abg6v
via KITCHEN MASALA

Tuesday, January 5, 2021

Bhindi Do Pyaza, Stir fried okra

bhendi-do-pyaza

Bhindi do pyaza is a okra dish prepared with lots of onion, hence the name. Goes well with roti or rice. Quick video, step by step photos.

I have tasted Bhindi Do Pyaza couple of times in restaurants. For a long time, I thought this is named so because we have to use two types of onion. That is large onion and small onion combined, as I have read it in chef Sanjeev Kapoor’s website. Some how, I have not tried this so far properly referring a recipe. Today finally made it and just loved it. The term Do Pyaza’ means ‘Double the onion’ used.

How to make Bhindi Do Pyaza summary

Bhindi (okra) is first sauteed in generous oil to remove slime nature. Then toss with lots of onion and all the usual subji spice powders, along with tomato. The dish should be retaining the onion’s crunchiness for best results.

FAQs:

Can I not add small onions?
Yes, you can just use 2 cubed large onions.

It looks too oily, can I reduce oil?
Yes, though reducing too much oil can make the bhindi do pyaza slimey. It’s the oil we add makes it easy and quick, by removing the sticky nature. So minimum 2 tablespoons needed for the dish in total.

bhindi-do-pyaza-recipe

There can be many variations in the recipe, just keeping the concept of adding double the onions. Use 2 large onions instead of using shallots. Also, make it as semi gravy/ masala by adding water or curd to coat the bhindi. Add a tsp of Ginger garlic paste in place of ginger. Avoid the Spice powders totally, temper with just few red chillies.

Since this tastes best when the bhindi and onion are crunchy, I suggest to make it and consume when hot. But, tastes good even in room temperature, no worries. Consume within a day, fresh, I would not suggest refrigerating.

Are Videos more your thing?

Here’s a Quick video on how to make Bhindi Do Pyaza

RELATED POSTS

GOES WELL WITH

bhindi-do-pyaza-recipe
Print Pin
0 from 0 votes

Bhindi do pyaza

Bhindi do pyaza is a okra dish prepared with lots of onion, hence the name. Goes well with roti or rice. Quick video, step by step photos.
Course Side Dish
Cuisine Indian
Prep Time 10 minutes
Cook Time 20 minutes
Servings 3
Cup measurements

Ingredients

  • 2 cups Bhindi / okra 25 medium or 250 gm
  • 1 Onion
  • 1/4 cup Shallots small onions
  • Salt as needed
  • 2 to 3 tbsp Oil
  • 1 tsp Cumin seeds
  • 1 Green chilli
  • 1 tsp Ginger

Spice powders:

  • 2 tsp Red chilli powder
  • 1 tbsp Coriander powder
  • 1 tsp Amchoor powder
  • 1/2 tsp Cumin seeds powder
  • 1/2 tsp Garam masala
  • 1/4 tsp turmeric

Instructions

  • First wash, pat dry bhindi completely. Chop according to your preference. I like it mine diagonal cut.
  • In a pan, add 2 tbsp oil. Add the chopped bhindi. Cook for 3-4 mins stirring or tossing occasionally for even cooking.
  • The slime nature will go off. Set aside.
  • Add 2 tsp oil. Sprinkle cumin seeds. Add peeled shallots (small onions).Cook for a minute in low flame. Add finely chopped ginger, green chilli, followed by cubed onion. Cook for 2 mins in medium flame to make it translucent.
  • Add all the spice powders and required salt. Give it a quick stir.
  • Tip in the sauteed bhindi, and mix to coat the spice. Add cubed tomato and mix.
  • Cook covered for 2 mins in medium flame.
  • Once done, toss well in high flame for a minute and switch off the flame.

Video

Notes

  • Do not over cook onion or bhindi.
  • Using generous oil helps in bhindi not becoming slimey.
  • Never chop bhindi when it is wet. No water content should be there to avoid the stickiness.

Step by step photos :

  1. Firstly, wash and pat dry bhindi completely. Then, chop according to your preference. I like it mine diagonal cut.
  2. In a pan, add 2 tbsp oil. Add the chopped bhindi. Cook for 3-4 mins stirring or tossing occasionally for even cooking. The slime nature will go off. Set aside.
    step1-bhindi
  3. Add 2 tsp oil and sprinkle cumin seeds. Then, add peeled shallots (small onions). Cook for a minute in low flame. Add finely chopped ginger, green chilli, followed by cubed onion.
    step2-onion
  4. Cook for 2 mins in medium flame to make it translucent. Add all the spice powders and required salt. Give it a quick stir.
    step3-spice
  5. Tip in the sauteed bhindi, and mix to coat the spice. Lastly, add cubed tomato and mix.
    step4-tomato
  6. Cook covered for 2 mins in medium flame.
    step5-cook
  7. Once done, toss well in high flame for a minute and switch off the flame.
    step6-ready

Notes

  • Do not over cook onion or bhindi.
  • Using generous oil helps in bhindi not becoming slimey.
  • Never chop bhindi when it is wet. No water content should be there to avoid the stickiness.

Serve with phulka, tandoori roti or rice.

bhindi-do-pyaza

The post Bhindi Do Pyaza, Stir fried okra appeared first on Raks Kitchen.


from Raks Kitchen https://ift.tt/3ogk1Cd
via KITCHEN MASALA

Monday, January 4, 2021

Onion tomato thokku – Vengayam thakkali thokku recipe

Onion tomato thokku with step by step pictures and video. It is a quick sidedish to make which serves great with chapathi, ildi dosa etc.onion tomato thokku recipe

Onion tomato thokku – A spicy tangy condiment which can serve as a great side for idli, dosa, chapathi etc. This is a very quick sidedish to prepare which takes just 15 mins when all the ingredients are prepared and ready.

I first tasted onion tomato thokku in my office when my collegue brought it for lunch. I soo loved it and asked her for the recipe and tried it for that day dinner itself. Its quick, easy to make and tasted soo good.

About this recipe :

This is a very simple recipe with minimal ingredients. Just heat any cooking oil , I used groundnut oil which I use for cooking. Temper mustard, jeera, curry leaves let it to splutter. Add onion saute until transparent then add ginger garlic paste and salt. Saute for 2 mins then add tomatoes saute until mushy, cook covered for few mins until raw smell leaves. Add chilli powder, coriander powder mix well and cook for a minute or so. Finally add water and mix well. Cook for 2 mins and switch off. Onion tomato thokku ready.

Variations:

  • You can add fennel seeds while tempering.
  • Replace sambar powder with red chilli and coriander powder.
  • In addition add garam masala powder if you want more masala flavour.
  • Add garlic chopped if you like the flavour. You can even add crushed garlic. Add it soon after the tempering.

Serving and and storing suggestion:

Serve onion tomato thokku with chapathi, idli, dosa etc. This thokku keeps well for 3 days in room temperature itself and for about a week in fridge. I wouldn’t recommend freezing.

Similar Recipes:

If you have any more questions about this onion tomato thokku recipe do mail me at sharmispassions@gmail.com
Follow me on Instagram, Facebook, Pinterest ,Youtube and Twitter .

Tried thisonion tomato thokku recipe? Do let me know how you liked it.Tag us on Instagram @sharmispassions and hash tag it on #sharmispassions.

Print

Onion tomato thokku recipe

Onion tomato thokku - A spicy tangy condiment which can serve as a great side for idli, dosa, chapathi etc. This is a very quick sidedish to prepare which takes just 15 mins when all the ingredients are prepared and ready.
Course Side Dish
Cuisine Indian
Prep Time 10 minutes
Cook Time 10 minutes
Total Time 20 minutes
Servings 2
Author Sharmilee J

Ingredients

To temper:

  • 3 tbsp cooking oil
  • 1 tsp mustard seeds
  • 1/2 tsp cumin seeds
  • few nos curry leaves

Instructions

  • To begin with : Heat oil in a kadai - add mustard seeds let it splutter first. Then add jeera let it crackle then add curry leaves, let it splutter.
  • After that add onion. Saute until transparent.
  • Next add ginger garlic paste and required salt.
  • Saute for 2 mins.
  • Now add tomatoes.
  • Saute until mushy. Mash with laddle and cook.
  • Cook covered for 2 mins or until raw smell leaves.
  • Add red chilli powder and coriander powder. Onion tomato thokku is gettng ready.
  • Saute for a minute or so. Do not burn the masalas.
  • Add 1/4 cup water.This is to avoid burning of masalas.This step is close to finish of onion tomato thokku.
  • Cook for 2 mins till it becomes a thokku consistency.
  • Switch off when oil floats at edges or on top.
  • Serve with chapathi, idli, dosa etc.

Notes

  • Make sure to add only ripe tomatoes.
  • Do not compromise on oil, oil should float a bit alteast when you switch off.
  • Do not burn the spice powders so just saute for a minute or so then immediately add water, this is to avoid burning.
  • If you like more of masala flavour then add garam masala powder and fennel seeds while tempering.

How to make onion tomato thokku :

1.To begin with : Heat oil in a kadai – add mustard seeds let it splutter first. Then add jeera let it crackle then add curry leaves, let it splutter.onion tomato thokku recipe temper

2. After that add onion. Saute until transparent.onion tomato thokku recipe add onion

3. Next add ginger garlic paste and required salt.add ginger garlic paste

4. Saute for 2 mins.saute

5. Now add tomatoes.add tomatoes

6. Saute until mushy. Mash with laddle and cook.saute until mushy

7. Cook covered for 2 mins or until raw smell leaves.cook for 2 mins

8. Add red chilli powder and coriander powder. Onion tomato thokku is gettng ready.add spice powders

9. Saute for a minute or so. Do not burn the masalas.saute for a minute

10. Add 1/4 cup water.This is to avoid burning of masalas.This step is close to finish of onion tomato thokku.add water

11. Cook for 2 mins till it becomes a thokku consistency.cook for 2 mins

12. Switch off when oil floats at edges or on top.switch off

Serve with chapathi, idli, dosa etc.

onion tomato thokku recipe

My tips while making onion tomato thokku :

  • Make sure to add only ripe tomatoes.
  • Do not compromise on oil, oil should float a bit alteast when you switch off.
  • Do not burn the spice powders so just saute for a minute or so then immediately add water, this is to avoid burning.
  • If you like more of masala flavour then add garam masala powder and fennel seeds while tempering.onion tomato thokku recipe

The post Onion tomato thokku – Vengayam thakkali thokku recipe appeared first on Sharmis Passions.


from Sharmis Passions https://ift.tt/3pLysif
via KITCHEN MASALA

Banana Upside Down Cake

“Upside Down Banana Cake is a delicious vanilla cake topped with a caramel glazed bananas, they look so pretty and taste even more delicious” Banana Upside Down Cake with Step by Step Pictures. I love baking with bananas. So far I have shared tons of recipes using bananas. You can imagine the cake and I...

Read More

The post Banana Upside Down Cake appeared first on Yummy Tummy.


from Yummy Tummy https://ift.tt/38W31uU
via KITCHEN MASALA

Sunday, January 3, 2021

Ginger Wine

“Delicious Ginger Wine which needs just few ingredients to makes and can be made in less than 5 days.” Natural homemade ginger wine!  Ginger Wine recipe is super simple to make and needs just few ingredients. Start by sterilizing your equipment – ceramic jars, demijohns, wooden spoons, etc – by washing them with boiling hot...

Read More

The post Ginger Wine appeared first on Yummy Tummy.


from Yummy Tummy https://ift.tt/3omIiGM
via KITCHEN MASALA

Friday, January 1, 2021

Hot Chocolate Bombs

“A Popular and Trending Hot Chocolate Bombs which is a fun recipe to make at home. These hot chocolate bombs melts when added into hot milk creating a delicious hot chocolate.” Hot chocolate bombs are chocolate spheres filled with hot chocolate mix and lots of marshmallows! Pour steaming hot milk over the top and watch...

Read More

The post Hot Chocolate Bombs appeared first on Yummy Tummy.


from Yummy Tummy https://ift.tt/351e8kX
via KITCHEN MASALA

Rice kheer, Indian Instant pot recipes

rice-kheer-recipe

Rice kheer in instant pot, using instant pot for rice kheer is easier as it need not be supervised or worry about overflowing. Step by step & quick video.

I planned to make rice kheer for my Instant pot Diwali special Live session in my facebook page. Because of long waiting time, I changed my plan last minute. I really loved the way it is prepared less messy when compared to the regular method, as well as less worrying. This is similar to the paal payasam I posted earlier. But this is so versatile.

For variations, if you like more rice and thicker consistency, you can use 1/4 cup rice instead of 1/8 cup. One more variation is you can powder the rice coarsely for more homogenous texture.

rice-kheer

Are videos more your thing?

Here’s a quick video on how to make the rice kheer in instant pot.

While shooting, I was letting the rice slightly browned, so my kheer was on cream colour rather than white. So please take care not to change the colour of the rice for whiter results.

In terms of mode, I chose Porridge menu. But you can also do this in pressure cooker mode by reducing the milk we add earlier (half the quantity) and then adding rest of the milk and simmer in Saute mode for thickening. You can also use condensed milk for even more quicker results, instead of adding 2 cups milk at the end and simmering. If using condensed milk, reduce sugar quantity accordingly.

Nuts can be of your choice. It can be badam, pistachio or even ghee roasted cashews.

Instant pot Rice kheer summary:

Rice and milk cooked in Porridge menu and later simmered quickly after adding sugar, saffron & cardamom.

This can be served warm or cold depending on your personal preference. I basically love all my kheers chilled.

Browse my 25+ payasam & kheer posts.

RELATED POSTS

rice-kheer-recipe
Print Pin
0 from 0 votes

Rice kheer in instant pot

Rice kheer in instant pot, using instant pot for rice kheer is easier as it need not be supervised or worry about overflowing. Step by step & quick video.
Course Dessert
Cuisine Indian
Prep Time 10 minutes
Cook Time 35 minutes
Waiting time 20 minutes
Servings 6

Equipments (Amazon Affiliate links)

  • Instant pot Duo 7 in 1, 6 Quart
Cup measurements

Ingredients

  • 1 liter Milk
  • 2 tbsp Basmati rice
  • 1/4 cup + 2 tbsp sugar
  • 1 pinch saffron soak in 1 tbsp milk
  • 1 Cardamom
  • 1 tsp Ghee
  • Nuts to garnish I used pistachios

Instructions

  • Wash & soak basmati rice for minimum 10 mins. Also, soak saffron in 1 tbsp of milk. Set aside.
  • Remove the lid of Instant pot, start in Saute mode – Normal heat for 5 mins.
  • First, add ghee and washed rice. Roast for a minute.
  • Pour milk and close the lid. Cancel Saute mode.
  • Press Porridge menu twice to choose High pressure.
  • Make sure to seal the steam vent.
  • Once done, let pressure release naturally. Turn off keep warm. (Takes approx 20 mins).Open the lid, mix well.
  • Press Saute mode – Normal again for 5 mins.
  • Add sugar, soaked saffron + milk and powdered cardamom.
  • Mix well and bring to boil. Cancel Saute mode.
  • Garnish with nuts to serve.

Video

Notes

  • Since we cook for long time, the milk turns slightly on pink/ cream colour. And it tastes nice too because of that.
  • Make sure to scrap the bottom after porridge mode is over.
  • Sugar can be adjusted according to one’s preference.
  • Condensed milk can be added instead of sugar and reducing milk quantity.

Instant pot Rice kheer method:

  1. Wash & soak basmati rice for minimum 10 mins. Also, soak saffron in 1 tbsp of milk. Set aside.
    Step1-soak
  2. Remove the lid of Instant pot, start in Saute mode – Normal heat for 5 mins.
  3. First, add ghee and washed rice. Roast for a minute. Pour milk and close the lid. Cancel Saute mode.
    rice kheer step2-saute
  4. Press Porridge menu twice to choose High pressure. Make sure to seal the steam vent.
  5. Once done, let pressure release naturally. Turn off keep warm. (Takes approx 20 mins).
  6. Open the lid, mix well. Press Saute mode – Normal again for 5 mins.
    step3-sugar
  7. Add sugar, soaked saffron + milk and powdered cardamom.
    rice kheer step4-add
  8. Mix well and bring to boil. Cancel Saute mode.
    rice kheer step5-ready
  9. Lastly, Garnish with nuts to serve.

Note

  • Since we cook for long time, the milk turns slightly on pink/ cream colour. And it tastes nice too because of that.
  • Make sure to scrap the bottom after porridge mode is over.
  • Sugar can be adjusted according to one’s preference.
  • Condensed milk can be added instead of sugar and reducing milk quantity.

If serving chilled, cool down completely and refrigerate for an hour and enjoy!

I garnished with chopped pistachios.

instant-pot-Indian-recipes

The post Rice kheer, Indian Instant pot recipes appeared first on Raks Kitchen.


from Raks Kitchen https://ift.tt/3o7psmX
via KITCHEN MASALA