Friday, January 5, 2024

Thalagam recipe

Thalagam recipe with medley of vegetables, fresh roasted ground spices and coconut. Learn how to make it with step by step images and video. This is also known as thalagam kuzhambu or thiruvathirai thalagam widely.

Thalagam recipe

Thalagam is made during festivals like Thiruvathirai, Pongal and during Tamil month of Aadi along with manjal pongal. You can also make it on regular days.

Check out similar varutharacha kuzhambu and our home-style ezhu kari kootu recipe in this website.

[feast_advanced_jump_to]

Thalagam is a Tirunelveli speciality dish, popular in that region in Tamil nadu. One can also call it thalagam kuzhambu. Every household have their own way of making and the recipe may vary. But as I browsed the recipe in other websites and watch Youtube videos, one thing I noticed was, thalagam recipe uses sesame seeds.

There are lots and lots of different recipes but I wanted to try this simple and minimal ingredients that is different from the regular spice paste we usually make. So I kept this thalagam recipe in such way it has main flavor from black sesame seeds.

I also wanted to use just naatu kaigarigal (country vegetables/ local produce) that we use for pongal kootu. But became lenient and used vegetables like drumstick, white pumpkin which we usually do not use on such occasions.

Even a pongal kuzhambu iyer style is similar to this. You can go through the Recipe, My notes, Tips and Variations to know what the differences are and decide how you want it.

Ingredients

Thalagam recipe ingredients:

thalagam vegetables
ingredients for thalagam (roasting)
  • County vegetables - Local produce (nattu kaikari) - Yellow pumpkin, broad beans, elephant yam, seppan kizhangu (colocasia/ Taro), sweet potato, mochai (field beans or hyacinth beans), raw banana/ plantain, drumstick and white pumpkin.
  • For spice paste - Coconut, black sesame seeds for maximum flavor, red chilli for spice, rice and toor dal for thickening.
  • Tamarind - Used for giving taste as well as balancing the itching property of yams.
  • Jaggery - for enhancing taste.
  • Salt

See recipe card below for full list and quantities.

Instructions

I used ¼ cup dried mochai, so soaked it overnight and pressure cooked for 3 whistles in medium flame with salt and ½ cup water in a small pressure cooker. You can use fresh mochai too to make kuzhambu thalagam.

soak tamarind

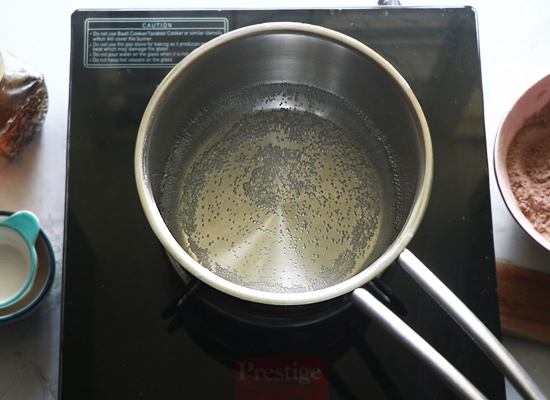
1. Firstly, gather all ingredients needed. Then soak tamarind in ½ cup hot water to begin with.

roast black sesame seeds

2. After that, let's prepare the spice paste. Firstly dry roast sesame seeds until it pops and remove in a plate.

rice for thalagam

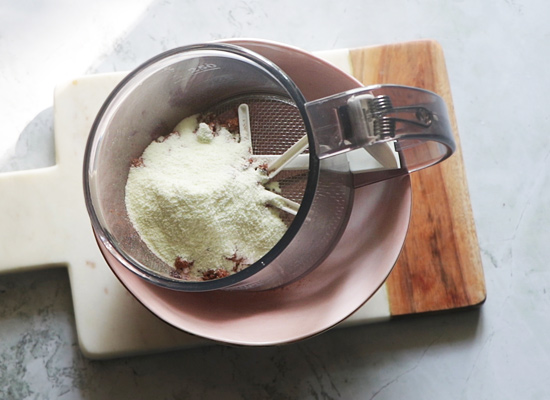
3. Then roast rice until it turns milky white, set aside.

toor dal thalagam

4. After that, add 2 teaspoon of oil in the pan, add toor dal, red chillies and roast until dal turns golden in color.

curry leaves thalagam spice

5. Then add curry leaves and give it a roast.

coconut for thalagam kuzhambu

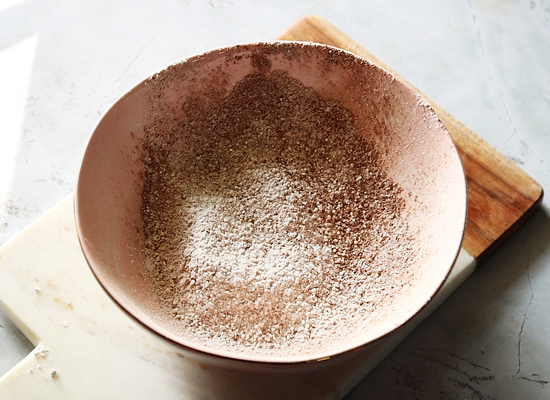
6. Finally add coconut and roast until just dry, no need to wait until golden.

thalagam spice powder

7. Remove in a plate for cooling.

thalagam vegetables

8. Take a small pressure cooker, add hard vegetables which takes longer to cook in bottom. Drumstick, yam etc. Then top it off with all other vegetables gradually.

tamarind for thalagam

9. After that, extract tamarind juice.

add tamarind extract

10. Strain the pulp and add to it (1 cup total).

pressure cooker small

11. Close the lid and pressure cook for just 2 whistles in high flame.

cooked vegetables thalagam kuzhambu

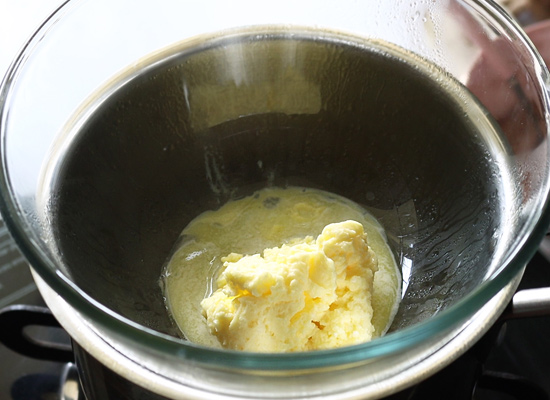
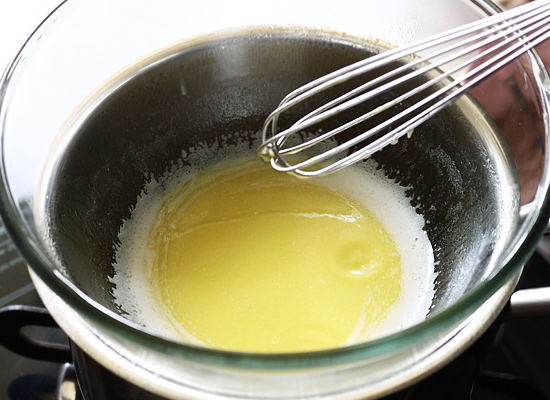
12. Once done, I transferred to another vessel as my cooker was too small. Do not stir, just add turmeric, 1 more cup water, salt and jaggery

ground spice for thalagam

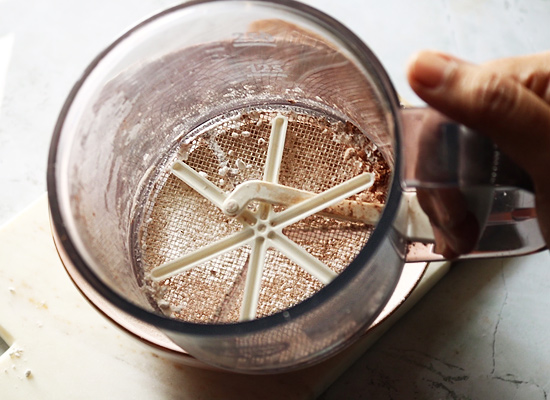
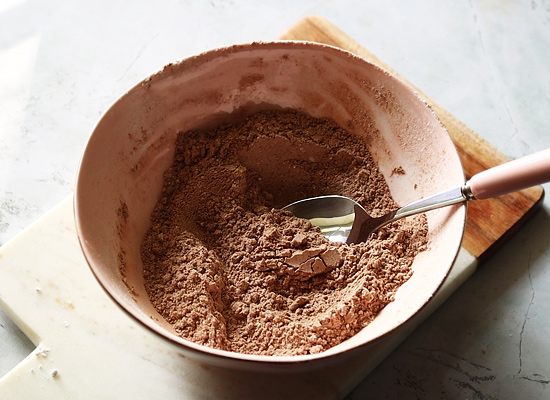
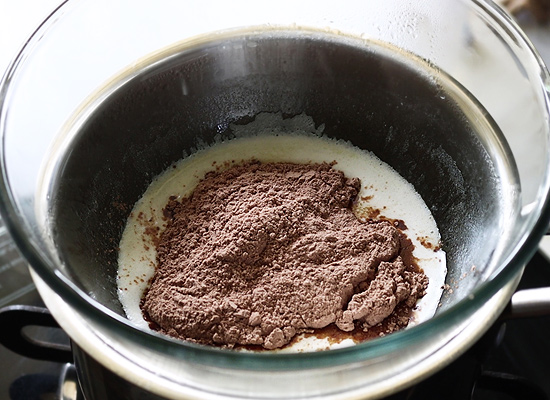
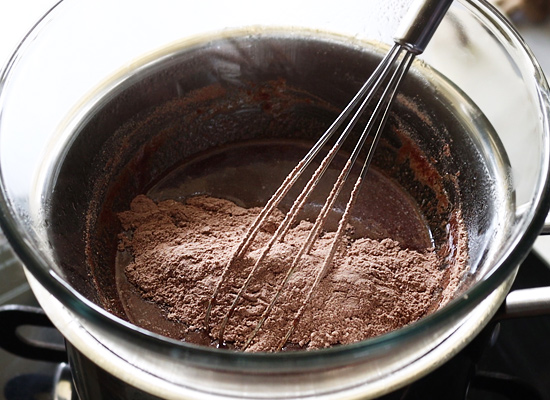
13. Grind the spices we roasted with ¼ cup (or as needed) water.

adjust water

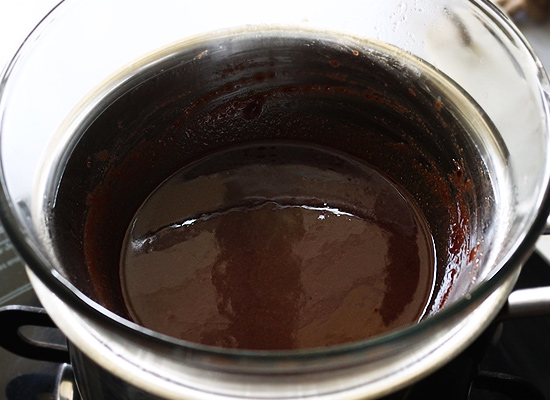
14. Pour it to the cooked vegetables and add 1 & ¼ cup more water washing off the mixie. Gently give it a mix.

boil iyer style thalagam

15. Once it boils mix each minute (3-4 minutes).

tirunelveli thalagam

16. Once homogenous, switch off the stove.

temper

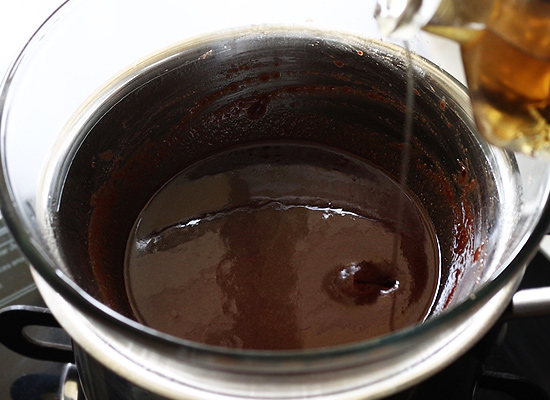
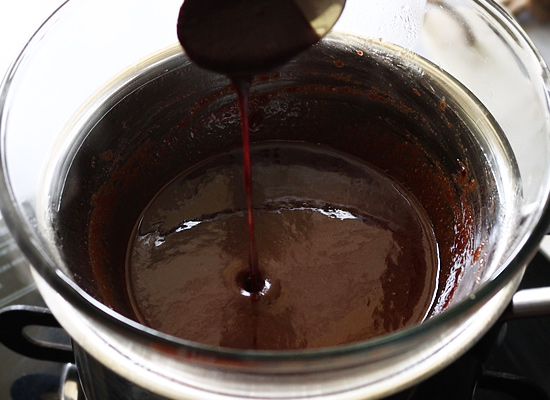
17. Heat a small pan with coconut oil and splutter mustard.

thalagam ready

18. Finally add it to the thalagam and it's ready!

Serve thalagam with Thiruvathirai kali or as pongal kuzhambu, or with cooked rice on regular days.

thalagam recipe - Thalagam kuzhambu

Hint: I used my 1.5 liter pressure cooker and brass kadai to make this thiruvathirai thalagam, which are linked in the recipe card.

Substitutions & Variations

  • Sesame seeds - Highlight of the recipe which gives the unique flavor to the thalagam. But you can omit it and use 1 tablespoon coriander seeds,¼ teaspoon fenugreek seeds & ¼ teaspoon asafoetida.
  • Elephant yam- use pidi karunai kizhangu instead of senai kizhangu. You can also use siru kizhangu (Chinese yam/koorka) too.
  • Mochai - I used dried mocha kottai, but you can use fresh ones if you get in season. Eitherway, suggest to pre-cook with salt prior using in the recipe.

The recipe is naturally vegan and gluten free.

As I said earlier, there are numerous way to make thalagam. Here are few more suggestions

  • Spicy - add ½ teaspoon black pepper in the spice paste.
  • Number of vegetables - Usually 7 vegetables or 9 vegetables are used in this thalagam. You can even add brinjal, potato as per your wish when you are making it on regular days.
  • Coconut tempering - add 1 tablespoon of coconut while tempering. Roast until golden in color and top it to the thalagam.

See this pongal gotsu recipe on my website!

Storage & Serving suggestions

Thiruvathirai thalagam kuzhambu stays good for 10 hours at room temperature and couple of days in fridge.

Serve it with Thiruvathirai kali or plain cooked rice or manjal pongal which is prepared in the Tamil month of Aadi.

Top tip

  • Cut the vegetables in large cubes for best texture in this thalagam kuzhambu recipe.
  • Dot over cook the vegetables and depending on your cooker make and mode, you can even reduce to 1 whistle to avoid this.
  • Keep the vegetables like yam, sweet potato, immersed in water to prevent discoloration.
  • You can even cook in stove top if you are not comfortable in pressure cooking. Add vegetables that take long time to cook, like drumstick, elephant yam, broad beans first and boil for 3 minutes, on top of it, add other vegetables according to their cooking time.

FAQ

Can we use any vegetable in this thalagam?

A traditional thiruvathirai thalagam kuzhambu recipe made for festival offerings varies from household to household. In our home, our elders at home ask to avoid adding vegetables like drumstick, white pumpkin, brinjal on festival days. They even avoid turmeric powder and use fresh turmeric if possible.
But if you make on regular days, you can add your own choice of vegetables. The recipe I have provided is lenient and made on regular days. Please consult elders at home and follow their advice to make as an sacred offering.

Tirunelveli thalagam - Pongal thalagam

Looking for other recipes like this? Try these:

Recipe card

thalagam
Print Pin
No ratings yet

Thiruvathirai thalagam recipe | Thalagam kuzhambu

Thalagam recipe with medley of vegetables, fresh roasted ground spices and coconut. Learn how to make it with step by step images and video.
Course Side Dish
Cuisine Indian, South Indian
Prep Time 30 minutes
Cook Time 27 minutes
Author Raks Anand
Servings 3 people

Equipments (Amazon Affiliate links)

Cup measurements

Ingredients

  • 3 cups Mixed vegetables See note 1
  • 1 tablespoon Tamarind packed
  • 1 teaspoon Jaggery
  • ¼ teaspoon Turmeric Optional
  • Salt

Spice paste

  • 1 tablespoon Black sesame seeds or white sesame seeds
  • 1 tablespoon Raw rice Sona masuri
  • 2 teaspoon Coconut oil
  • 1 tablespoon Toor dal Split pigeon peas
  • ½ cup Grated coconut
  • 6 Red chilli Dry red chillies
  • 2 sprigs Curry leaves

To temper

  • 1 tablespoon Coconut oil virgin
  • ½ teaspoon Mustard

Instructions

  • I used ¼ cup dried mochai, so soaked it overnight.
  • Pressure cooked for 3 whistles in medium flame with salt and ½ cup water in a small pressure cooker.
  • You can use fresh mochai too to make kuzhambu thalagam. Either way pressure cook it prior using in the recipe.

Extract tamarind juice

  • Firstly, gather all ingredients needed. Then soak tamarind in ½ cup hot water to begin with.

Spice paste

  • After that, let's prepare the spice paste. Firstly dry roast sesame seeds until it pops and remove in a plate.
  • Then roast rice until it turns milky white, set aside.
  • After that, add 2 teaspoon of oil in the pan, add toor dal, red chillies and roast until dal turns golden in color.
  • Then add curry leaves and give it a roast.
  • After that, add 2 teaspoon of oil in the pan, add toor dal, red chillies and roast until dal turns golden in color.
  • Add curry leaves and give it a roast. Finally add coconut and roast until just dry, no need to wait until golden.
  • Remove in a plate for cooling.

Thalagam kuzhambu

  • Take a small pressure cooker, add hard vegetables which takes longer to cook in bottom. Drumstick, yam etc. Then top it off with all other vegetables gradually.
  • After that, extract tamarind juice and add to it (1 cup total).
  • Close the lid and pressure cook for just 2 whistles in high flame.
  • Once done, I transferred to another vessel as my cooker was too small.
  • Close the lid and pressure cook for just 2 whistles in high flame.
  • Once done, I transferred to another vessel as my cooker was too small.
  • Do not stir, just add turmeric, 1 more cup water, salt and jaggery.
  • Grind the spices we roasted with ¼ cup (or as needed) water.
  • Pour it to the cooked vegetables and add 1 & ¼ cup more water washing off the mixie. Gently give it a mix.
  • Once it boils mix each minute (3-4 minutes) and switch off the stove.
  • Heat a small pan with coconut oil and splutter mustard.
  • Finally add it to the thalagam and it's ready!

Video

Notes

  • I used yellow pumpkin (parangikkai 8 cubes), broad beans (avarakkai 12 numbers), mochai (¼ cup), plantain (vazhakkai ¼), Elephant yam (senai kizhangu 5 cubes), Sweet potato (sakkarai valli kizhangu -6 small cubes), Arbi/ taro (Seppan kizhangu 1 cut into 4 cubes), white pumpkin(poosanikai 6 cubes), drumstick (murungakkai 1) total 9 vegetables.
  • Avoid drumstick, white pumpkin, turmeric if making for festivals.
  • Black sesame are more fragrant and authentically used in this dish.
YoutubeDo you like short videos? Subscribe now!
InstagramMention @rakskitchen or tag #rakskitchen if you have tried this recipe.

The post Thalagam recipe appeared first on Raks Kitchen.


from Raks Kitchen https://ift.tt/N2pRZqu
via KITCHEN MASALA

Wednesday, January 3, 2024

Homemade Chocolate

Homemade Chocolate is simple and easy to prepare tastes delicious with a melt in the mouth texture. Homemade Chocolate can made in 10 mins with just 4 available ingredients in your pantry. Let us learn to make chocolate at home using step by step pictures and video.

homemade chocolate placed in a beige color bowl

This Homemade Chocolate Recipe is one of the fail proof recipes that I use often to make chocolate at home. It requires just 4 ingredients which includes butter, milk powder, powdered sugar and cocoa powder.

What is Homemade Chocolate?

Traditionally homemade chocolates are made using cocoa butter which gives it a very close taste to store bought ones but cocoa butter is not at our reach. The next alternate is using coconut oil or butter. Coconut oil gives a flavor to the chocolate so if you like coconut oil flavor then you can use it. Butter or ghee is perfect to use for homemade chocolates.

This homemade chocolate is customizable according to your liking – you can use coconut oil, cane sugar and cacao powder for a more healthier version.

Store bought chocolates are made using cocoa beans from the scratch and it is a lengthy process – It includes first cutting the cocoa fruit removing the seeds which are called cocoa beans, fermenting the beans, dehydrating them, roasting it the cocoa beans, then removing the outer skin and collecting the cocoa nibs then grinding it along with sugar and melted cocoa butter to a smooth paste, then pour into mold and let it set.

This easy homemade chocolate can be made at home in no time. When compared to the lengthy process of chocolate making this is a quick and easy version that gets done in just few minutes. This is one of the best homemade chocolate recipes that I have tried so wanted to post it here.

homemade chocolate placed in a beige color bowl

Cocoa powder vs Cacao powder

I have tried this homemade chocolate using both cocoa powder and cacao powder and there is no much difference in taste and texture. Cacao power is more healthier as it is minimally processed so it is more natural. Now that I have been used to cacao powder that I no longer use cocoa powder at all. The color of cacao powder is mild when compared to coco powder but that does not give much difference to the dishes that we make using it.

Similar recipes

Homemade Chocolate Video

Homemade Chocolate Ingredients

  • Butter – Use good quality fresh butter. I used homemade butter.
  • Milk powder – Make sure to use fine milk powder else pulse it couple of times and then use it.
  • Powdered sugar – You can pulse normal crystal sugar, sieve it and use it.
  • Cocoa powder – Use fine good quality cocoa powder or cacao powder.
homemade chocolate ingredients

Butter vs Coconut oil vs Ghee

I have tried with all these in different occasions and here is what I personally prefer

  • Coconut oil – This is one of the healthy options to use but gives a strong flavor to the chocolate so if you like coconut flavor then you can use it.
  • Butter – Butter is one of the most commonly used ingredient and gives the best taste and flavor.
  • Ghee – Ghee gives good taste and flavor to homemade chocolate and there is no much difference in taste and texture.
homemade chocolate butter,ghee, coconut oil

How to make Homemade Chocolate

1.To begin with add 3 tablespoon powdered sugar, 2 tablespoon cocoa powder and 1 tablespoon milk powder to a sieve.

add sugar,coco powder,milk powder to a sieve

2.Sieve well to a bowl.

sieve to a bowl

3.Press the balls and sieve then discard the remains.

discard remains

4.Mix well and set aside.

mix well

5.Boil water in a sauce pan first.

boil water in a sauce pan

6.Place a bowl over it. Make sure the bowl is dry and the base of the bowl should not touch the boiling water. Add 1/4 cup butter to the bowl.

add butter to a bowl

7.Whisk well until completely melted.

butter is melted

8.Add sieved ingredients. Add in 2 batches.

add sieved ingredients

9.First whisk add the rest then whisk well.

whisk well

10.The mixture should be smooth without lumps.

smooth mixture without lumps

11.Add 1/2 teaspoon vanilla essence.

add vanilla essence

12.Give a quick stir.

giv e a quick stir

13.Switch off.

switch off

14.Immediately pour into the mold. Tap few times then set in fridge for an hour. Homemade chocolate is almost ready.

pour into mould

15.Remove from fridge. White patches on top is normal so don’t worry. Our homemade chocolate is ready to de mold.

set in fridge

16.Gently pull out and remove the chocolates.

pull out to demold

17.Repeat to finish.

repeat to finish

18.Homemade chocolates ready.

homemade chocolates ready

Store in fridge and enjoy!

homemade chocolate placed in a beige color bowl

Store in fridge and enjoy homemade chocolate!

Expert Tips

  • Make sure to add it to the mold quickly once the dry sieved mixture is added. Otherwise the mixture will get thick and you will not be able to pour.
  • You can replace butter with coconut oil or vanaspati or ghee too, check out the measures in the recipe card.
  • While mixing scrap sides and mix well. Use a whisk for easy mixing.
  • If its soft after setting in fridge, leave it to set for few more hrs.
  • You can add chopped nuts like almonds, cashews, pista or any other favorite nuts of your choice.
  • If you like dry fruits add tutti frutti or chopped dates etc.
  • Make sure to use only unsweetened cocoa powder.

Storage

Homemade chocolate tends to melt easily in room temperature so store in fridge until serving time. It keeps well for 2 weeks in fridge and in freezer for more than 3 months.

FAQS

1.What is double boiling method?

Take a sauce pan add water let it boil. Then place a mixing bowl over it make sure its dry and the base should not touch water. This is called double boiling method.

2.I don’t have silicon mold, Can I make this chocolate?

Yes you can make it – just spoon the mixture on a plate or parchment paper into small circles and let it set. You can even set it in small steel or glass cups but while demolding run a knife at the sides and demold.

3.Should only glass bowl used for double boiling method?

No not at all you can use steel bowl too but make sure it is dry and with no moisture. Also the base of the bowl should touch the boiling water inside.

homemade chocolate4

If you have any more questions about this Homemade Chocolate Recipe do mail me at sharmispassions@gmail.com. In addition, follow me on InstagramFacebookPinterest ,Youtube and Twitter .

Tried this Homemade Chocolate Recipe? Do let me know how you liked it. Also tag us on Instagram @sharmispassions and hash tag it on #sharmispassions.

📖 Recipe Card

homemade chocolate01
Print

Homemade Chocolate

Homemade Chocolate is simple and easy to prepare tastes delicious with a melt in the mouth texture. Homemade Chocolate can made in 10 mins with just 4 available ingredients in your pantry. Let us learn to make chocolate at home using step by step pictures and video.
Course Dessert
Cuisine Indian
Keyword butter recipes, chocolate recipes, homemade recipes, vanilla recipes
Prep Time 5 minutes
Cook Time 5 minutes
Total Time 10 minutes
Servings 15 mini chocolates
Calories 38kcal
Author Sharmilee J

Ingredients

Using butter

  • 1/4 cup butter at room temperature
  • 3 tablespoon powdered sugar
  • 2 tablespoon coco powder
  • 1 tablespoon milk powder
  • 1/2 teaspoon vanilla essence

Using Coconut oil / Ghee

  • 1/4 cup coconut oil / melted ghee
  • 1/4 cup powdered sugar
  • 1/4 cup cocoa powder
  • 2 tablespoon milk powder
  • 1/2 teaspoon vanilla essence

Instructions

  • To begin with add powdered sugar, cocoa powder and milk powder to a sieve.
  • Sieve well to a bowl.
  • Discard the remains.
  • Mix well and set aside.
  • Boil water in a sauce pan first.
  • Place a bowl over it. Make sure the bowl is dry and the base should not touch the base. Add butter to the bowl.
  • Whisk well until completely melted.
  • Add sieved ingredients. Add in 2 batches.
  • First whisk add thhe rest then whisk well.
  • The mixture should be smooth without lumps.
  • Add vanilla essence.
  • Give a quick stir.
  • Switch off.
  • Immediately pour into the mould. Tap few times then set in fridge for an hour.
  • Remove from fridge.
  • Gently pull out and remove the chocolates.
  • Repeat to finish.
  • Homemade chocolates ready.

Video

Notes

  • Make sure to act quickly once the dry sieved mixture is added. Otherwise it will get thick and you will not be able to pour.
  • You can replace butter with coconut oil or vanaspati too.
  • While mixing scrap sides and mix well. Use a whisk for easy mixing.
  • If its soft after setting in fridge, leave it to set for few more hrs.

Nutrition

Serving: 15g | Calories: 38kcal | Carbohydrates: 2g | Protein: 0.3g | Fat: 3g | Saturated Fat: 2g | Polyunsaturated Fat: 0.1g | Monounsaturated Fat: 1g | Trans Fat: 0.1g | Cholesterol: 9mg | Sodium: 26mg | Potassium: 18mg | Fiber: 0.2g | Sugar: 2g | Vitamin A: 99IU | Vitamin C: 0.04mg | Calcium: 6mg | Iron: 0.1mg

The post Homemade Chocolate appeared first on Sharmis Passions.


from Sharmis Passions https://ift.tt/RNts6Pd
via KITCHEN MASALA